6 recording – MacroSystem Bogart SE Ver.4 User manual User Manual
Page 29
29
Bogart SE 4 User manual
4.6 Recording
This screen is a very important and fundamental one, since it is
used to record the raw material for your projects .
You can now use the recording menu to switch between the
modes “Normal”, “Time”, “Photo” and “Fast M .” . DV and HD
videos can be mixed directly in one project . It is also possible
to record HDV and AVCHD footage in a DV project . In the
same way, it is possible to insert DV footage in an HD project .
The footage is automatically converted to the current project
setting . When importing via Firewire, the format will automati-
cally be recognized and displayed during the recording (SD /
HD) . If the format is displayed in a yellow font, it is not compat-
ible with the project and will be converted during the record-
ing . You should pay particular attention to the format display,
in case you occasionally change the HD->SD conversion (iLink
conversion) of an HDV camcorder .
The USB recording function can now be used to import several
different video formats, in HD as well as in SD projects . This
allows not only to import AVCHD files, but also DivX or MP4
files, without having to take the detour via the Media Manager .
Compatibility and quality can vary, depending on the source
material .
When you record analog video footage, only the recording
modes Normal and Time will be available . Except for that,
analog footage cannot be imported into an HDV project .
Analog source footage can only be recorded in an SD project .
Once the footage has been recorded, it can be transferred and
converted in an HD project via the clipboard .
By clicking on the volume display button you can call up
a volume display on the opposite screen edge which
serves to adjust the decibel (dB) level before or during record-
ing (not available in HDV projects) . Try to set the level as high
as possible in order to achieve the best audio quality, but do
not overmodulate it (stay out of the red area) . You can change
the level by clicking on the dB slider below it . The sound
becomes quieter (up to 30 dB) or louder (up to 20 dB), de-
pending on whether you move the slider toward the left or
right . Flashing blue or yellow means there are no problems and
flashing red represents overmodulation . Clicking on the volume
display button closes the volume display again .
This button is used to start recording once a video
signal is available . Please note that, when HD/SD signals
are being recorded, a video monitoring picture may not be
displayed, depending on the monitor settings . For HD signals
there will only be a preview in the middle at the bottom . This
preview will not be in full size and at the full frequency . Re-
cording non-HD footage however, is shown in a full-size/
frame-rate preview .
While recording, a click on the trackball right button has the
same effect as pressing the stop button in the small display .
By alternately clicking on the left and the right trackball but-
tons, while the pointer is located over the recording symbol, it
becomes possible to separate desired footage from undesired
footage, while recording is taking place . If you want to divide
up your recorded video material, you should proceed to the
Edit screen when your recording is finished . You can find more
information in section “4 .7 Editing” under “splitting” .
There are two recording buttons in the recording menu . One is
used for taped recordings, the other is for USB imports .
Should you have HD data on an external medium or
an AVCHD camera which is connected via a USB-
connection, you should click on the USB-Import but-
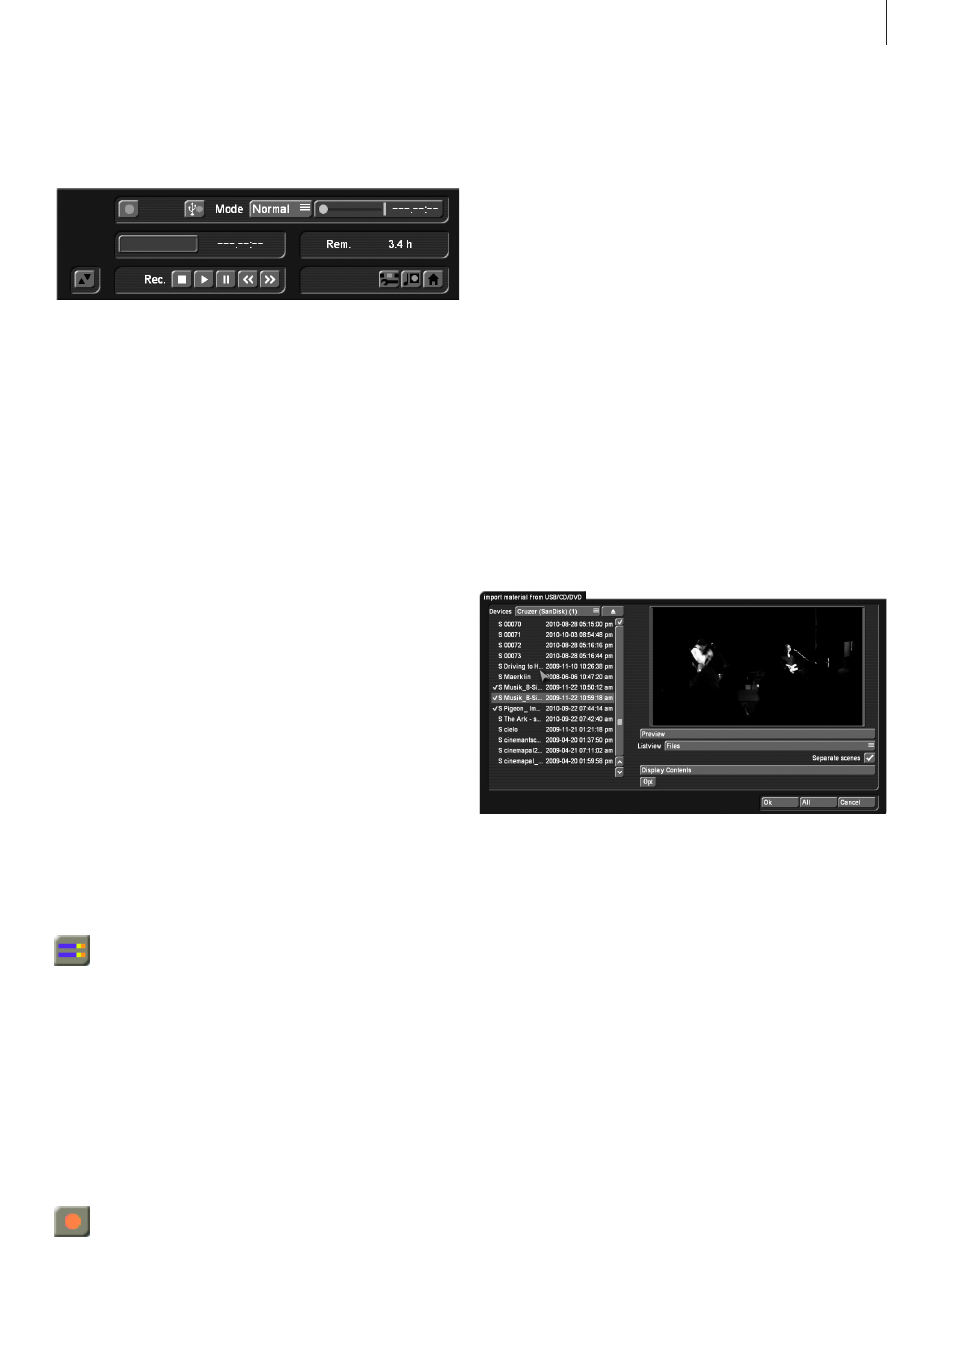
ton . After that, you will be shown an import menu .
The top left field of this menu displays the currently selected
device . If you connect multiple USB devices, you will have a
list of devices to choose from . You should now click on the
device button and select the device you want in the list . You
will now be presented with a list of the scenes found on the
device . The way in which these scenes are listed, may differ .
It can be switched between all scenes or a list with folders . To
change the display, you should click in the left-hand menu on
the setting for files or folders . If the setting has been changed,
the list must be updated . To this end, you should click on “Dis-
play contents” . If you have selected the folder view, two extra
buttons will appear below the scrollbar: “<” and “>” . These
make it possible to change folders on your medium .
Select the desired scenes in this menu . Use the multiple selec-
tion to choose all or some scenes . Selected scenes will then
be marked with a checkmark .
Individual scenes: Before importing the footage, you can
choose whether you want to import the scenes you selected