11 titling – MacroSystem Bogart SE Ver.4 User manual User Manual
Page 57
57
Bogart SE 4 User manual
27. White balance: In case recording has led to erroneous
white balance resulting in white and gray surfaces that look
wrong but the color is OK, you can specify the location and
size of a rectangle with the button “Reference Color” . Then the
color fault within the rectangle is averaged and the deviations
in the entire image are canceled out . Note that only light color
faults can be improved . You can turn a red surface into a gray
one, but the effects on the rest of the image are extreme (color
distortion) .
In order to identify this reference color, you should use the
slider at the bottom left to find an image that contains a white
area . In the case that there is no colorless (white) surface in
the image, it is possible to use a reference color from another
scene as the reference color . To do this, you should click on
the “Select scene” button . This will enable you to select an-
other scene from your scene bin . In this scene, you will also be
able to move in time and determine a reference position . Use
the top left button to switch between the original scene “Ef-
fect” and the added scene “Selection” . Once you have select-
ed the scene image, you can use the buttons “Position” and
“Size” to select the reference color . The color that has been
chosen from the range, will be shown in the color field below .
28. Zoom: A defined image area can be zoomed in. Below
“Position” you give the location and size of the rectangle area .
Below “Zoom In” and “Zoom Out” you specify the start and
end time of the effect (up to 12 seconds) .
Note: Increasing the zoom during editing does not fully replace
an optical zoom found in the camera. Digital zooming during
editing always results in quality loss.
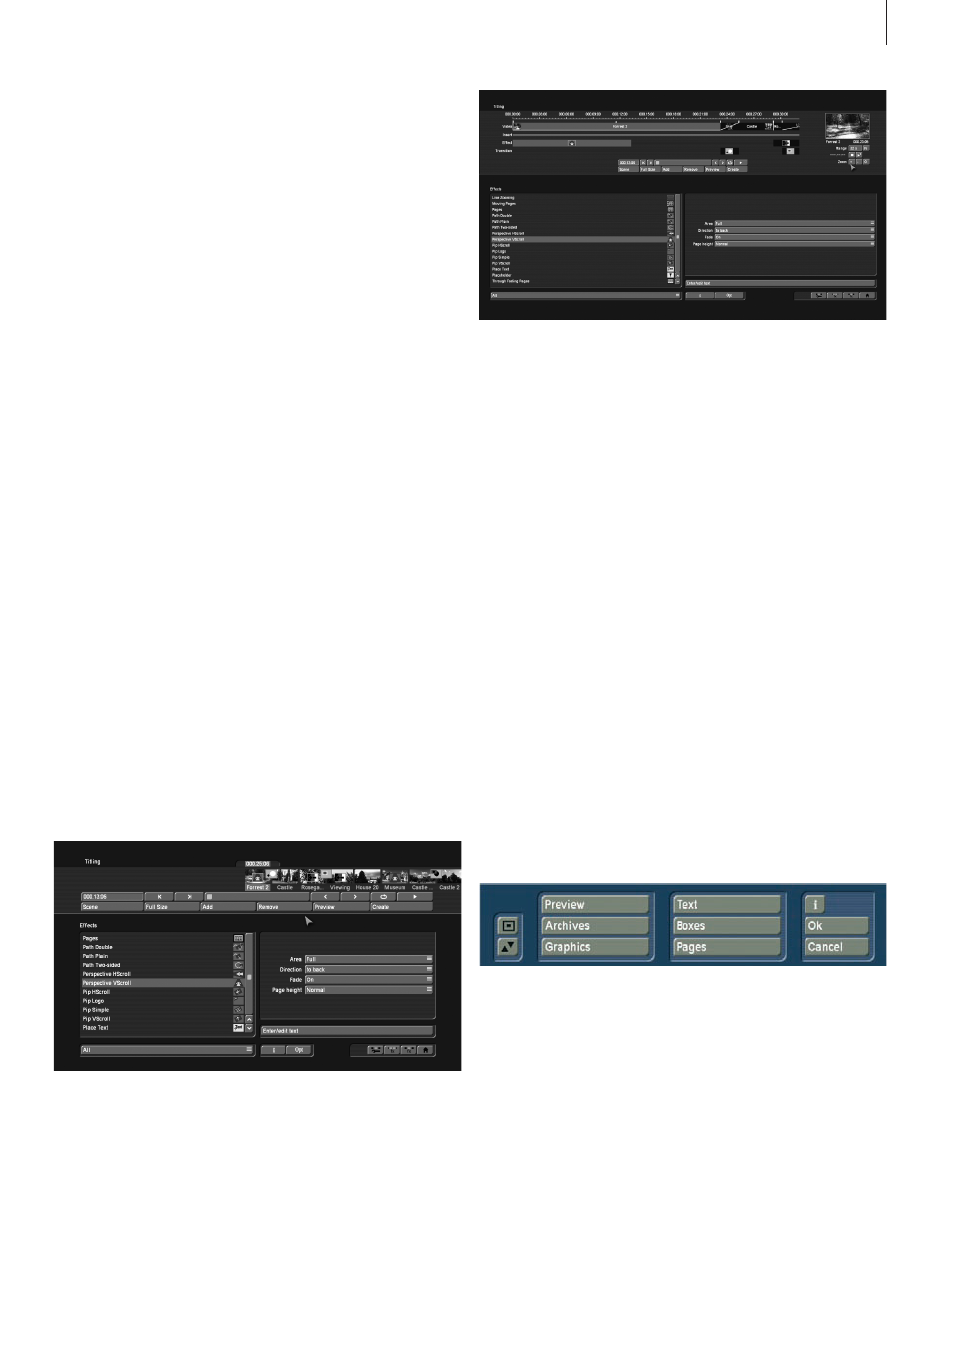
4.11 Titling
Titling essentially works as if it were an image processing
effect . However, instead of filtering (brightening . . .) the image,
titling inserts digital text in your video . Titling has two menus .
The settings in the “Titling” menu correspond closely to those
of the image processing effects menu . You can read the cor-
responding description there for information about functions
such as Insert, Delete, Range, Preview, Single image, Calcu-
late, and Scene . After you have selected a desired title effect,
and perhaps set further Options in the field to the right of the
effect list, you must first add the effect into the storyboard .
You can then enter the Titler menu by clicking on the button
“Enter/edit Text” below the effect options .
Should you already have activated Title Studio or another op-
tionally available titler, titles may be entered in a different way .
In that case, you should refer to the manual for that product .
You can use the “Opt .” menu to determine the titler that you
will be using . If you have activated Title-Studio, this Opt menu
should present you with a setting for the text treatment . If the
setting is set to “Standard”, the next title effects that will be in-
serted in the storyboard will be opened with the standard titler .
If the choice is set to Title-Studio, effects that will be inserted
in the future will be opened with the add-on product Title-Stu-
dio . Titles that had already been inserted in the storyboard will
be opened with the titler that was set at that time .
Description of the standard Bogart titler:
(1) In the background you see the first frame of your video
scene . This full frame display serves as an orientation for
adding text . This lets you immediately see how the text looks
overlaid on the particular scene you are editing .
At the vertical or horizontal edge of the window you may see
- according to effect -a scroll bar, with which you can scroll
through the text box . If text boxes are already present in the
video image, then you can use this menu to enter text with the
help of an external keyboard .
(2) If you click on the button “Text”, you will continue to see