MacroSystem Bogart SE Ver.4 User manual User Manual
Page 69
69
Bogart SE 4 User manual
you insert samples, the guide lines are “magnetic”, which
makes it possible to position them with great accuracy - more
on this later . The lines are only displayed where there is no
transition effect between the scenes .
3. There are different possibilities to identify overmodulation of
the audio . A click on this button will test the audio and tell you
if clipping is occurring . If clipping is indeed occurring, a mes-
sage will inform you and you will be able to jump directly to the
relevant position on the timeline . You can then deal with the
problem easily . Additionally, areas with clipping will be colored
red in the narrow blue strip on top of the original sound track .
If there are several clipping areas, you can edit these one after
the other by repeatedly clicking the test button . If a very long
project has not yet been tested at all, the test can take some
time .
The Timeline mode view displays the audio modulation in the
audio mixing samples . Should sound clipping occur, this will
be indicated in red in the top border of the sample .
4. There are several buttons next to the sound tracks . In ad-
dition to the existing buttons for selecting tracks (right) and
selecting effects (left), a new button has been added at the
left-hand side . It displays a stylized symbol of a speaker . With
this button, the sound of any track can be switched on or off at
any time . Clicking on such a symbol opens a window in which
you can set the volume of the sound track . There are also but-
tons with which you can mute the sound or set it at 0 dB . This
way, you could temporarily mute the original sound while you
are concentrating on the comments . Changes to the tracks are
also taken into account when a project is finalized (exporting,
DVD burning . . .) . This makes it easy to create several different
versions (with/without music, German or English comments . . .) .
You should be careful not to accidentally “forget” a track .
5. / 6. The individual sound tracks contain sound samples .
The sound samples are shown in the top half of the so-called
sound curve . This is a general indication of the sound volume
changes . The lower half displays the sound envelope . This
allows to apply transitions and other sound volume changes as
you see fit . Details will be described later .
Sound samples that are subject to transition effects are dis-
played differently in the original sound track (5 .) . The transition
between the sound samples is displayed here as a diagonal
line . The sound curve display can be switched on or off in the
settings .
7. This button is used to call up the audio settings . In addition
to the existing functions, there is an additional button on the
right for each of the tracks . If it has been activated (checkmark
present), the corresponding sound track will be shown in the
mixing display . If the button is deactivated, the track will not
be displayed . Switching off the display of individual tracks
sample is playing, for example the background music is to be
softened for the duration of a commentary, indirect volume
control is the most convenient solution . Modifying the audio
samples by means of the wave form or splitting the music
manually would also entail a disproportionate amount of work .
• If unwanted noises are to be eliminated from a audio sample
or over-modulated passages of an audio sample adjusted to
the general volume level, the wave form represents a power-
ful tool, albeit one which is not particularly easy to use . Once
an audio sample has been edited by means of the Wave Form
function, indirect volume control is however subject to certain
limitations .
5 . Smooth-fading audio samples in and out
6 . Adding audio effects
Audio effects (standard effects, surround effect, supplemen-
tary effects) can be added to individual audio samples in the
same way as to complete sound tracks .
7 . Rechecking audio mixing
Add the remaining audio samples in turn and adjust the vol-
ume, fading and effects as required .
8 . Creating audio
Create the sound . The color control bar immediately beneath
the storyboard should no longer contain any yellow compo-
nents .
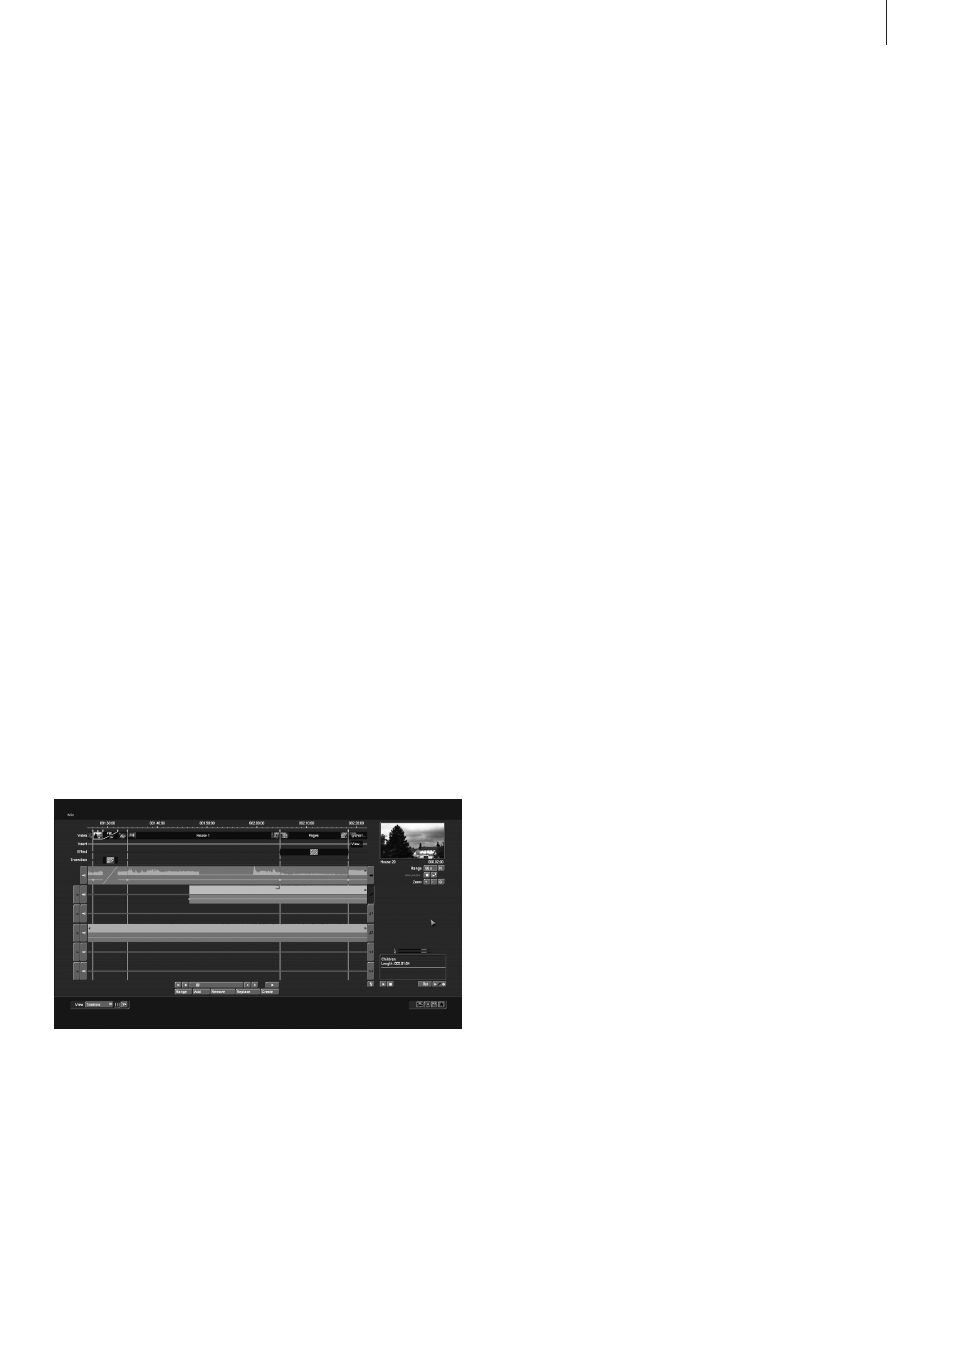
4.13.2.1 Screen elements in the timeline view
Using a screen shot of the audio-mixing screen, the individual
elements will be described below .
1. The menu view is set with this button . This allows you to
switch between the timeline view and the storyboard view
at any time, making it possible to make use of their specific
advantages .
2. Use this button to lengthen the yellow guide lines from the
video track that optically separate the scenes from each other
to the full height of the sound tracks . They indicate the start
of a scene and improve clarity when arranging the samples on
the various sound tracks . When you move samples or when