MacroSystem Bogart SE Ver.4 User manual User Manual
Page 35
35
Bogart SE 4 User manual
With an Insert-edit, the selected scene in the scene bin is over-
laid onto the Storyboard . Only the video is overlaid, not the
audio of the scene . Clicking on “Insert” overlays the selected
scene in the Storyboard with the selected scene from the
scene bin . The scene in the Storyboard (background) is then
partially or completely covered with the insert scene (fore-
ground) . The background scene must, of course, be longer
than the foreground scene .
The range (start position, length) can be set freely and changed
at any time, even after the Insert is placed . Every click on “In-
sert” leads automatically to a Range menu . The starting point,
which is by default set to the first frame of the insert, can be
moved towards the end (“Start” button) . To do this, you have
to select “Position” . Now you can see the background scene .
To trim the insert-scene either from the front or from behind,
switch the selection button to “Trim” so that you can see the
“IN” and “OUT” buttons . During this setting, you can see the
background scene . Set the selection button to “Trim E” so that
you can see the insert-scene instead .
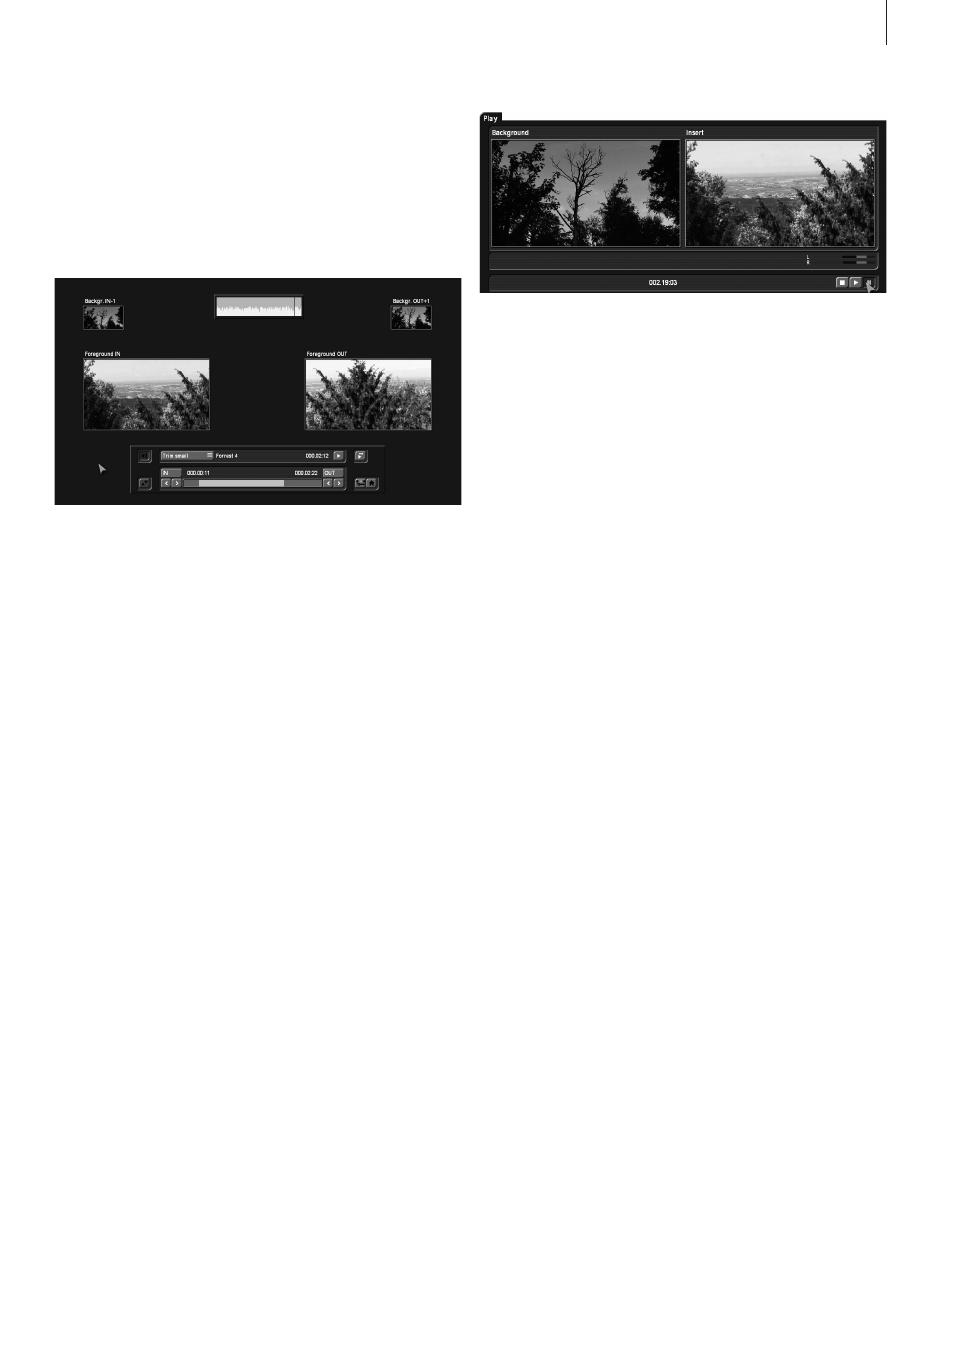
The “Trimming small” mode is used to show both foreground
and background scene in smaller versions . When trimming an
Insert scene, you’ll see the “Foreground IN” and “Foreground
OUT” screens . Above, you’ll see two smaller screens depicting
the scene frame just prior (“Backgr .IN-1”) and after (“Backgr .
OUT+”) the insert . In this fashion, you have all the information
about the insert length and the position on top of the base
scene .
Using the “Position, small” mode, you will see the same layout
of the menu, however, in this case you are moving the insert
scene on top of the background scene . The preview for “Start”
and “End” shows you the position of the background scene,
where the insert begins and ends . The smaller scene images
above show you the “IN” and “OUT” frames of the insert itself .
Press play in the Insert menu to monitor how your insert has
been added . Click the Play button to play your insert . The Sto-
ryboard is played from 2 seconds before to 2 seconds after the
Insert . While this is being played, the original audio track of the
Storyboard scene is also played . This gives you good control
over the position of the Insert . To the right of the play button,
there is a special play button . When you click on this play but-
ton, a split screen will be displayed .
The left image shows the background scene and the right im-
age the Insert scene . Since the combined play back begins a
little before the Insert scene and stops only after it, you will see
the storyboard scene in both fields at this time . Play back can
be paused, restarted and stopped at any time . When you exit
the Insert positioning and return to the Edit or Main menu, your
settings will be saved . The so-called “background scene”, in
other words the Storyboard, can be split in three parts:
1 . The background scene before the insert
2 . The Insert part
3 . The rest of the background scene after the insert
This division allows you to place any number of insert se-
quences onto a single background scene . It is also not neces-
sary to manually split the long recording of the singer, since
this is done automatically . Inserts are indicated in the story-
board by a symbol (two overlapping rectangles) in the upper
part of the scene in the storyboard and can be removed at any
time . Divided background sequences are automatically put
back together . The button “Remove” offers the possibility to
delete the first and the last part of the background scene in
front of or behind the insert scene . Transition effects can also
be used . The operation is hardly different from the usual pro-
cess . One difference is that the length of the Storyboard does
not change . This is important, since the unchanged sound
would otherwise no longer exist . Instead of a hard fade-in of
the insert scene, it will -depending on the effect- be faded-in
smoothly . Therefore, the transition is entirely at the expense of
the insert scene . In the Insert menu, the audio envelope can be
faded in and out, using the speaker symbol . You can find more
details in Chapter 3 .2 .
Neighboring insert scenes can also be connected with transi-
tion effects . For this to be possible, the system must push the
next insert scene forward for the duration of the transition .
(14) After you have added an insert and if the scene is still
selected in the Storyboard, you can use the “Range” button
to modify inserted scenes . These scenes can either be moved
(Set the mode to “Position”, and then click “Start” .) The Insert
scene can also be re-trimmed at the beginning or at the end
(using the “IN/OUT” buttons in Trim mode) . The function “Trim
E” allows you to see the insert-scene while trimming .