Configure block writes, Uning, Ssistant – Super Systems 9130 Series User Manual
Page 88
Series 9130 Operations Manual Rev -
87
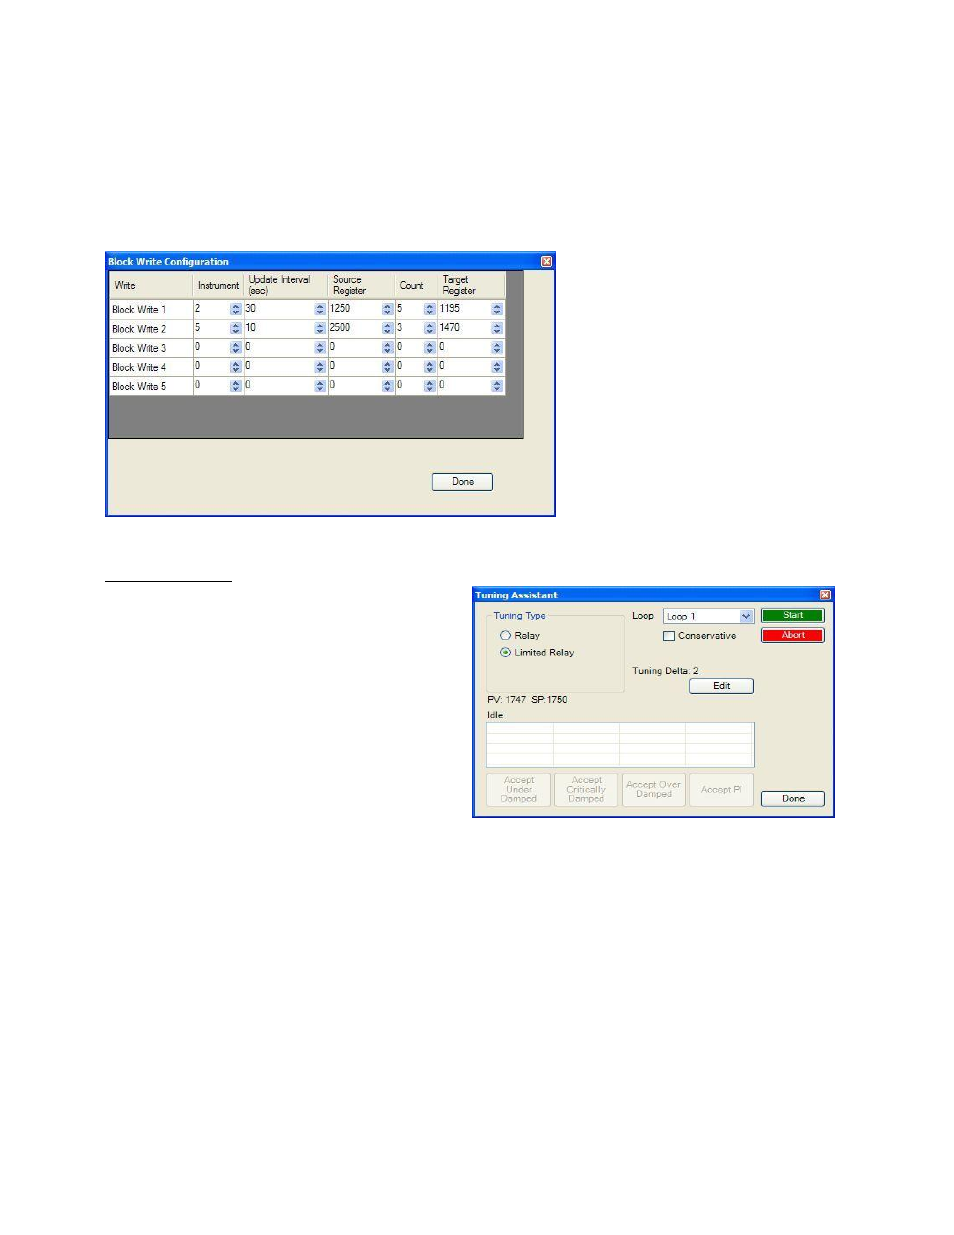
Configure Block Writes
This screen will allow the user to
configure up to five (5) block writes for
the instruments.
The Instrument field is the instrument
to use the write for. The range is 0 – 32.
The Update Interval field is the update
time, in seconds, to perform the write.
The range is 0 – 300 seconds. The
Source Register field is the 9220
register where the values will come
from. The range is 0 – 32767. The
Count field is the number of successive
registers to read. The range is 0 – 80.
The Target Register field is the 9220
register to put the count into. The range
is 0 – 32767.
Tuning Assistant
The tuning assistant will allow the user to
automatically generate the PID settings for a
specific loop. Click on the “click” value to start the
tuning assistant.
The user can select the loop to auto tune from the
drop-down list next to the “Loop” label. The
choices are: Loop 1 or Loop 2. The type of tuning
to be used can be selected from the “Tuning Type”
section in the top left of the form. The options are
either Relay or Limited Relay. Using the Relay
option will just use 100% output while the 9130 is
controlling the furnace. The Limited Relay option
will reduce the % output by a user-specified
amount. When the Limited Relay option is selected, the “Tuning Delta:” label and the Edit button will be
visible. When the Relay option is selected, these two items will be invisible. Clicking on the Edit button will
allow the user to select the new % output value. The range is 0 to 100. The “Conservative” option will allow
the user to minimize, if not remove, the possibility for an overshoot of the setpoint. If a small overshoot is
acceptable, leave the “Conservative” checkbox unchecked. If, however, no overshoot is desired, then
checking the “Conservative” checkbox will accomplish this. The current value for the process variable (PV)
and the selected loop’s setpoint (SP) will be displayed under the “Tuning Types” section. Click on the Start
button to begin the auto tune process.
Note: The process may take a few seconds to start
. Once the
process has started, the “Idle” line will change to “Tuning: Pointer xx”. This means that the tuning process
is working. When the tuning is finished, the “Tuning: Pointer xx” line will read “Idle” again, and the list
underneath will be populated with suggested PID settings.
Note: clicking on the Done button while the
tuning is in progress will close down the screen, but the user will have to confirm the action
.
However,
clicking on the Abort button will simply