Super Systems 9130 Series User Manual
Page 89
Series 9130 Operations Manual Rev -
88
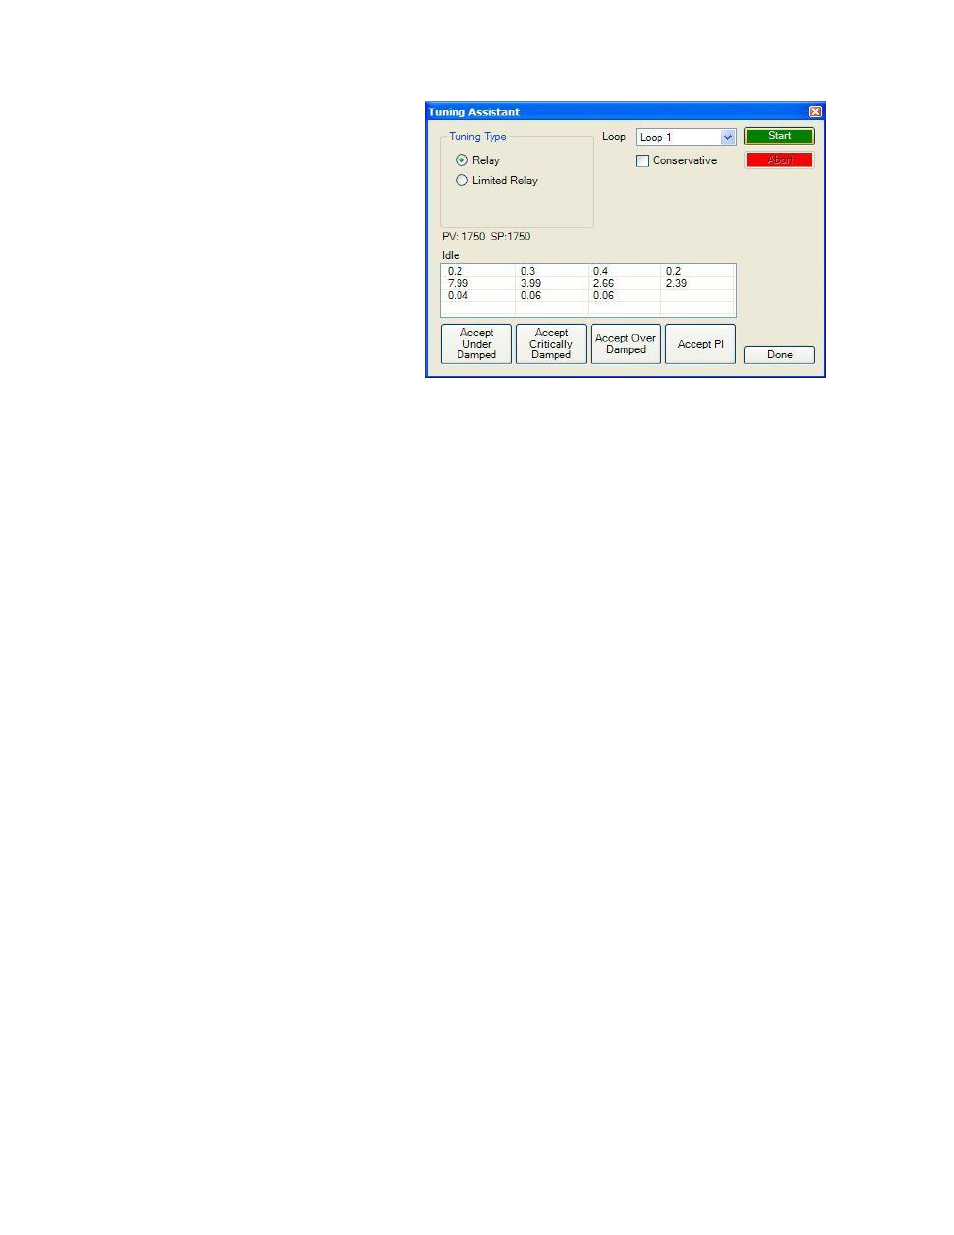
abort the calibration process
.
Each column for the PID settings relates to
the button below it. For example, the
second column is the PID settings for the
Critically Damped values. The user can
accept only one set of numbers. To select a
set of values, click on the corresponding
button. For example, to accept the critically
damped values, click on the Accept
Critically Damped button.
The under damped values will reach the
setpoint faster, but there will be more
overshoot involved. The over damped
values will work to minimize the overshoot,
but it will be slower than the under damped
values. The critically damped values are considered the “optimum” values because they are a balance
between the under damped and over damped values with regards to time and overshoot. The PI values are
the proportional band and the reset value (the
P
and the
I
from
PID
).
Once a set of values has been accepted, the user can press the Done button to exit the screen. The
accepted values can be viewed on the
PID Loop Setup
menu option
. Note: Once the screen is closed out,
the PID settings values will be lost
. To populate these values again, another tuning routine will need to be
run.Timer Setup
This option will allow the user to setup and start the Timer on the 9130 controller.
Timer Enabled
This option will determine the status of the timer. The timer can either be Enabled (Checked) or Disabled
(Unchecked). If it is disabled, it cannot be used.
Timer Status
If the timer is running or completed, the status will be listed next to the “Timer Status:” label.
Start Mode
This option will determine how the timer is started. The options are: Start on Enable, Deviation, and Band.
Start Control
This option will determine how the control of the timer is handled. The options are: No Change, Set to
Control to Auto, Set to Control Auto, Standby SP, and Set to Control Manual, Idle Output.
Run Mode
This option will determine what keeps the timer running. The options are: Run, Deviation Hold, and Band
Hold.
Timer End Control
This option will determine how the timer control is finished. The options are: No Change, Set to Control to
Auto, Set to Control Auto, Standby SP, and Set to Control Manual, Idle Output.
Acknowledge
This option will determine how to acknowledge the end of the timer. The options are: Hold for Reset, and
Timer Clear.
Digital IN1 is Timer Run/Hold
This option will determine if the Digital Input 1 run/hold option is available. The options are Enabled
(Checked) or Disabled (Unchecked).