Setting the wipe start position, Modifying wipe, Basic operations – Panasonic AV-UHS500 12G-SDI/HDMI UHD 4K Compact Live Switcher User Manual
Page 37
37
Basic operations
Setting the wipe start position
Wipe start can be set at any desired position.
Target patterns:
WIPE1: 5
WIPE2: 4, 5, 6, 7
SQ1: 5
SQ2:
4, 5, 6, 7
The WIPE pattern is set using the Position sub menu of the
Background menu (or Key menu).
1
Press the
BKGD
CBGD
button (or
KEY1
CKEY
button) to light its
indicator, and display the Background menu (or Key
menu).
2
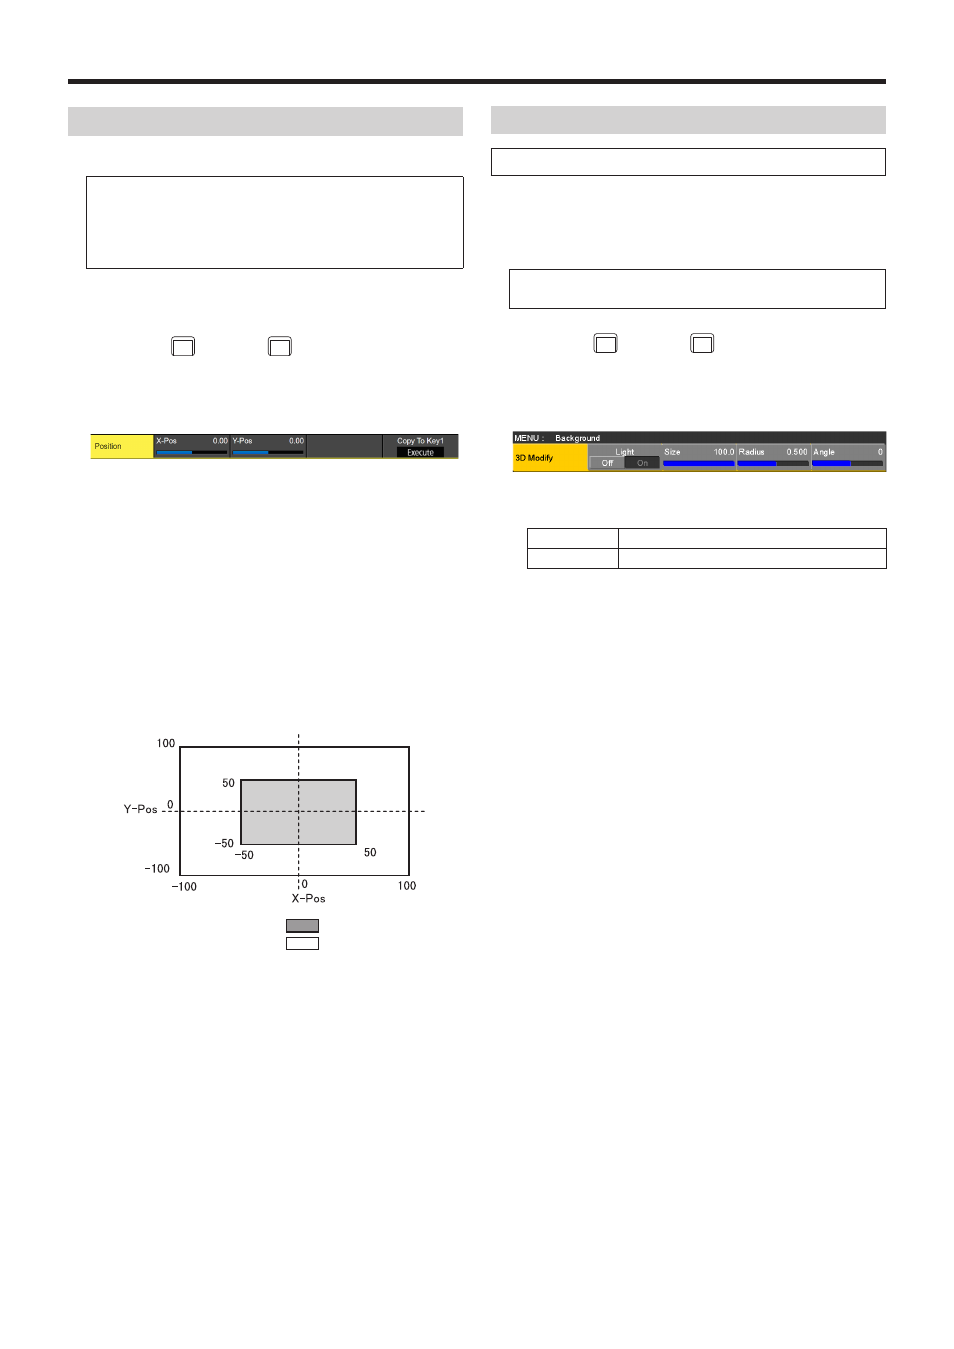
Use [F1] to display the Position sub menu.
3
Either operate the positioners or use [F2] and [F3] to set
the wipe start position using the X-Pos item and Y-Pos
item.
This setting is possible only if the target pattern has
been selected for the background or key pattern.
4
Either operate the fader lever or press the [AUTO]
button to check the wipe operation.
(When, for instance, –50 has been set for X-Pos and
–50 for Y-Pos, the following screen (or key) appears
from the bottom left and wipe is performed while the
screen (or key) moves to the screen center.)
<X-Pos, Y-Pos setting range>
Inside screen area
Outside screen area
5
To copy the start position setting, press [F5] (Copy To
Key1 or Copy To BKGD).
The background setting is copied to the key setting
while the key setting is copied to the background setting.
Modifying wipe
Setting the 3D (page turning) effect
A lighting effect can be added to a wipe pattern.
Alternatively, the page turning effect parameter can be set.
These effects can be set for background transitions and key
transitions.
Target patterns:
3D1: 1, 3, 7, 9
1
Press the
BKGD
CBGD
button (or
KEY1
CKEY
button) to light its
indicator, and display the Background menu (or Key
menu).
2
Use [F1] to display the 3D Modify sub menu.
3
Use [F2] to select whether the lighting effect is to be
added using the Light item.
On
The lighting effect is added.
Off
The lighting effect is not added.
4
Use [F3] to set the size when images have been
reduced using the Size item.
5
Use [F4] to set the radius of the page turning effect
using the Radius item.
6
Use [F5] to set the direction of the page turning effect
using the Angle item.