Rugged Cams Premier DVR User Manual
Page 133
132
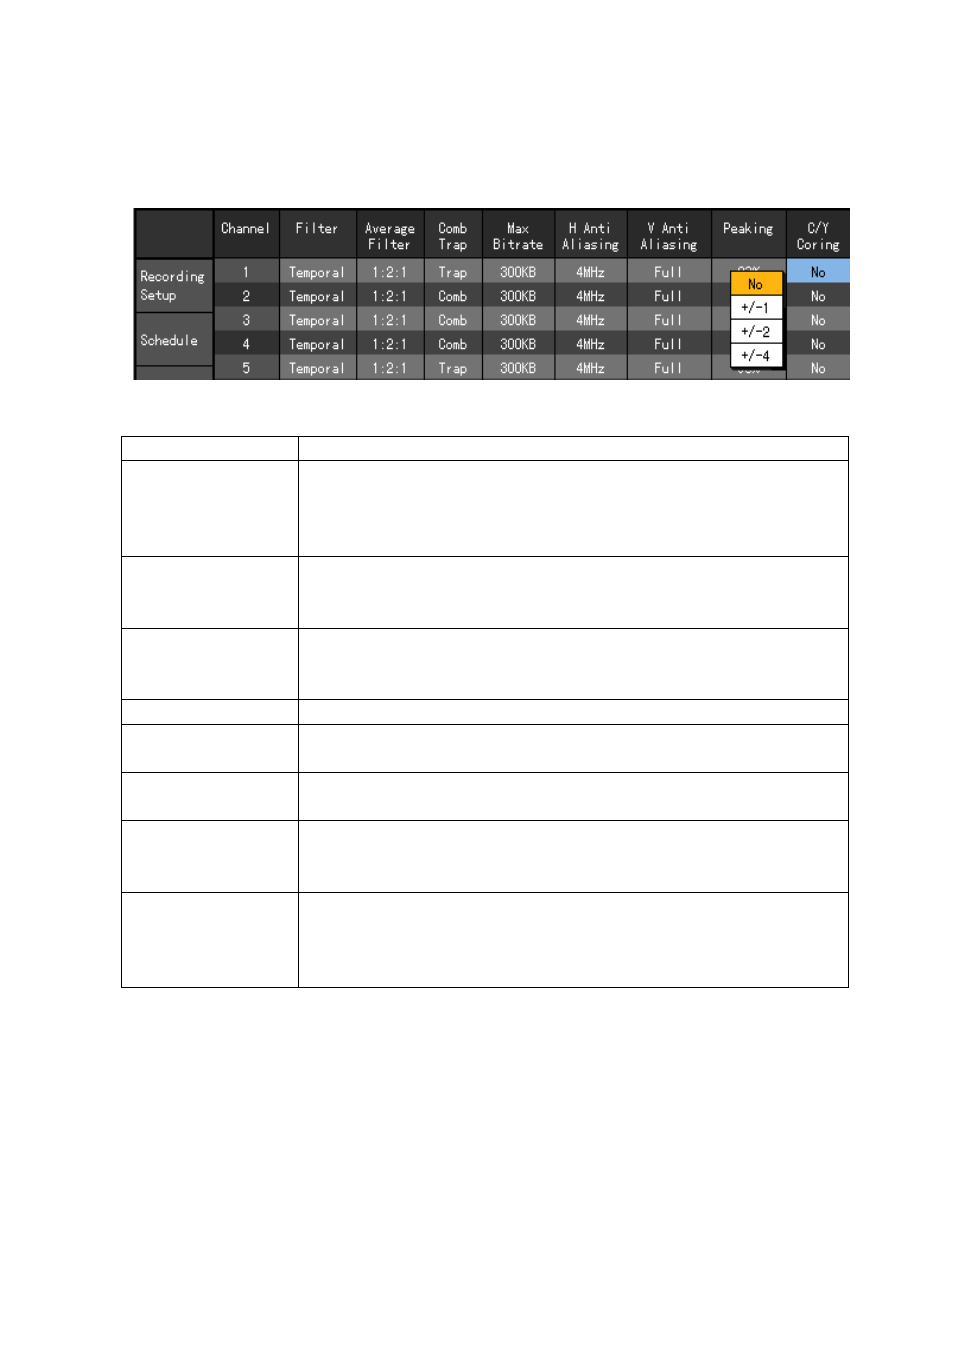
H) C/Y Cording
Press the [SELECT] button in the {C/Y Cording} menu, move the focus to the position you want
using the direction (ST) buttons and select it with the [SELECT] button as in the following
figure.
(3) Meaning of Advanced options
Menus
Description
{Filter}
Filters images. You can select one of Deinterlace Filter and Temporal Filter,
Deinterlace Filter for the noise in still images and Temporal Filter for the
noise in moving images. By default, it is general to use the Temporal Filter
in the DVR because it handles moving images.
{Average filter}
Two options of 1:6:1 and 1:2:1 are provided. Given 1:6:1, the cleaner image
similar to the original image can be achieved although the file size gets
bigger. The default value is 1:2:1.
{Comb / Trap}
The Comb filter is used when the boundary line between brightness and
color is not clear and it enhances the resolution of the brightness. The trap
filter controls the contrast of images.
{Max. bit rate}
Means the max. size of moving images.
{H Anti Aliasing}
Sets the horizontal anti aliasing value. In general, 4MHz provides the image
closest to the real one.
{V Anti Aliasing}
Sets the vertical anti aliasing value. In general, [All] option provides the
image closest to the real one.
{Peaking}
Peaking is the filter that emphasizes on the edge part in Y component,
providing No, 31%, 62%, 93% options. It default value is No. With 93%,
the edge part is the most emphasized.
{C/Y Cording}
The C/Ycoring provides the filtering that blurs the edge part of Y component,
settable as one of No, +/-1, +/-2, +/-4. Its default value is No. With +/-4, the
smoothest image can be achieved. As a result, it provides an output similar to
that of the average filter.