Rugged Cams Premier DVR User Manual
Page 86
85
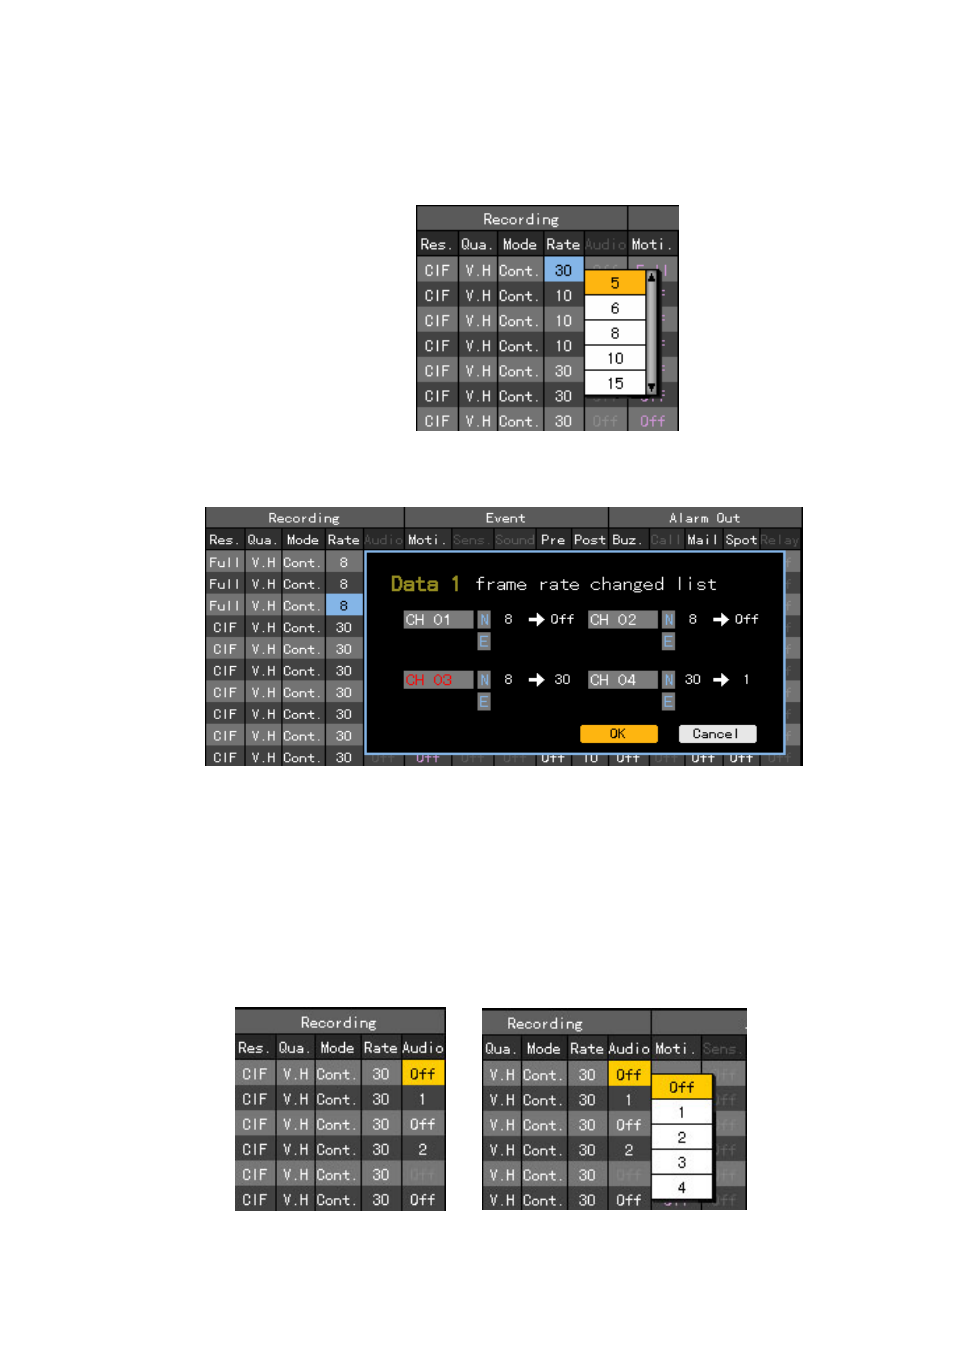
Using the direction (STWX) buttons, move the focus to the channel you want to set in the
{Recording setup} Æ {Data1~4} Æ {Record} Æ {Rate} menu and press the [SELECT] button.
When the selection box is displayed, select the recording frame using the direction (ST) buttons
and press the [SELECT] button.
To set all channels with the same value at once, move the focus to the {Rate} and press the [SELECT]
button.
When the setting frame rate is larger than the Max. record frame, the following menu is displayed.
In the above figure, the channel indicated with the red color is the one you set just now. ‘N’ and ‘E’
stand for Normal and Event, respectively. If there is a channel that is not used, its rate is reduced
first and then others are followed. When the channel mode is being set to Event (Motion, sound,
sensor)/Continuous, the rate of ‘E’/ ‘N’ zone is reduced. And if it is being set to Auto, the larger
one between frame rates of ‘E’ and ‘N’ is reduced first.
Press [Ok] to confirm the task, or press [Cancel] to cancel it.
E) Audio setup
Set the recording for the external audio input linked to the system.
Using the direction (STWX) buttons, move to the channel you want to set in the {Recording
setup} Æ {Data1~4} Æ {Record} Æ {Audio} menu and press the [SELECT] button.