Matrox MXO2 PCIe Host Adapter User Manual
Page 247
223
Specifying your settings for Matrox ISO recording
$
From the
Video
Source
list, select the type of video input you want to
record. For example, to record video from your HDMI source, select
HDMI
. The available video input sources depend on your selected video
input format.
$
Aspect Ratio
Specify the aspect ratio of your SD source video. For HD
sources, this option is automatically set to 16:9.
$
From the
Audio
Source
list, select your audio source. For example, if
you want to record your HDMI embedded audio input, select
HDMI
(embedded audio)
. The available audio input sources depend on your
selected video input source.
¦
Note
When recording HDMI embedded audio, only uncompressed
embedded audio is supported.
4
Click
Output Settings
to specify the settings that you want for monitoring
your source video and audio on your Matrox hardware as explained in
“Specifying your output settings”
.
5
If you have multiple Matrox devices, repeat steps
and
to configure the
source and output settings that you want for each device.
6
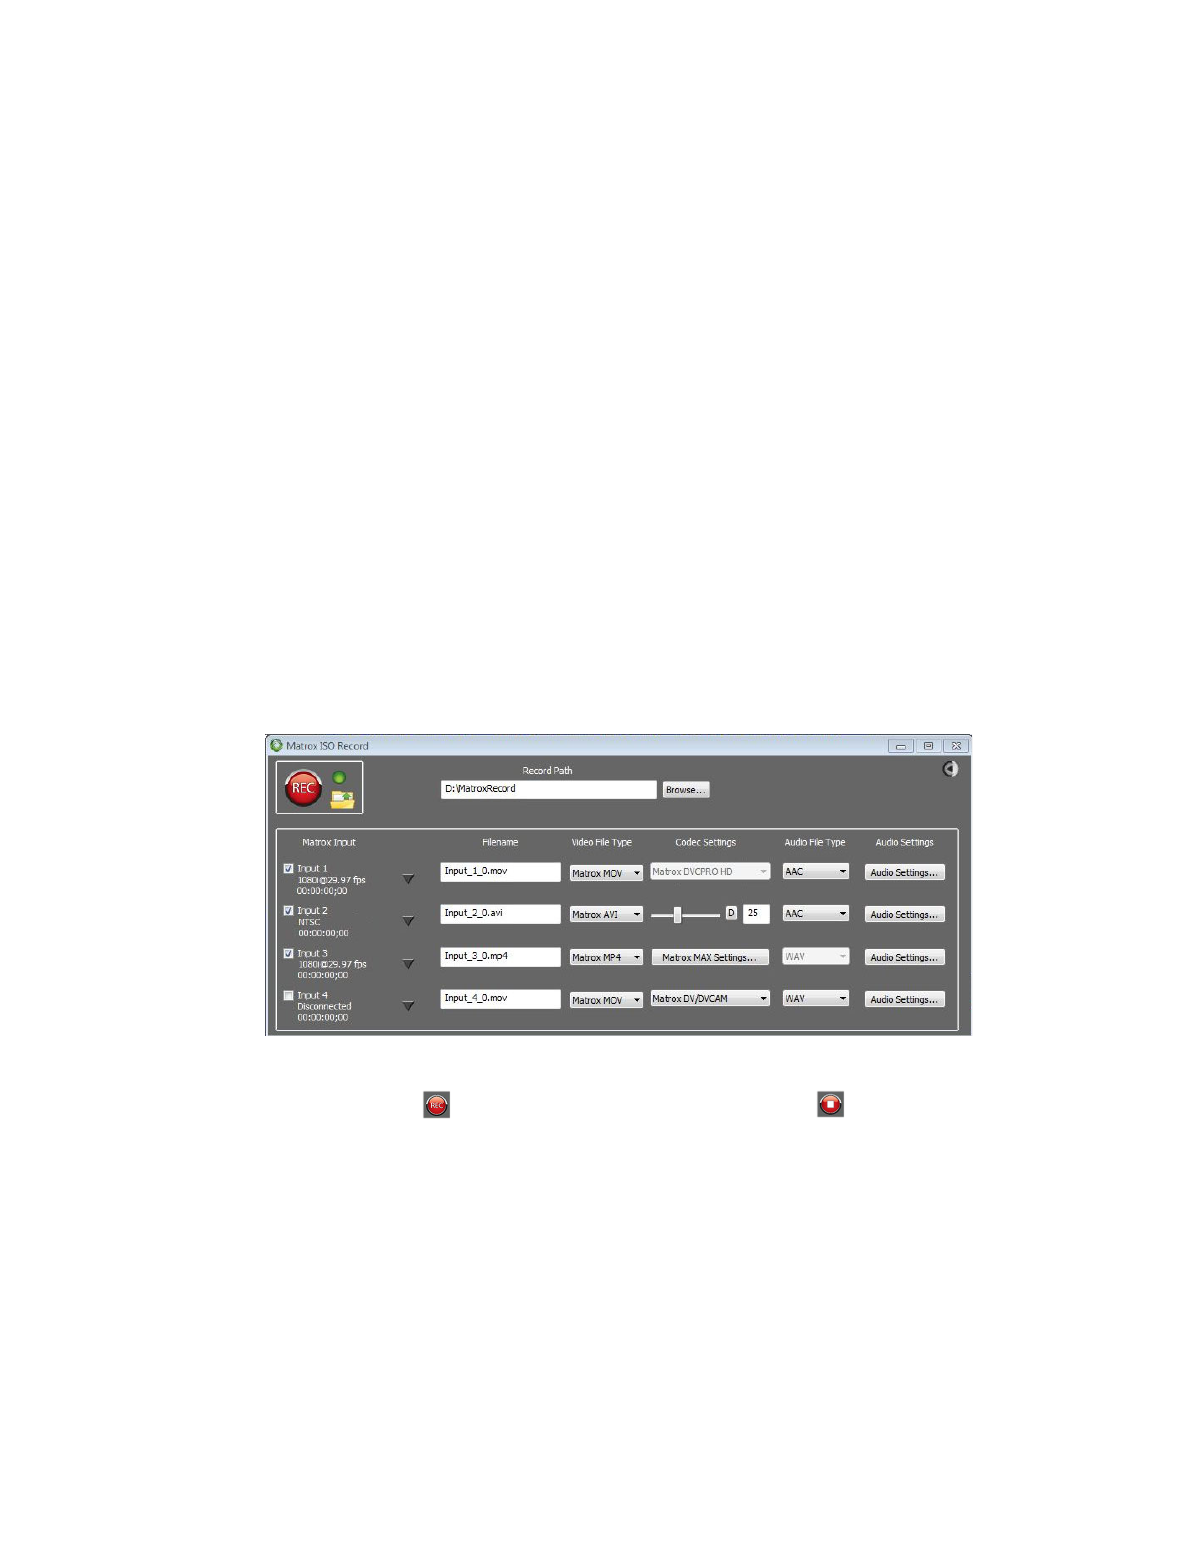
Click
ISO Record
to open the Matrox ISO recording tool:
7
Select the settings that you want for recording as explained in
settings in the Matrox ISO recording tool”
8
Click
to start recording your selected inputs. Click
to stop the
recording session. You can also start and stop the recording of individual
inputs during a recording session (see
¡ Important
If the status light turns red when recording, this indicates that
one or more of the selected inputs experienced dropped or skipped frames.
After the recording session ends, check the
Record.Log
file to see the
dropped/skipped events for your recording session (see
).