Matrox MXO2 PCIe Host Adapter User Manual
Page 99
75
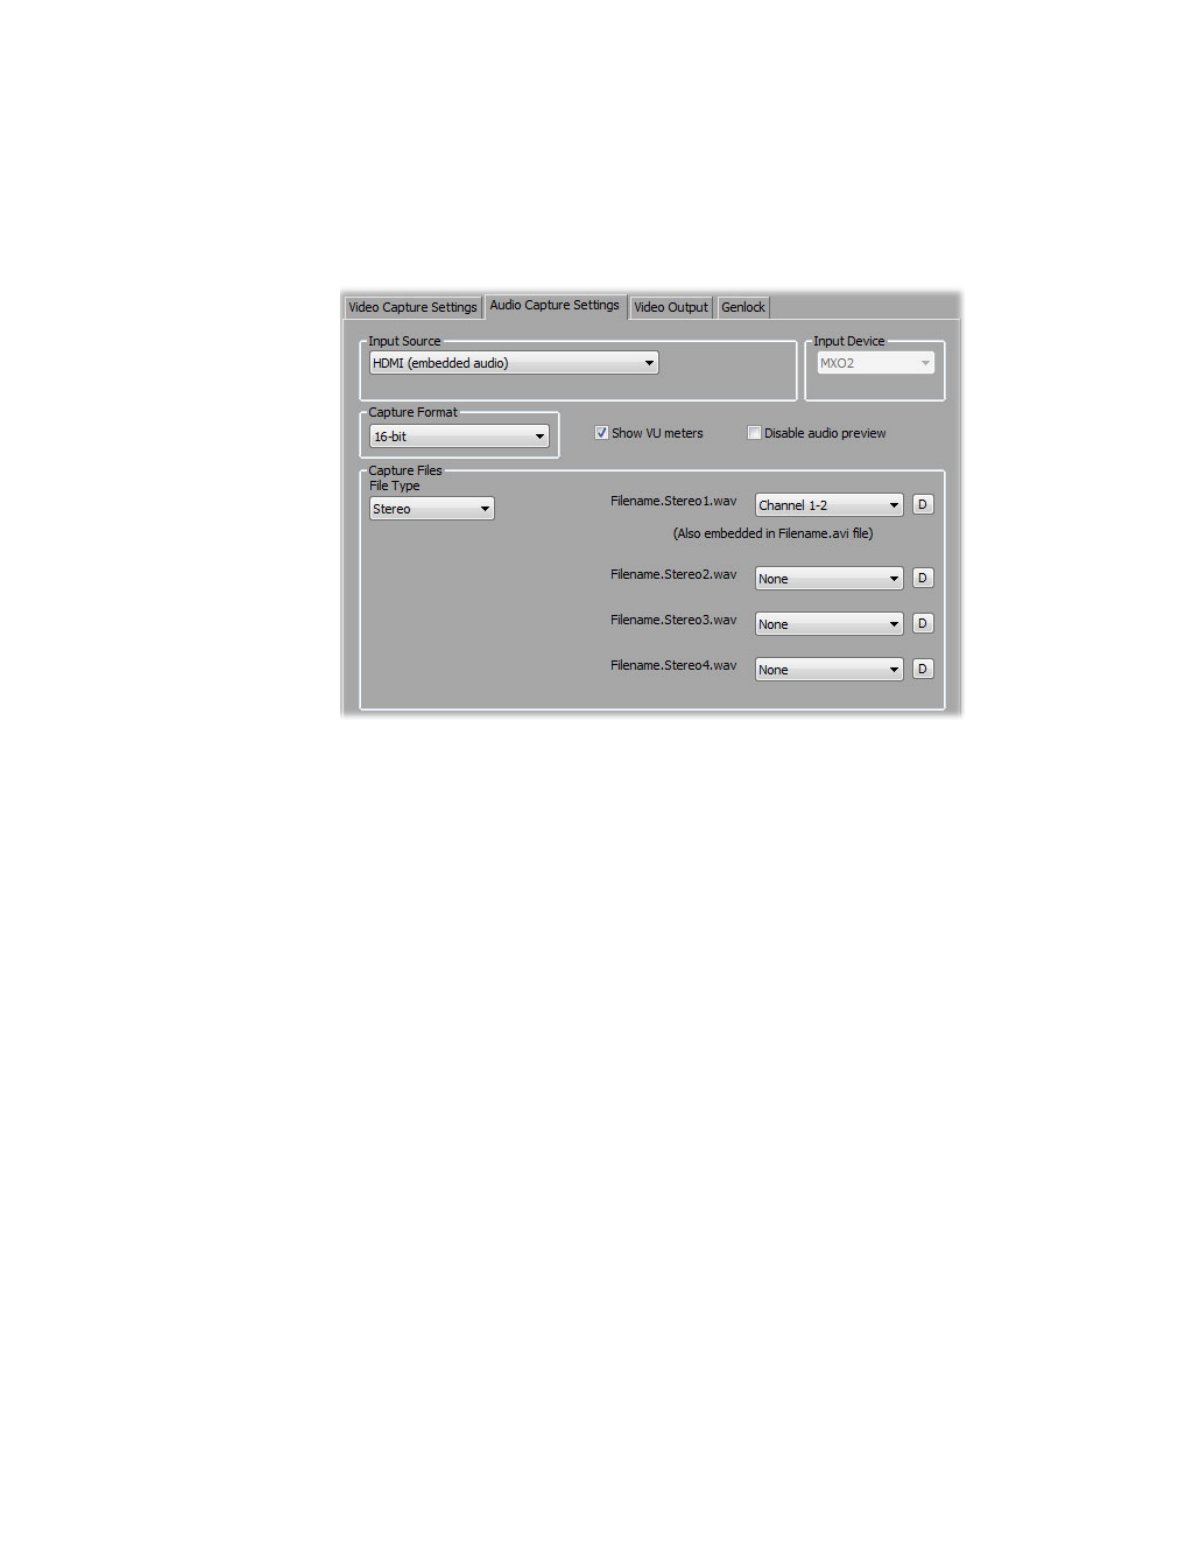
Defining your capture settings
3
Click the
Configure
button, then click the
Audio Capture Settings
tab:
4
Under
Input Source
, select your audio source. For example, if you want to
capture the embedded audio of your HDMI source, select
HDMI
(embedded audio)
. Your audio input source may be set for you based on
your selected video input source.
¦
Note
When capturing HDMI embedded audio, only uncompressed
embedded audio is supported.
5
Under
Capture Format
, select the bit-depth for your captured audio files.
6
If you want the VU meters to be displayed each time you configure your
Matrox MXO2 capture settings or open the
Capture
panel to start a capture,
select
Show VU meters
. For details on using the VU meters, see
“Monitoring audio levels for capture”
on page
77
.
7
If you experience dropped frames during capture, select
Disable audio
preview
to disable the audio preview only while you’re capturing material
(for
.avi
captures only).
8
Under
Capture Files
, indicate whether you want to capture to stereo or
mono audio files, and select which channels you want to save to separate
.wav
files.
$
From the
File Type
list, select
Stereo
to save your captured audio to
stereo
.wav
files, or
Mono
to save your captured audio to mono
.wav
files.
If you’re capturing an
.m2v
clip, the
File Type
will be set to
Stereo
.
$
From the
Filename
lists, select which stereo pairs or mono channels you
want to save to your
.wav
files (up to four stereo files or up to eight mono