Configuring the matrox mpeg-2 i-frame codecs – Matrox MXO2 PCIe Host Adapter User Manual
Page 269
245
Rendering material to a Matrox VFW .avi file
1
Under
Bit Depth
, select the bit depth you want for your video.
¦
Note
Matrox RT.X2 does not support 10-bit uncompressed video.
2
Under
Scan Mode
, select the scan mode of your video.
3
Click
OK
to save your selection. The settings you selected will be used each
time you render material with your program, until you change the settings
again.
Configuring the Matrox MPEG-2 I-frame codecs
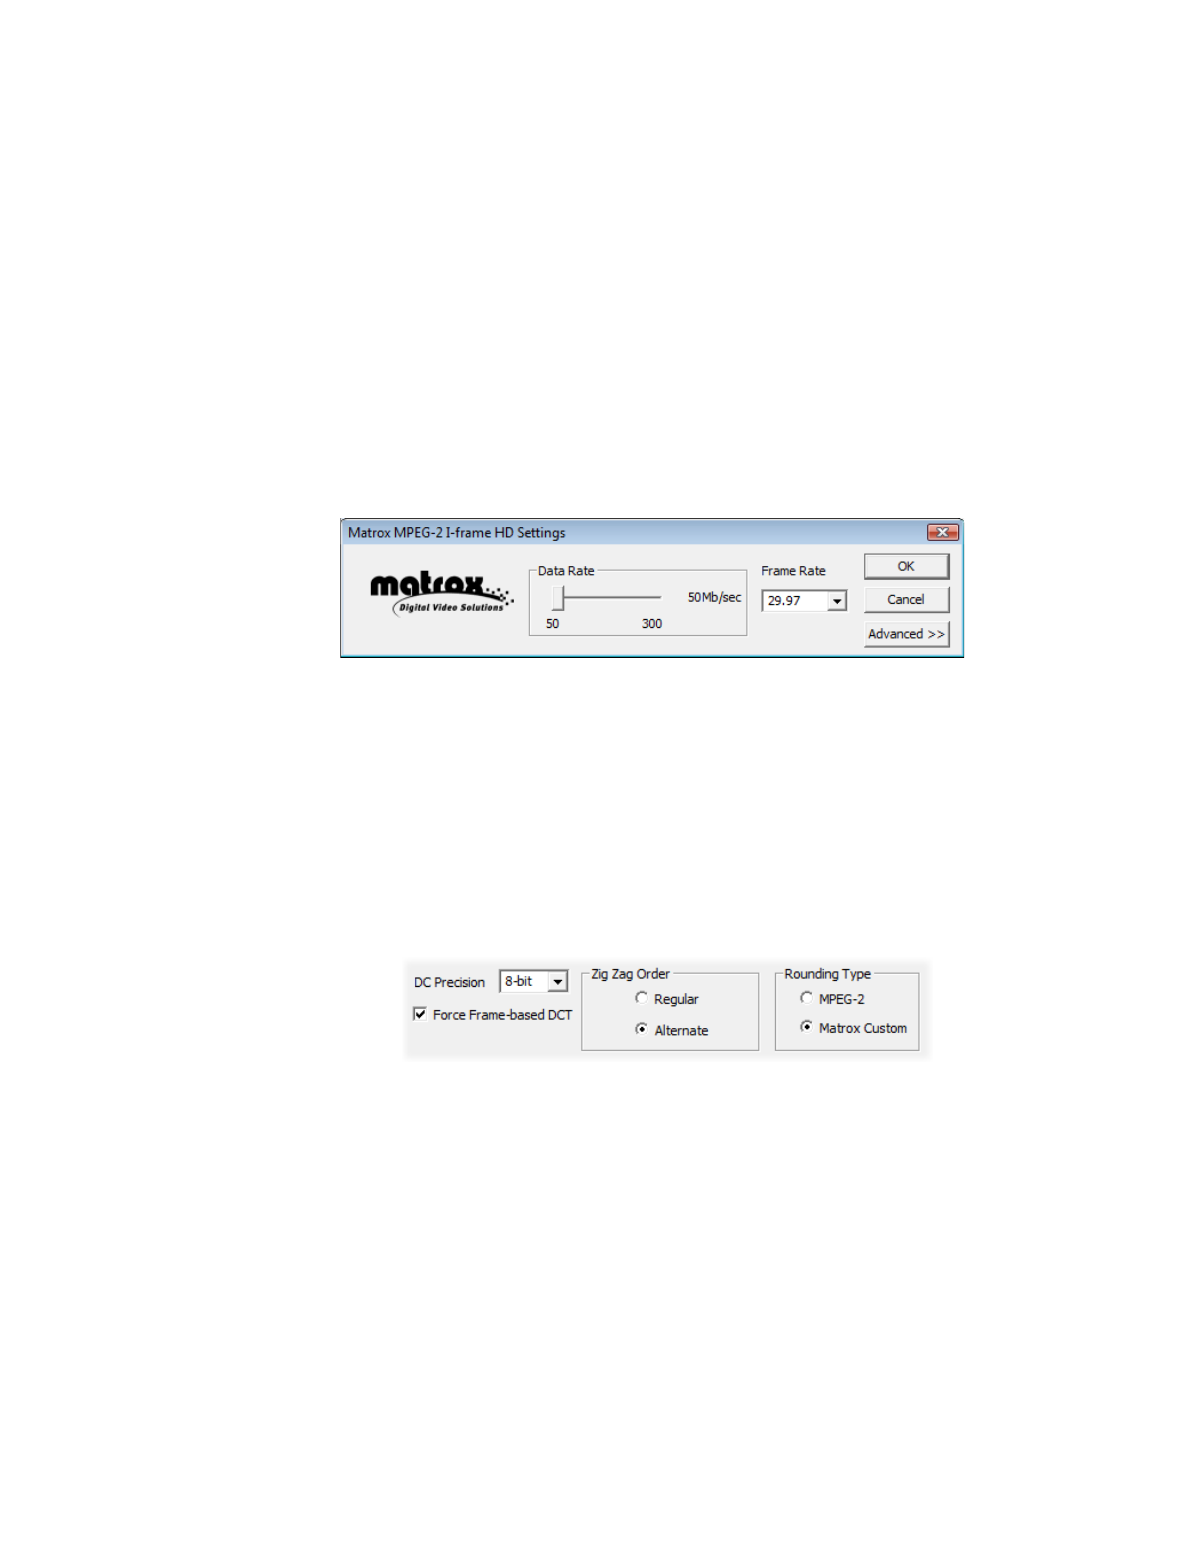
When you choose to configure a Matrox MPEG-2 I-frame codec (SD or HD
resolution), a dialog box similar to the following appears:
1
Drag the
Data Rate
slider until your desired data rate is displayed. The
higher the data rate you select, the better the video quality will be.
Depending on the capabilities of your system, however, you may not be able
to smoothly play back video at a high quality using your VFW program.
2
Beside
Frame Rate
, select a frame rate from the list. Make sure the frame
rate you select is appropriate for the format to which you are rendering.
3
To apply advanced settings to your MPEG-2 I-frame file, click the
Advanced
button.
¦
Note
The default advanced settings should provide good results for most
applications. It’s recommended that you change these settings only when
needed for special purposes.
4
Beside
DC Precision
, select the bit-depth precision of the DC intra block.
The higher the DC precision value that’s used to render your video, the more
likely that the DC content will be increased at the expense of the AC content
in the encoded stream. This may result in lowering the overall quality of the
compressed stream at a specified data rate.
5
Under
Zig Zag Order
, select one of the following: