Matrox MXO2 PCIe Host Adapter User Manual
Page 96
72
Chapter 8, Using Matrox MXO2 with Adobe Premiere Pro
3
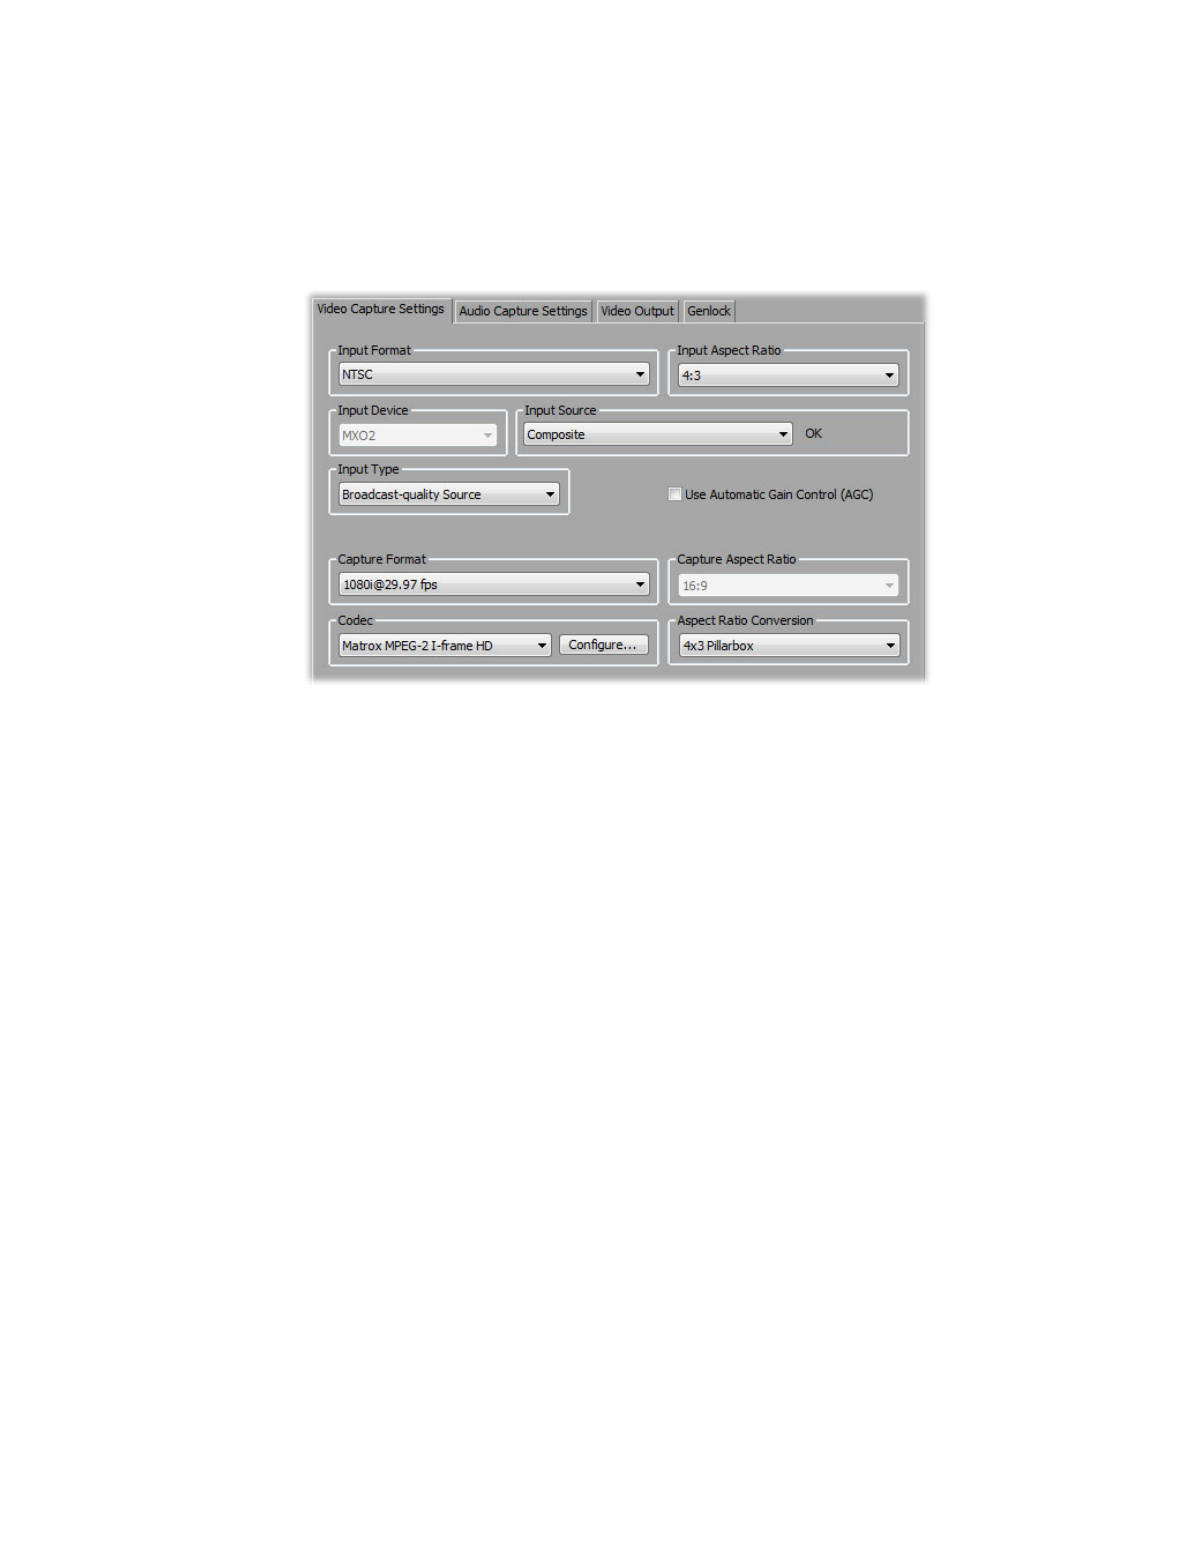
Click the
Configure
button, then click the
Video Capture Settings
tab.
4
Under
Input Format
, select the video format that matches your source
video. For a list of the video input formats supported on the various MXO2
inputs for capturing clips, see
.
5
Under
Input Aspect Ratio
, select the aspect ratio of your SD source video
(4:3 or 16:9). For example, to capture SD video that was recorded using the
standard TV screen format, select
4:3
. To capture SD video that was
recorded using the widescreen 16:9 format, select
16:9
. If you’re capturing
HD video, the
Input Aspect Ratio
will be set to
16:9
.
6
Under
Input Source
, select the type of input you want to capture. For
example, to capture material from your HDMI source, select
HDMI
. The
available input sources depend on your selected input format.
¦
Note
If Matrox MXO2 can’t detect your source device when you start a
capture, you’ll receive an error message. Either black video will be captured
or the capture won’t be able to start until a valid input signal is present. In
either case, you must make sure that your source device is switched on and
properly connected to MXO2 to properly capture the video.
7
Under
Input Type
, select the type of equipment you’re using for capture:
$
Broadcast-quality Source
Select this if your source device is
broadcast-quality. This setting provides the best capture results for most
devices.
$
Consumer-quality Source
Select this if you’re having problems
capturing video because your source device doesn’t meet
broadcast-quality standards. For example, the capture may be interrupted