Editing and saving a sampled waveform (wave edit) – Roland SPD-SX PRO Sampling Pad with 32GB Internal Memory User Manual
Page 92
Importing and Managing Audio Files (WAVE)
92
Button
Explanation
[F1] (CANCEL)
Ends sampling.
[F2] (START/STOP)
Begins sampling.
The indicator changes to “STOP” during sampling, which stops recording when pressed.
[F3] (CLEAR PEAK)
Resets the peak indicators.
2.
Press either the [F2] (START) button or use the auto-trigger feature to start sampling.
3.
Press the [F2] (STOP) button to stop sampling.
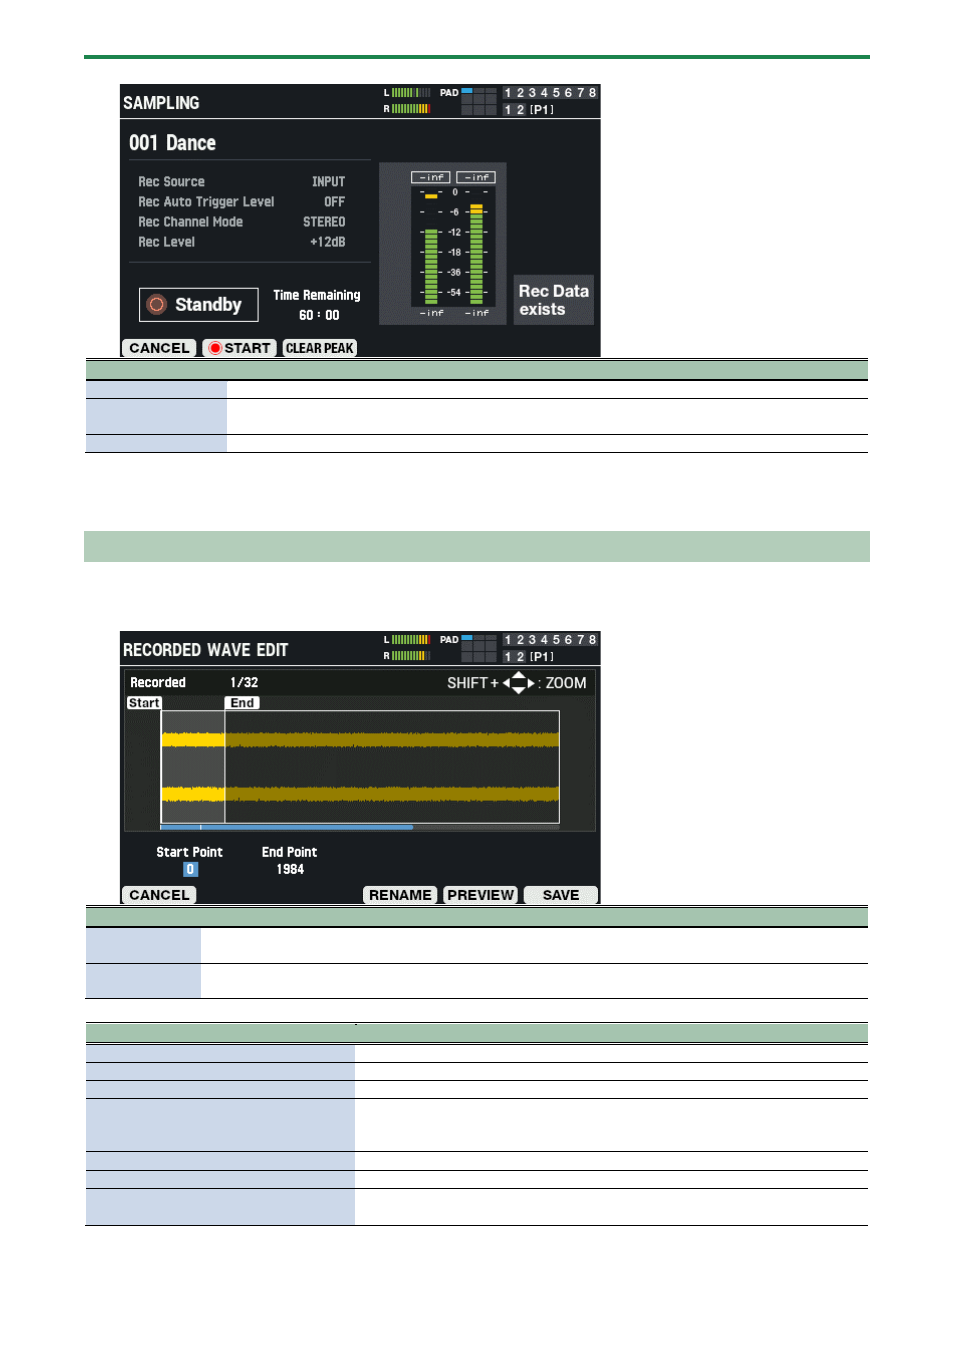
Editing and Saving a Sampled Waveform (WAVE EDIT)
1.
On the SAMPLING screen, press the [F6] (WAVE EDIT) button.
The wave edit screen appears.
Parameter
Explanation
Start Point
Sets the start point.
This clips everything in the waveform off that comes before this position.
End Point
Sets the end point.
This clips everything in the waveform off that comes after this position.
Button
Explanation
[F1] (CANCEL)
Exits WAVE EDIT mode.
[F4] (RENAME)
Edits the wave name.
[F5] (PREVIEW)
Previews the sampled waveform.
[F6] (SAVE)
Saves the sampled waveform to this unit’s memory.
Along with saving, this lets you assign the wave to the pads of the currently
selected kit.
Cursor [
г
] [
в
] buttons
Selects a parameter.
[-] [+] buttons
Edits the setting.
[SHIFT] button + cursor [
а
] [
б
] [
г
] [
в
]
button
Zooms the displayed waveform in/out.