Managing the xencenter plug-in, Registering the xencenter plug-in, Managing connections on the xencenter server – H3C Technologies H3C Intelligent Management Center User Manual
Page 29
21
2.
From the navigation tree, select VAN Connection Manager > Plug-in Management.
The Plug-in Management page appears.
3.
Click the registered VCE plug-in.
The page for modifying the VCE plug-in appears.
4.
Verify all parameters are correct, and then click Uninstall.
Managing the XenCenter plug-in
Registering the XenCenter plug-in
1.
Click the Resource tab.
2.
From the navigation tree, select VAN Connection Manager > Plug-in Management.
3.
In the XenCenter Plug-in area, select English from the list.
4.
Click Download to download the iMCXenPlugin.xcplugin.xml file to the local machine.
5.
On the XenCenter server, create the \XenCenter\Plugins\H3C\iMCXenPlugin directory of the
Citrix installation path, and then copy the .xml file to the directory.
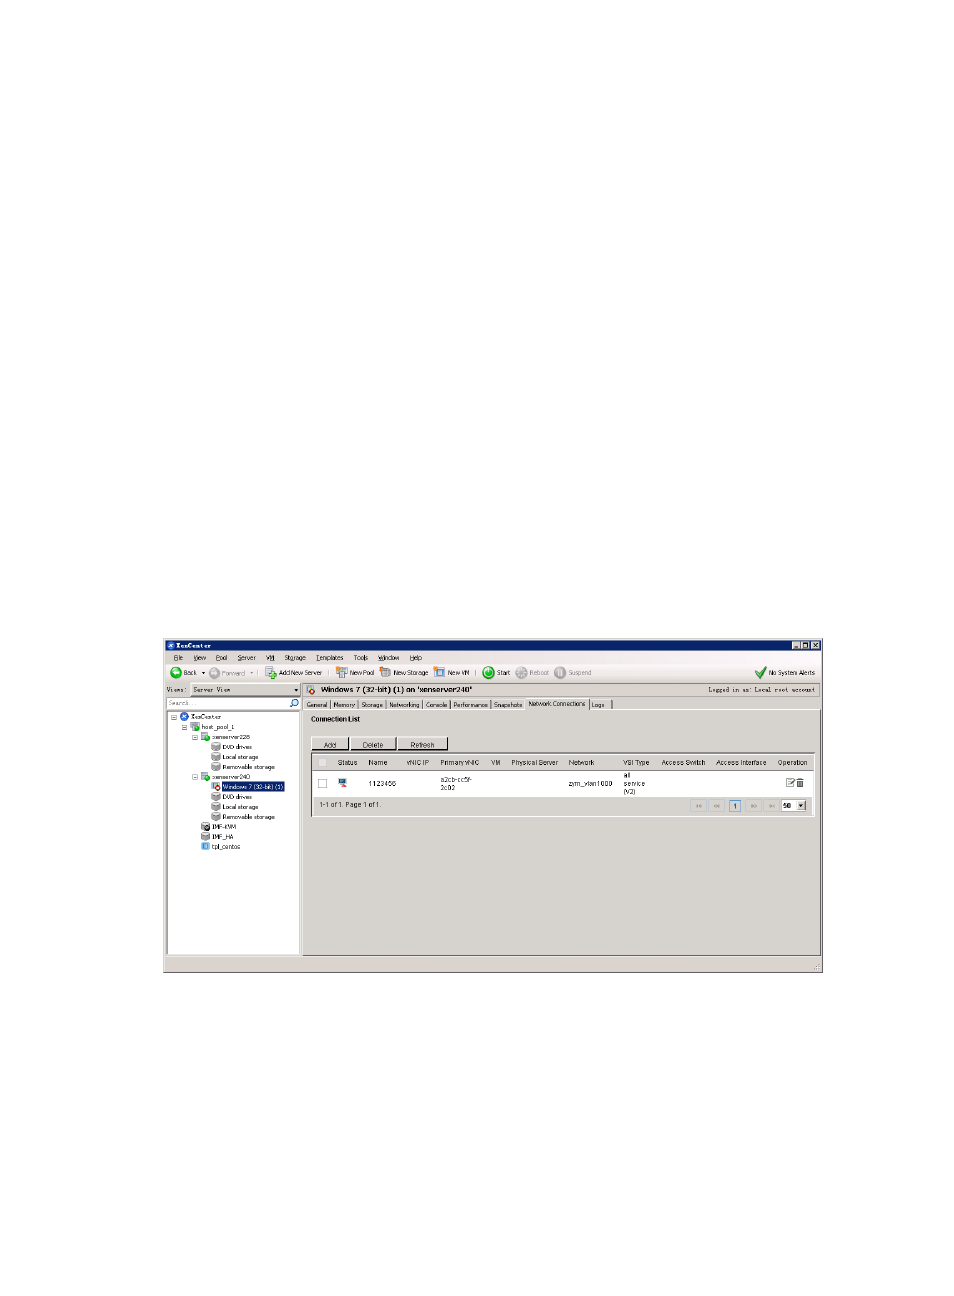
After the XenCenter plug-in is successfully registered, relog in to XenCenter and verify that a tab named
Network Connections appears for each VM. Access the connection list for a VM to manage the
connection, as shown in
.
Figure 10 Managing connections
Managing connections on the XenCenter server
On the XenCenter server, the administrator can add, modify, delete, deploy, and undeploy connections.
The connection information is synchronized between VCM and the XenCenter server.
Managing connections on the XenCenter server has the same operations as on vCenter Server. For
information about managing connections on vCenter Server, see "