Mounting the machine torch – Hypertherm HT2000-200 Volt User Manual
Page 87
INSTALLATION
4-34
HySpeed HT2000
Instruction Manual
19
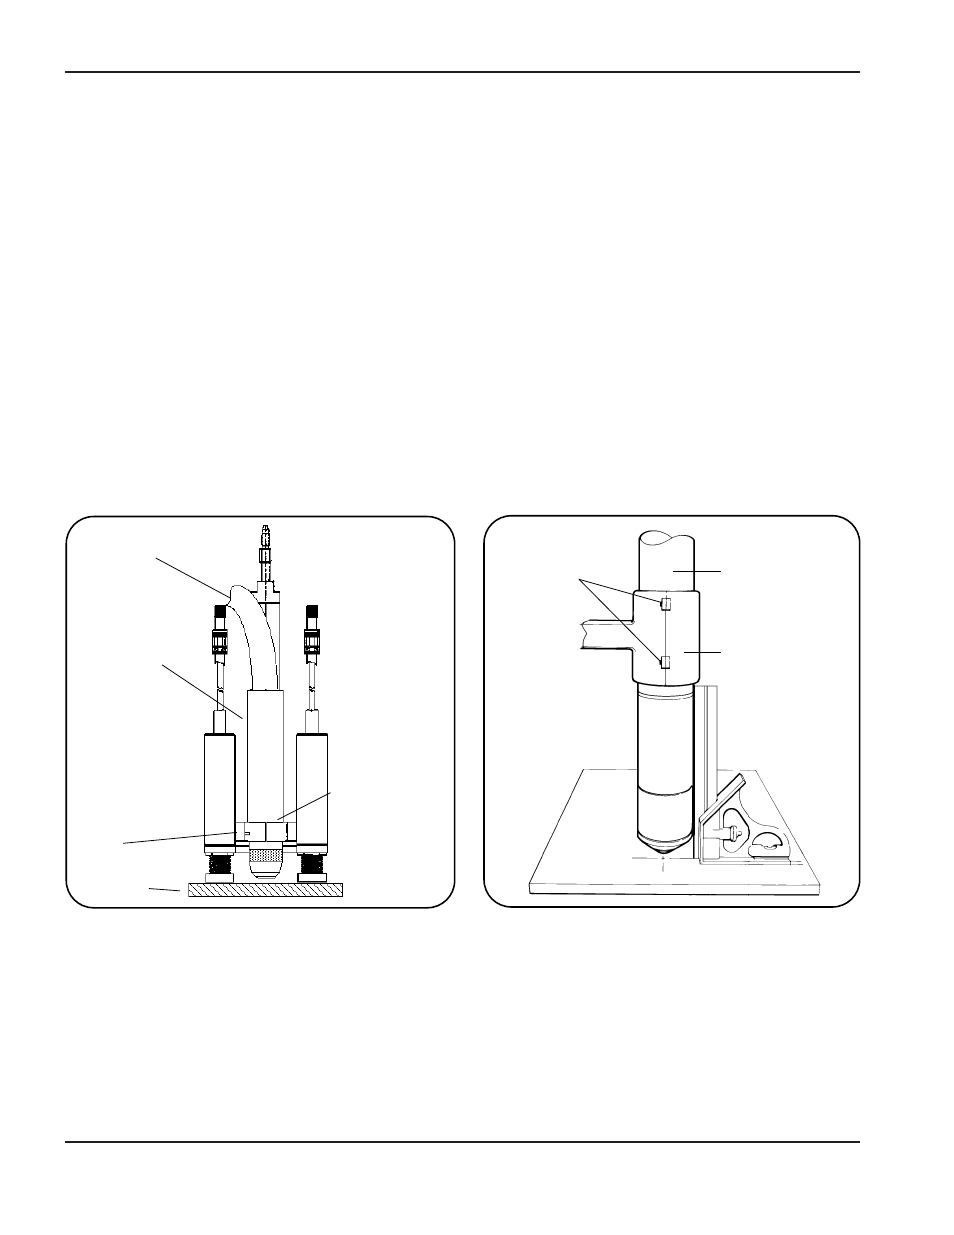
Torch Alignment
Prior to cutting with the machine torch, ensure that the torch is at right angles to the workpiece to get a clean,
vertical cut. Use a square to align the torch. The torch should be aligned at 0° and 90° (Figure 4-20).
Figure 4-20
Torch Alignment
(shown without IHS probes)
Figure 4-19
Mounting the Machine Torch
(shown with IHS probes)
Torch leads
Torch sleeve
Securing
screw
Torch mounting
bracket with IHS
Workpiece
Securing screws
Torch sleeve
Torch mounting
bracket without IHS
Mounting the Machine Torch
1. Loosen
Securing screw(s)
and install the machine torch (with torch leads attached) in the torch mounting
bracket or the torch mounting subassembly if IHS is used. See Figure 4-19 for torch mounting bracket with
IHS, and Figure 4-20 for torch mounting bracket without IHS.
2. Position the torch until the torch body extends all the way through the bracket, so that the bracket is now
around the plastic
Torch sleeve
and not touching the stainless steel torch body. Position the torch
approximately .25 " (6mm) from the work surface.
3. Tighten the securing screw(s). Final adjustment of the torch height is detailed in
Section 5: Post-
Installation
.
Argon-Hydrogen Connections
See
Section 7
: Operation: Argon-Hydrogen Manifold.