Trim mode operation buttons – Grass Valley EDIUS Neo 3 User Manual
Page 414
412
EDIUS NEO — User Reference Guide
Section 5 — Timeline Operations
Note
Depending upon the screen layout, display mode, project aspect ratio,
overlay settings and other factors, your Trim Mode display may not appear
exactly as represented here.
Alternative Methods:
•
Double-click the In or Out point of a clip.
Any of the following will switch the display from Trim Mode to Normal
Mode:
•
Select Mode>Normal Mode or Mode>Trimming Mode from the
Preview window menu bar.
•
Click the
[X
] in the lower right corner of the Trim Mode window.
•
Press the
[F6]
key on the keyboard.
Note
[F6] toggles Trim Mode on and off.
•
Press the
[F5]
key to switch to Normal Mode.
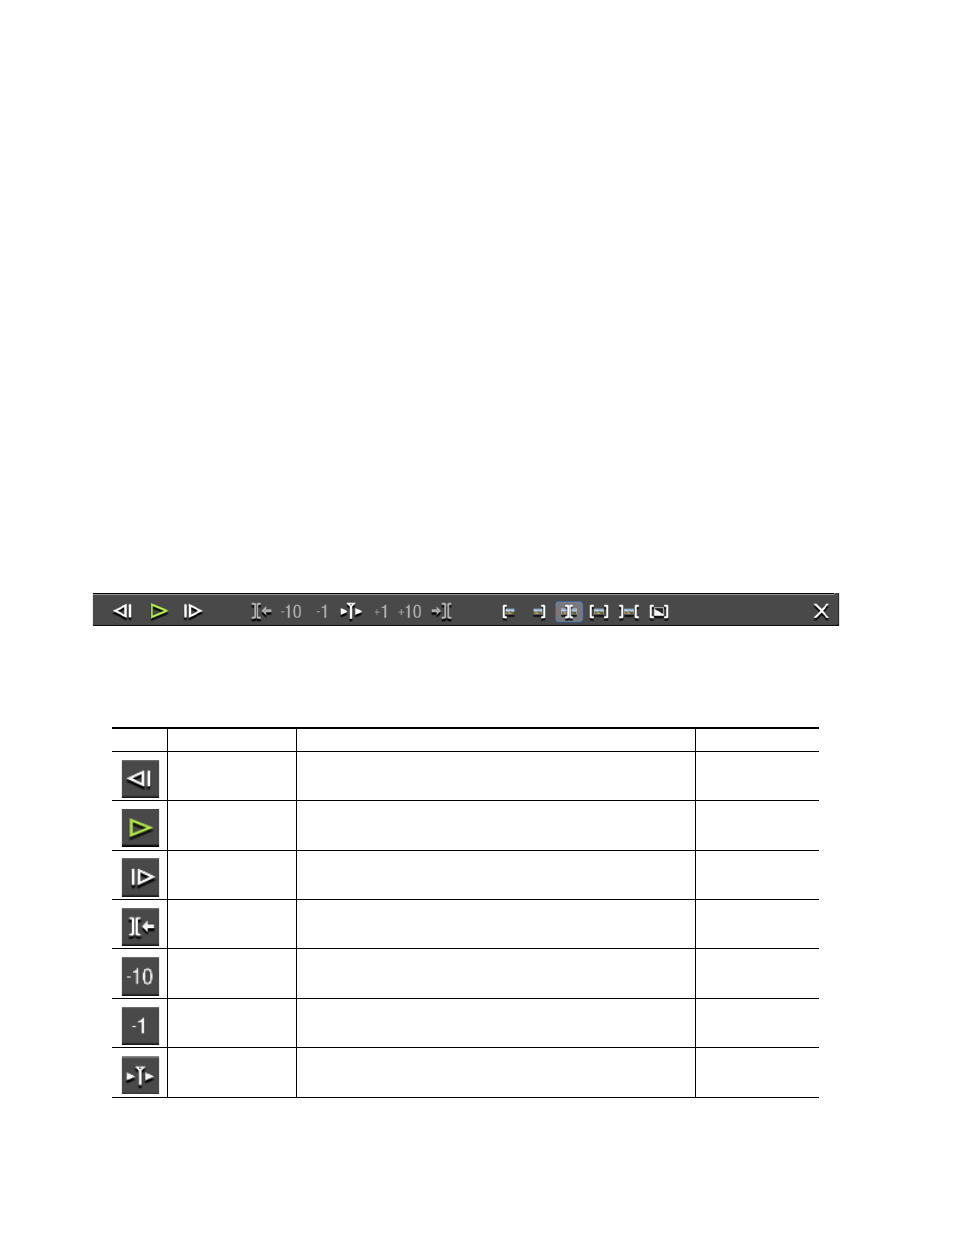
shows the Trim Mode operation buttons. This tool bar is visible
only while in trim mode.
Figure 466. Trim Mode Operation Buttons
Trim Mode operation button details are provided in
Table 8. Trim Mode Operation Buttons
Button
Function
Description
Keyboard Shortcut
Previous Frame
Move to the previous frame
[
<--
]
Profile (Play/Pause)
Play the Timeline in the normal direction. When clicked during playback, playback is
paused.
[
SPACE
]
Next Frame
Move to the next frame.
[
-->
]
Move to Previous Edit
Point - Trim
The focus and the Timeline cursor move to the edit point (cut point) to the left of the
current cut point.When no cut point is selected, the focus and the Timeline cursor
move to the edit point to the left of the current position.
[
Page Up
]
Trim -10 Frames
Adjust the trim position by -10 frames from the current position.
[
SHIFT
]+[
,
]
Trim -1 Frame
Adjust the trim position by -1 frame from the current position.
[
,
]
Play the Event Area
Repeatedly play the video around the selected cut point. Click again to stop.
[
/
]