Section 2: timing system setup, 1 equipment overview, 2 touchpad installation – Daktronics OmniSport 2000 Timing Console User Manual
Page 21: Section 2, Timing system setup, Equipment overview, Touchpad installation
Timing System Setup
3
Section 2:
Timing System Setup
Daktronics aquatics timing system setup will be unique to each pool. This manual describes a typical
pool setting. Generally it is recommended that 2-3 people assist in the setup for a meet. Allow 2-3
hours to complete the timing system setup for the first time. For connections to the scoring displays,
refer to the riser diagrams in Section 2.8.
2.1 Equipment Overview
The information in this section is general information only and may or may not apply to
every pool setting.
Touchpads with 7/16" wrench to adjust brackets
Deck cabling with lane modules and lane extension cable
Horn start with start cable
OmniSport 2000 console, power pack, swimming keyboard insert and manual
Meet management computer and software with serial cable
2.2 Touchpad Installation
1. Before the meet, install the touchpads in the pool. With one person on each end of
the touchpad, carefully lower the touchpad into the pool. Center the touchpad in
the lane. Secure the supplied adjustable bracket to the pool gutter. If the pool does
not have a gutter, secure the touchpad by running a cord through the holes on top
of the touchpad and tying it to the starting block.
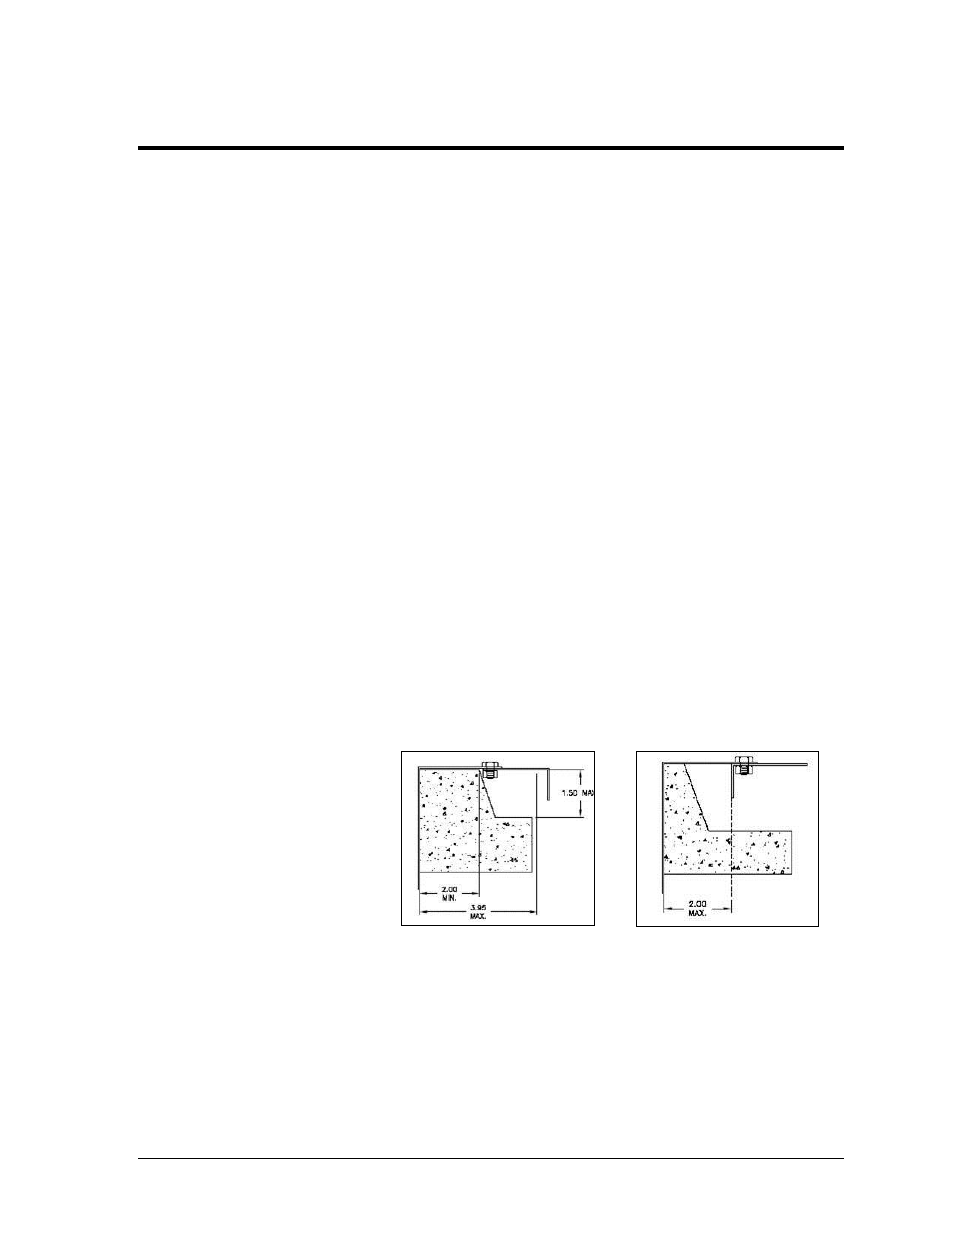
2. The universal
bracket adjusts
to both a narrow
or wider gutter
lip. (Figure 2 and
Figure 3).
Figure 2: Universal Bracket for
Wider Gutter Lip
Figure 3: Universal Bracket for
Narrow Gutter Lip