Auto scan – ACTi NVR 2.3 Enterprise V2.3.04.07 User Manual
Page 36
NVR 2.3 (V2.3.05.11) User’s Manual
Auto Scan
Select
‘Auto’ and click ‘Next Step’ to start auto scan. NVR will take a short while to look for
devices on your network. Only devices on the same subnet can be found. A list of available
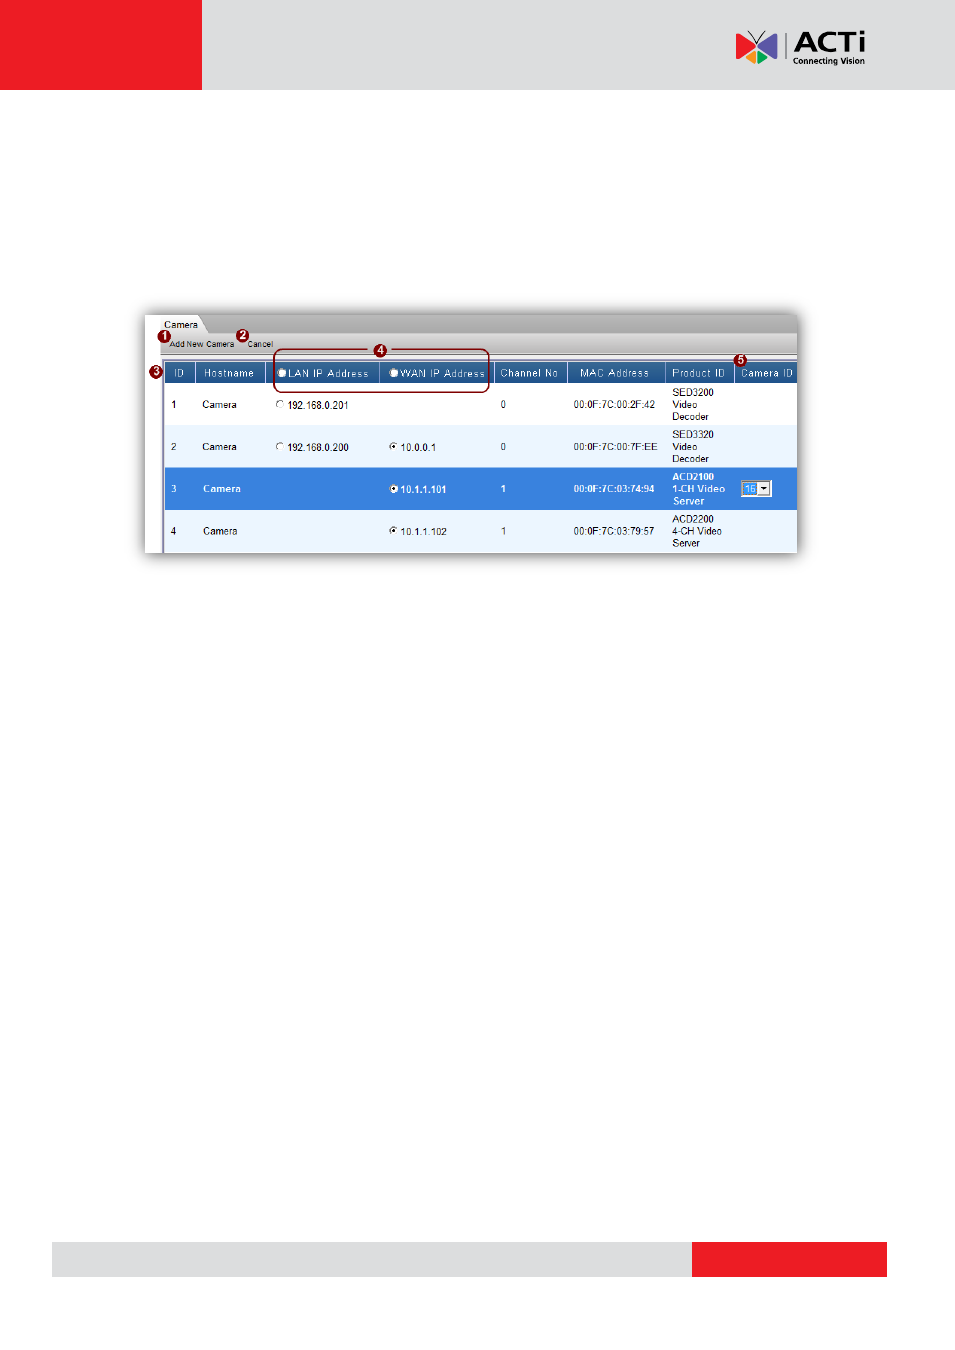
cameras and video servers will be displayed once the search is complete.
Fig. 13 Camera Setup
– Auto Scan - Auto Search Result List
1. Add New Camera: After you
’ve selected all the devices you wish to add to NVR and which
channel ID should they be assigned to, click here to add the selected devices into NVR
database.
2. Cancel: Click this button to abort adding devices and return to the Add New Camera
screen.
3. List of Cameras/Video servers: Here is a list of devices found over the network. You may
click on the row of the device you wish to add, and User can see the list of all the IP
cameras / video servers found. You may click the column heading to sort by each column.
4. LAN/WAN IP Address: Most devices have a single IP address. Some devices provide two
IP addresses identified as LAN or WAN. Please click on the radio button to select the IP
address you want to connect to. In most cases this would be the WAN address.
5. Camera ID: When you select the row of the device you wish to add, a drop-down list will
appear to the right in the Camera ID section. Select an unused camera ID to refer to this
device in NVR.
The column
“Channel No” is used for multiple channel Video Servers. One video server may
connect to many analog cameras, and they are identified by the Channel No. You may add
each Channel No. as a separate Channel in NVR.