ACTi NVR 2.3 Enterprise V2.3.04.07 User Manual
Page 54
NVR 2.3 (V2.3.05.11) User’s Manual
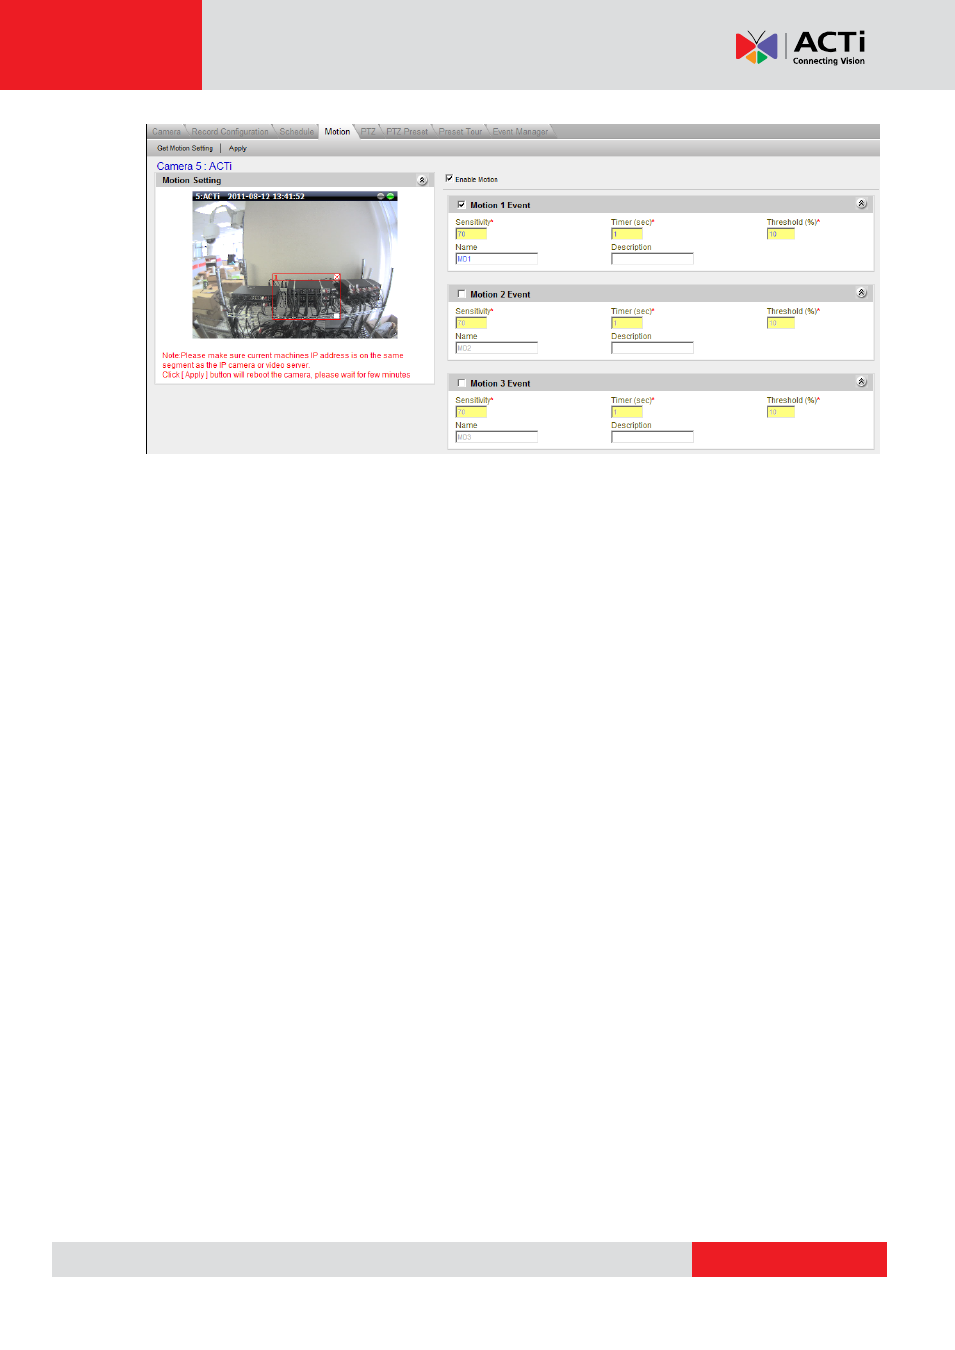
Fig. 32 Camera Setup
– Motion - Motion Setup
After you click the Motion Setup button, the
‘Apply’ button will show up and replace ‘Motion
Setup
’. Then you can start to configure motion (and PIR) detection
1.
Get Motion Setting: Click this button to connect to retrieve motion detection setting from
the device and see live view. In Active-Monitor, while the motion detection is active, a red
rectangle representing the motion region will appear during live view if there is motion
activity.
Note: If the motion detection region was configured only in camera and not through NVR,
the live view camera title bar will turn red, but the motion region rectangle will not show
up in Active Monitor live view.
2.
Apply button: Click this button to save the settings to camera and NVR.
3.
Enable Motion: This checkbox disables / enables all the motion functions. Before
modifying the motion region settings, please check this checkbox first.
4.
Enable / Disable Motion Event: Check this box to enable / disable individual motion
detection area. By enabling this, you can see a rectangle appearing in the preview
window, and start setup this individual motion detection region.
5.
Sensitivity: Enter the sensitivity level of this motion detection region. Higher sensitivity
levels are more easily triggered, but may give more false alarms. Sensitivity may range
from 1-100.
6.
Name: Enter the name of this motion detection region. This is the name that will be
shown in Event manager and the Active Monitor event panel when motion activity is
detected.
7.
Timer: The interval before the next motion detection can be triggered again. The range of
available value is 1-300 seconds.
8.
Description: Enter more detailed description of this motion detection area. Both the
❶
❷
❹
❸
❺
❻
❼
❽
❾
❿