TP-Link Omada ER8411 VPN Router User Manual
Page 221
User Guide 212
Managing Services
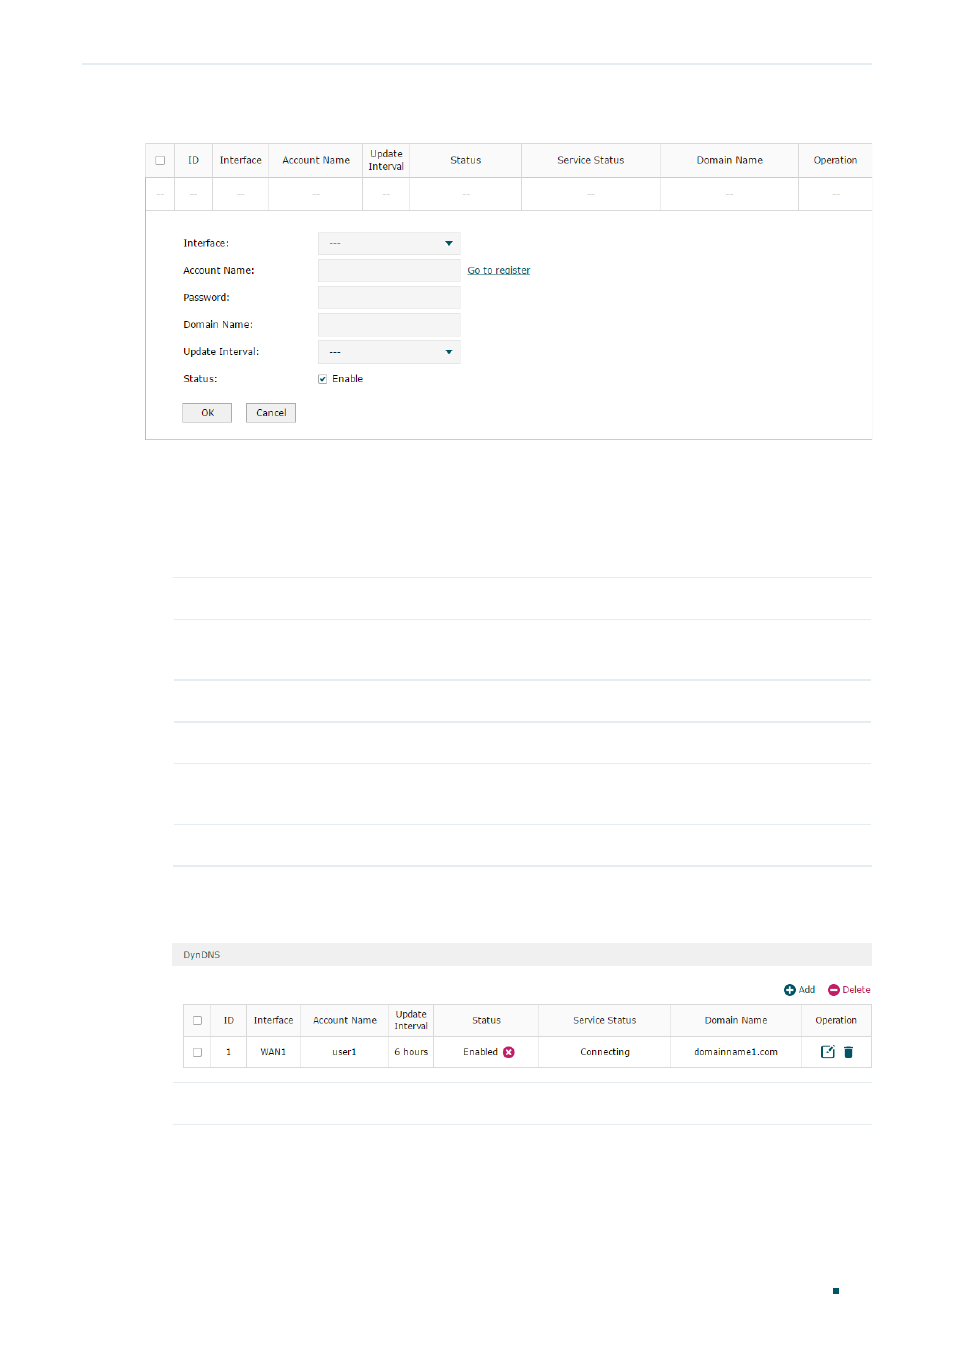
Dynamic DNS Configurations
Figure 2-5
Configure DynDNS
Follow these steps to configure DynDNS.
1) Click
Go to register
to visit the official website of DynDNS and register an account and
a domain name.
2) Configure the following parameters and click
OK
.
Interface
Select the interface for the DDNS service.
Account Name
Enter the account name of your DDNS account. You can click
Go to register
to
visit the official website of DynDNS to register an account.
Password
Enter the password of your DDNS account.
Domain Name
Specify the domain name that you registered with your DDNS service provider.
Update Interval
Specify the Update Interval that the device dynamically updates IP addresses for
registered domain names.
Status
Check the box to enable the DDNS service.
3) View the DDNS status.
Figure 2-6
View the Status of DynDNS
Status
Displays whether the corresponding DDNS service is enabled.