2 setting the printer – Casella CEL CEL-281 User Manual
Page 119
3.
Carefully remove the front cover. All circuitry is retained in the
rear cover.
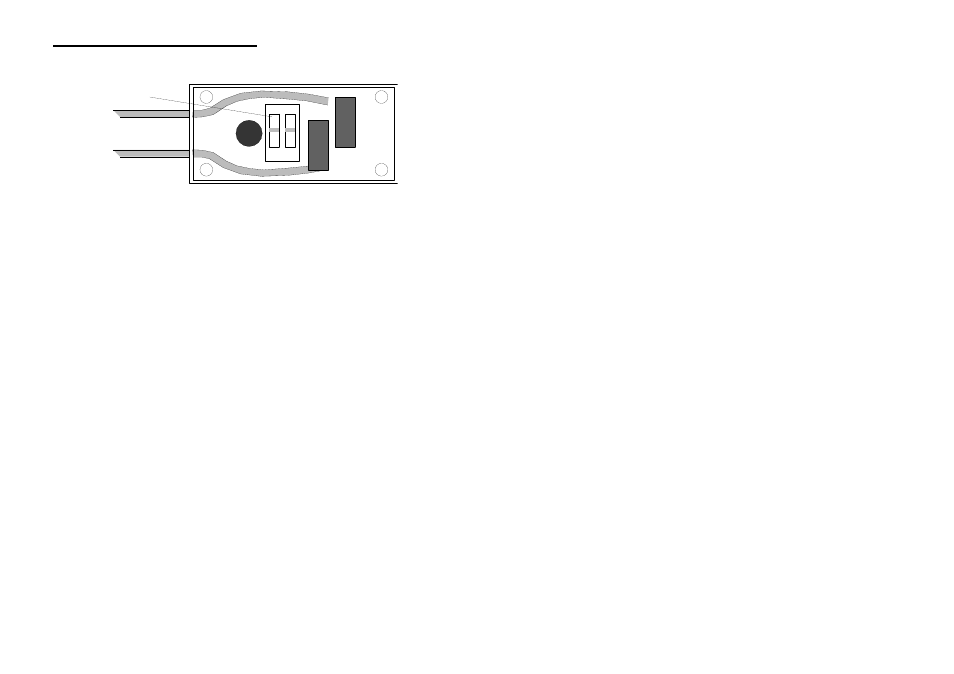
4.
Set the two DIP switches to produce the required report format,
referring to Figure 20 and to the following list.
ISO Format
Switch 1 Open, Switch 2 Shut.
DOD Format
Switch 1 Shut, Switch 2 Shut.
OSHA Format
Switch 1 Shut, Switch 2 Open.
The remaining switch combination disables the interface.
5.
Carefully replace the front cover.
6.
Replace the four screws.
7.
Carefully replace the button cap.
6.2
Setting the Printer
Before connecting the dosimeter, it is recommended that the printer
DIP switches are set as follows.
Column:
80,
Font:
USA,
Print mode at
power on:
Normal,
910119
OPEN
1
2
DIP Switches
Figure 20: Location of DIP switches in interface cable case
Page 110 - CEL-281 Operator's Handbook
Printing Hard Copy Reports