Audio operations, Assigning audio sources to audio channels, Adjusting the input gain (sensitivity) – Roland VR-120HD Direct Streaming AV Mixer User Manual
Page 45
45
Audio Operations
Assigning Audio Sources to Audio Channels
You can assign mic audio, line input, video input (HDMI, SDI) and so on to
channels 1–9/10.
This is an example of how to assign a sound source to channel 1.
1 .
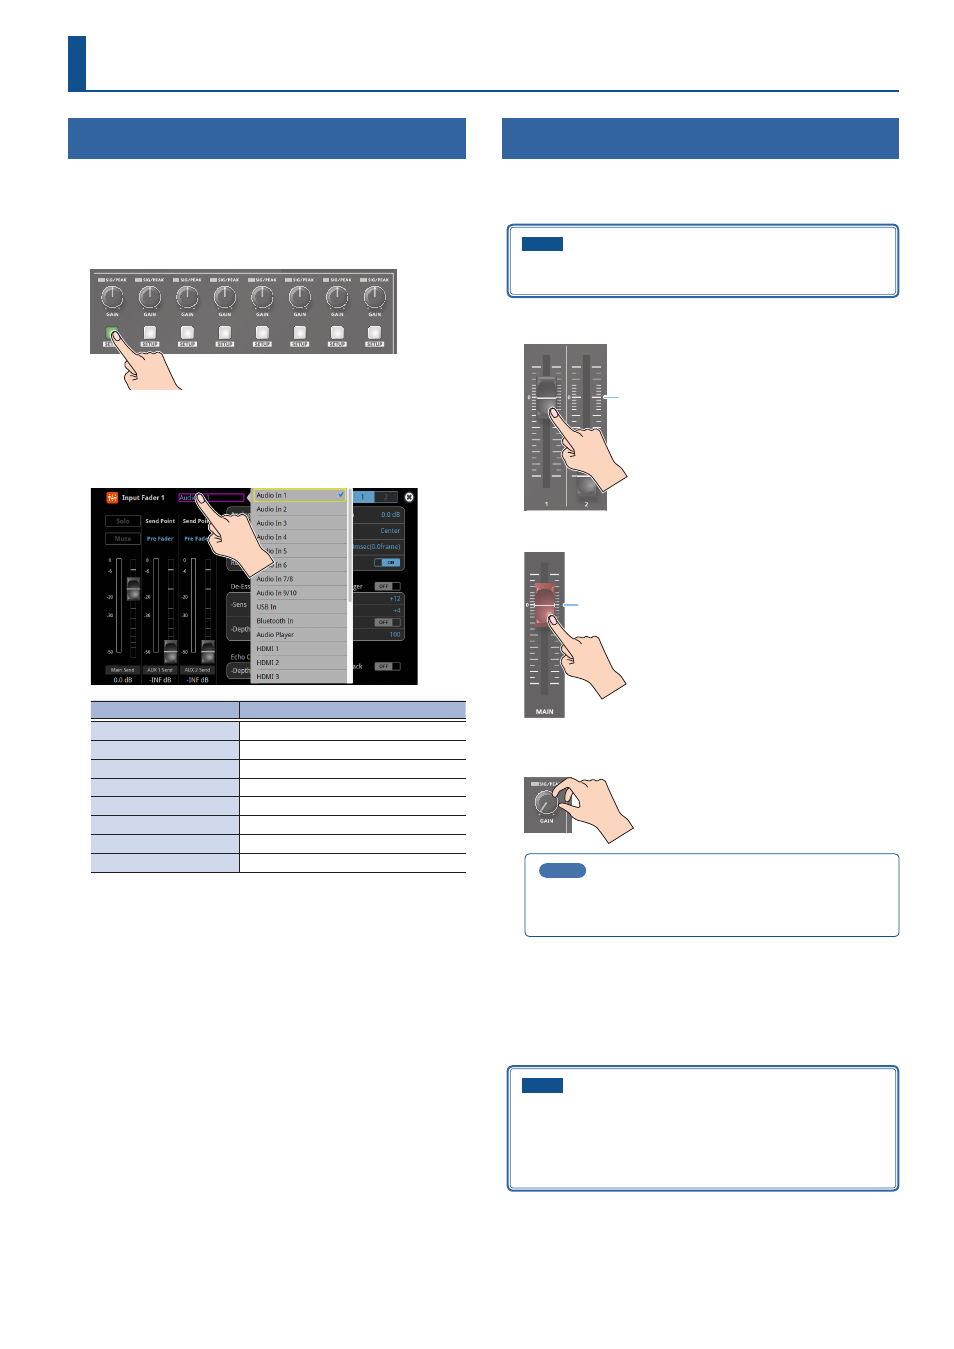
Press the [SETUP] button of the channel whose settings you
want to change.
The setup screen for the channel you pressed appears.
2 .
Touch <Input Fader> and select an audio source to assign to
the channel.
Value
Explanation
Audio In 1–6
Audio from AUDIO IN 1–6 jacks
Audio In 7/8–9/10
Audio from AUDIO IN 7/8–9/10 jacks
USB In
Audio from USB STREAM port
Bluetooth In
Bluetooth In audio
Audio Player
Audio from an audio player
HDMI 1–6
(*1)
Audio from HDMI IN 1–6 connectors
SDI 1–6
(*1)
Audio from SDI IN 1–6 connectors
V.Player
Audio from a video player
(*1) Select channels 1/2, channels 3/4, channels 5/6 or channels 7/8
from SDI or HDMI embedded audio.
3 .
Press the lit [SETUP] button to close the setup screen.
Adjusting the Input Gain (Sensitivity)
Here’s how to adjust the input gain so that the audio is at the appropriate
level.
Here we explain using the channel 1 audio as an example.
NOTE
Turning the [GAIN] knobs may produce a popping noise or cause
momentary audio drop-out, but this is not a malfunction.
1 .
Position the channel 1 audio fader near the “0 dB”.
0 dB
2 .
Move the [MAIN] fader to a position near the “0 dB”.
0 dB
3 .
Turn the channel 1 [GAIN] knob fully counter-clockwise,
minimizing (0 dB) the input gain.
MEMO
For the Audio In 1–6 (which have analog gain circuits), you can
turn this knob to adjust the analog gain. For other jacks/ports/
connectors, this adjusts the digital gain instead.
4 .
While producing the sound that will actually be input,
slowly turn the [GAIN] knob clockwise to adjust the input
gain.
Raise the input gain as high as possible without allowing the SIG/
PEAK indicator of channel 1 to light red when the loudest sound level
occurs.
NOTE
If the Audio Fader/Knob Mode is set to “Catch”, the fader operations
are ignored until the fader’s position “catches up” to the current
level. (p. 148)
* The [SETUP] button for the respective channel blinks while
the fader operations are being ignored.