Checking a specific audio input (solo), Soloing the input audio, Soloing the output audio – Roland VR-120HD Direct Streaming AV Mixer User Manual
Page 57: Setting on the audio level screen, Audio operations
57
Audio Operations
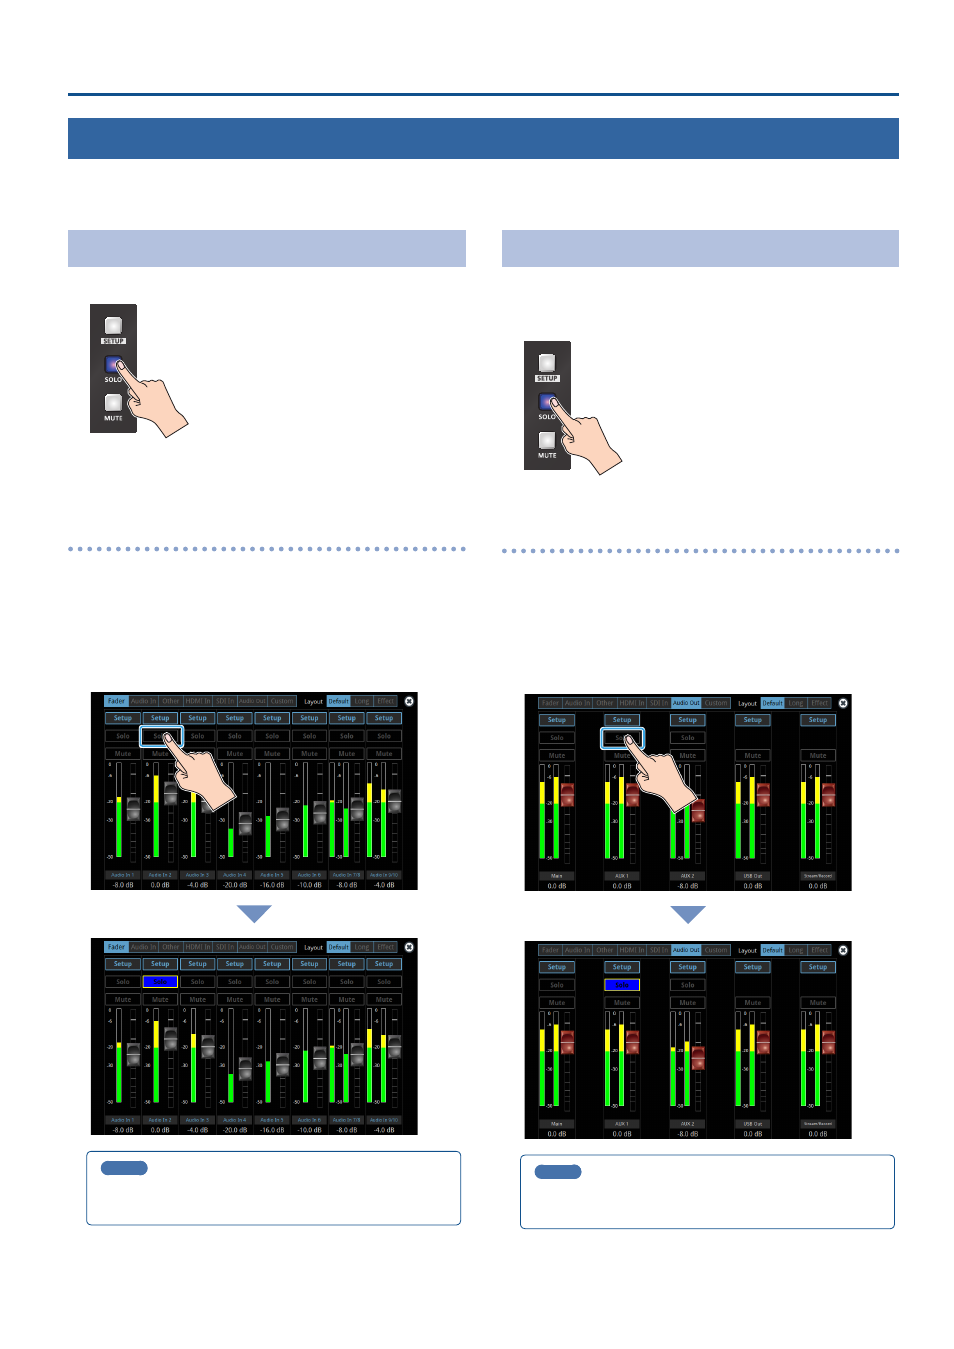
Checking a Specific Audio Input (Solo)
Here’s how you can temporarily monitor a specific audio input via the headphones (solo function).
* The solo function applies to the headphone output. It does not affect output other than the headphones.
Soloing the Input Audio
1 .
Press the [SOLO] button on the channels you wish to solo.
The button lights up, and the solo function turns on.
In the headphones, you hear only the audio of the channels that are
set to solo.
Setting on the audio level screen
1 .
Press the [AUDIO LEVEL] button.
The Audio Level screen appears.
2 .
Touch <Fader> tab.
3 .
Touch <Solo> for the channel you wish to solo.
The solo function for the selected channel turns on.
MEMO
You can also solo the channels by touching <Solo> on the setup
screen of the respective channel.
Soloing the Output Audio
This shows you how to solo the audio from the main bus and AUX
bus.
1 .
Press the MAIN [SOLO] button.
The button lights up, and the solo function turns on.
Setting on the audio level screen
1 .
Press the [AUDIO LEVEL] button.
The Audio Level screen appears.
2 .
Touch <Audio Out> tab.
3 .
Touch <Solo> for the bus you wish to solo.
The solo function for the selected bus turns on.
MEMO
You can also solo the buses by touching <Solo> on the setup
screen of the respective channel.