Playing back audio files (audio player), Importing an audio file, Playing back audio clips – Roland VR-120HD Direct Streaming AV Mixer User Manual
Page 58: Audio operations
58
Audio Operations
Playing Back Audio Files (Audio Player)
Audio files that you created on your computer can be loaded (imported) into this unit as materials, and then played back by using the pads.
You can save up to 16 audio files on this unit.
Importing an Audio File
To begin, save the audio files that you created on your computer
beforehand to the root directory of your SD card or USB flash drive.
Here’s an example of how to import an audio file into pad [1].
1 .
Insert the SD card containing material files into the SDXC
card slot.
* When using a USB flash drive, connect the USB flash drive to the USB
HOST port.
2 .
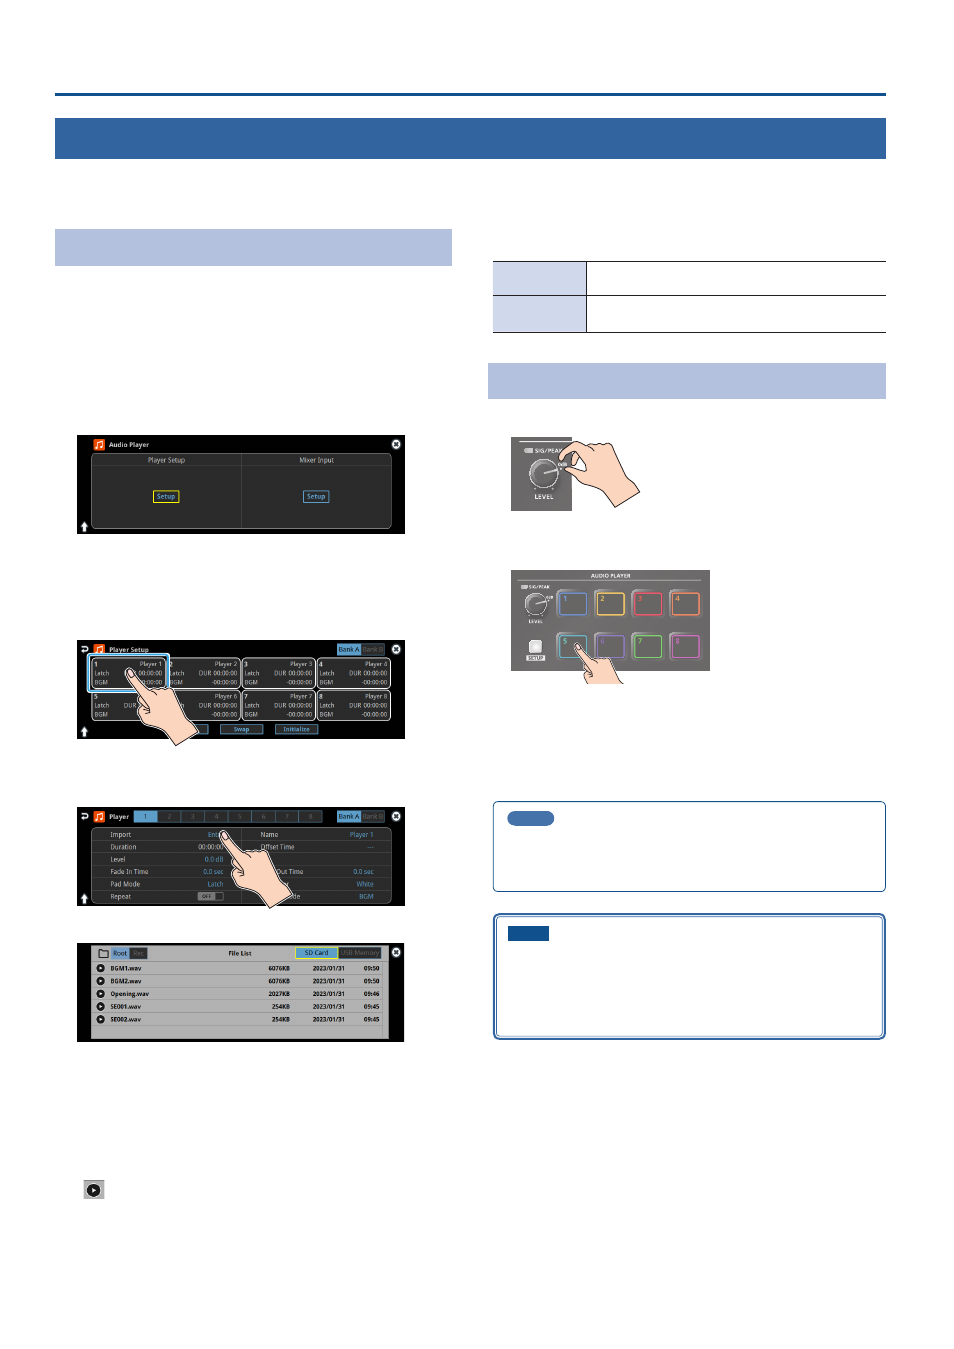
Press the AUDIO PLAYER [SETUP] button.
The Audio Player screen appears.
3 .
Touch Player Setup <Setup>.
The Audio Player setup screen appears.
4 .
Touch <1> in the audio clip area.
The audio clip setup screen appears.
5 .
Touch Import <Enter>.
A list of audio files on your storage media is shown.
* Use the “SD Card” or “USB Memory” selector at the top right-hand
corner of the screen to switch between the storage media to load
from.
* Select “Root” or “Rec” in the upper left part of the screen to switch
between folders from which the files are loaded.
6 .
Touch the filename of the audio file you want to load.
* You can audition the file in headphones by touching the preview icon
(
).
7 .
When the confirmation dialog box appears, select “OK” and
press the [VALUE] knob.
The file is imported, and the data is placed in pad [1] (Audio Player 1)
as an audio clip.
Supported files
Format
WAV (Linear PCM, 48 kHz, 16 bit, stereo/ 44.1 kHz,
16 bit, stereo)
File name
No more than 64 single-byte alphanumeric characters
* The extension “.
wav”
must be added.
Playing Back Audio Clips
1 .
Set the AUDIO PLAYER [LEVEL] knob to “0dB”.
2 .
Press a pad from [1]–[8] corresponding to the position of the
audio clip you want to play back.
This plays back the corresponding audio clips.
3 .
While playing back the audio clips, use the AUDIO PLAYER
[LEVEL] knob to adjust the overall volume for all audio clips.
Adjust the input gain so that the SIG/PEAK indicator of the audio
player doesn’t light up red when the sound level is at its loudest.
MEMO
If you leave this information showing on the audio player setup
screen, you can play back the audio clips while checking their
information (clip name, playback time, loop, etc.).
NOTE
If the Audio Fader/Knob Mode is set to “Catch”, the fader operations
are ignored until the fader’s position “catches up” to the current
level. (p. 148)
* The [SETUP] button for the respective channel blinks while
the fader operations are being ignored.