Rover port configuration, Rover configuration, Figure 40: rover – nct rtk port configuration – NavCom StarUtil Rev.G User Manual
Page 49
StarUtil User Guide – Rev. G
to a file for use in a GPS data analysis program. Refer to the Technical
Reference Manual for details on message 5E (see Related Documents in the
Refer to
for the steps below:
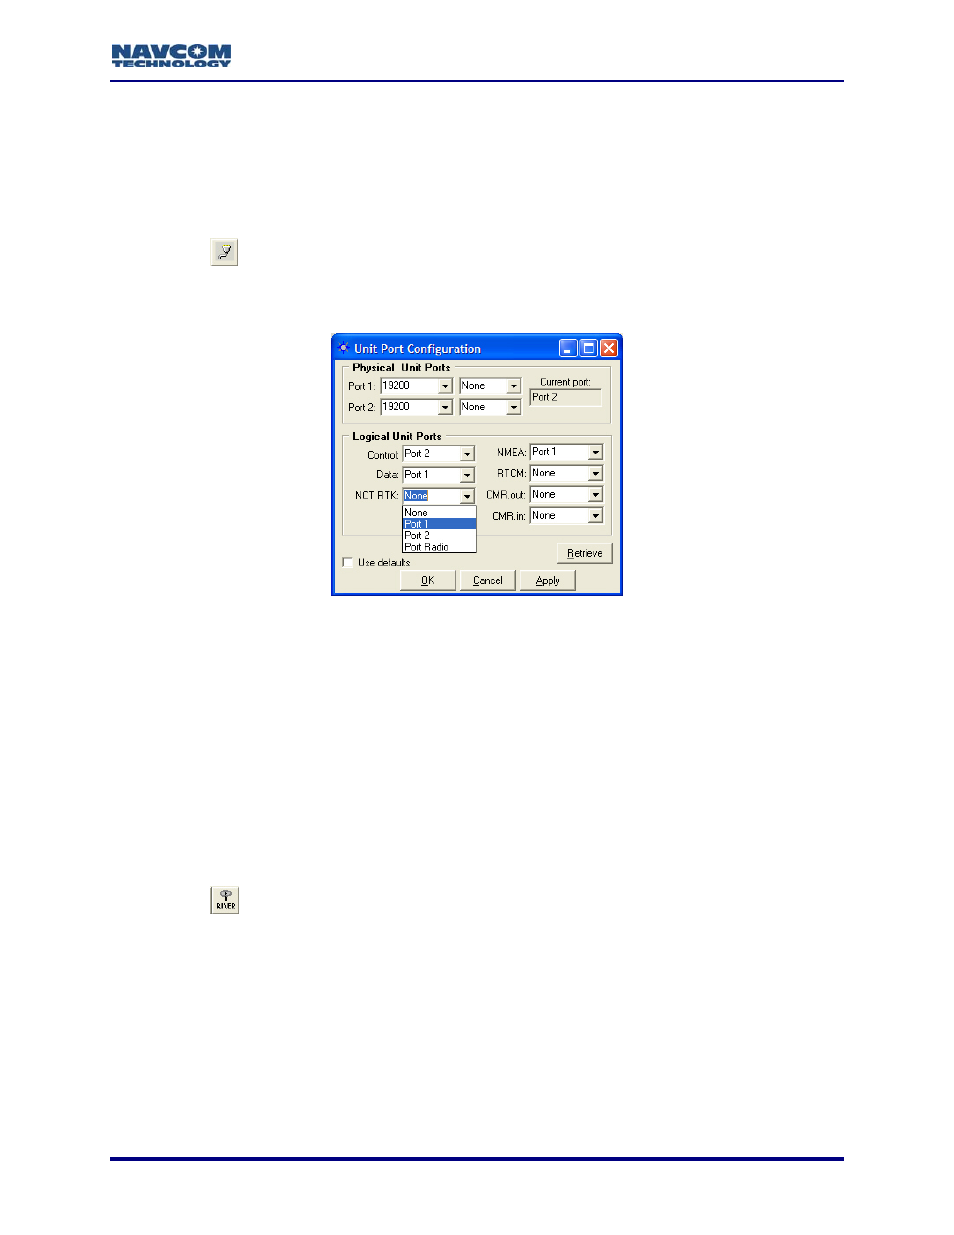
18. Click the
fore-matter).
Rover Port Configuration
Figure 40
icon on the toolbar to set the communications between the radio modem and
the GPS receiver. The
To open the
Setup > Ports.
Unit Port Configuration window opens.
window from the menu bar, select Receiver >
Figure 40: Rover – NCT RTK Port Configuration
19. Set the baud rate, as appropriate, for Port 1 (19200 default). Do not change the default
parity (None).
20. Set the NCT RTK logical port to Port 1 (equivalent to Com1).
cepts
23. Click the
Models RT-3010 & RT-3020 only (with internal radio): Set the NCT RTK logical
port to Port Radio.
21. Click the Apply button and then click the Retrieve button to confirm that the receiver ac
the settings.
22. Click the OK button to exit the window.
Rover Configuration
icon on the toolbar to configure the rover. The Rover / Navigation & Tracking
Setup window opens (see Figure 41).
To open the window from the menu bar, select Receiver > Setup > Rover /
Tracking and Navigation.
5-47