Exporting sessions, Erasing sessions, 5–projects – Teac HS-2 User Manual
Page 42
42
TASCAM HS-2
Exporting sessions
You can export session folders from the selected media to
an unselected media (two media devices are necessary).
When you export a session, the same directory structure
is created on the export destination.
CAUTION
If you export a session with a different sampling frequency
into a project, the session cannot be rebuilt.
1 Press the PROJECT key on the front panel to open
the
PROJECT
screen.
2 Touch the
e
button for the project that contains
the session that you want to export to open the
session selection screen. If it is not the current ses-
sion, a pop-up window appears confirming that
you want to load it. Touch the
OK
button.
3 Select the session that you want to export.
Touch the
MULTI SELECT
button to enable the se-
lection of multiple sessions.
4 Touch the
MENU
button on the session selection
screen to open a pull-up menu.
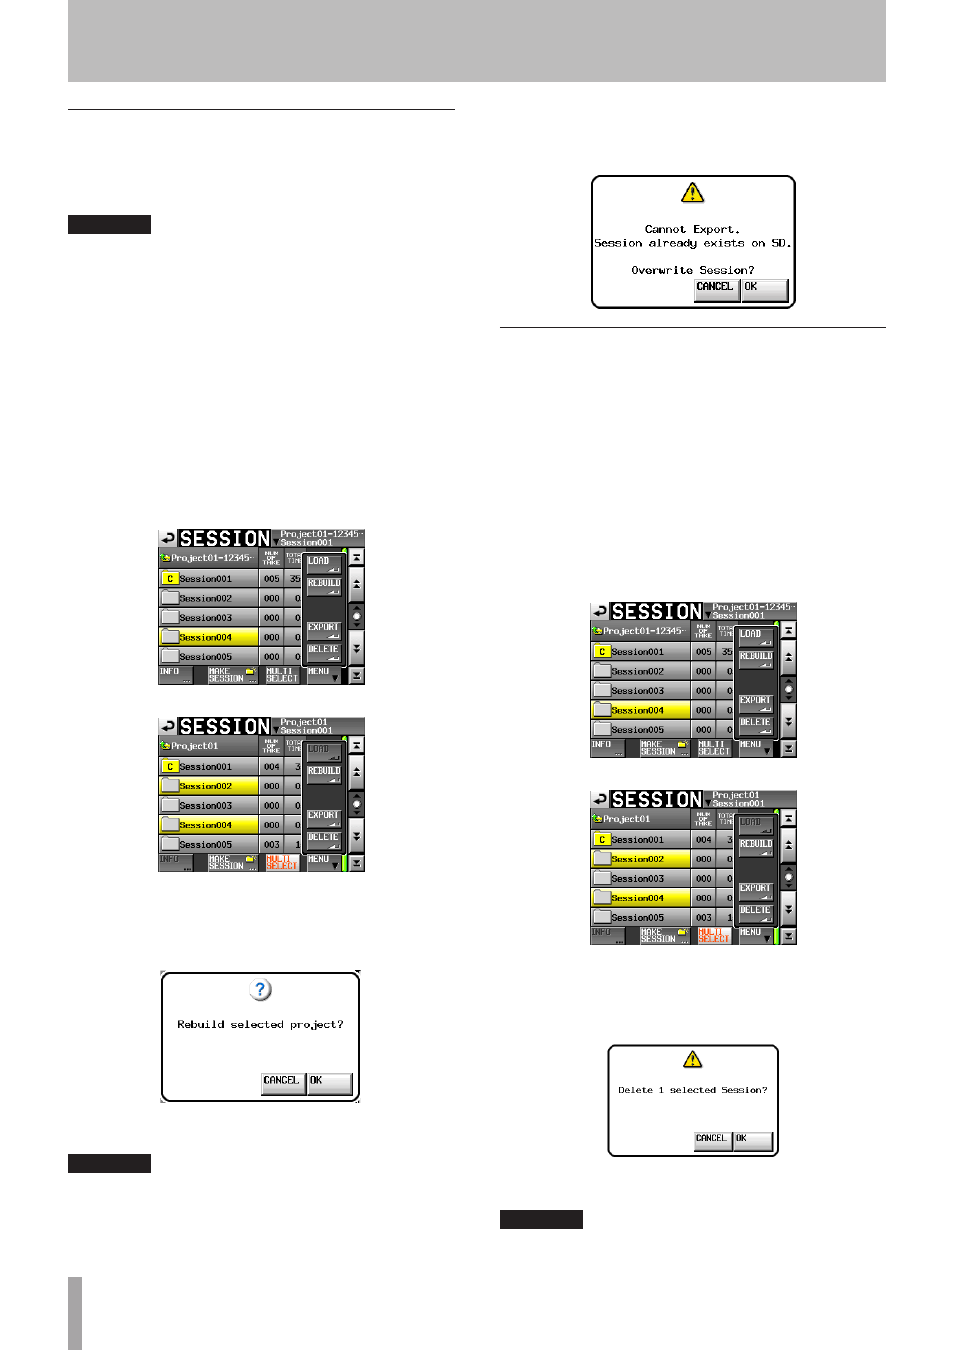
One session selected
Multiple sessions selected
5 Touch the
EXPORT
button in the pull-up menu.
6 Touch the
OK
button or press the DATA dial when a
confirmation pop-up message appears.
During export, a progress status pop-up appears.
When export completes, the pop-up disappears.
CAUTION
If a session with the same name already exists on the
media storage device to export to, a confirmation
message appears on the pop-up window.
Touch the OK button or the DATA dial to export the
session after the folder on the export destination has
been deleted.
Erasing sessions
1 Press the PROJECT key on the front panel to open
the
PROJECT
screen.
2 Touch the
e
button for the project that contains
the session that you want to erase to open the ses-
sion selection screen. If it is not the current project,
a pop-up window appears confirming that you
want to load it. Touch the
OK
button.
3 Select the session that you want to erase.
Touch the
MULTI SELECT
button to enable the se-
lection of multiple sessions.
4 Touch the
MENU
button on the session selection
screen to open a pull-up menu.
One session selected
Multiple sessions selected
5 Touch the
DELETE
button in the pull-up menu.
6 Touch the
OK
button or press the DATA dial when a
confirmation pop-up message appears.
During erasure, a progress status pop-up appears.
When erasure completes, the pop-up disappears.
CAUTION
When you erase a session, all timeline DATA, takes and
playlists in the folder are also erased.
5–Projects