Editing the timeline, Selecting the range to copy/cut/delete, Designating the editing start point – Teac HS-2 User Manual
Page 53: 7–timeline mode, 53 editing the timeline
TASCAM HS-2
53
Editing the timeline
You can cut, erase and divide regions.
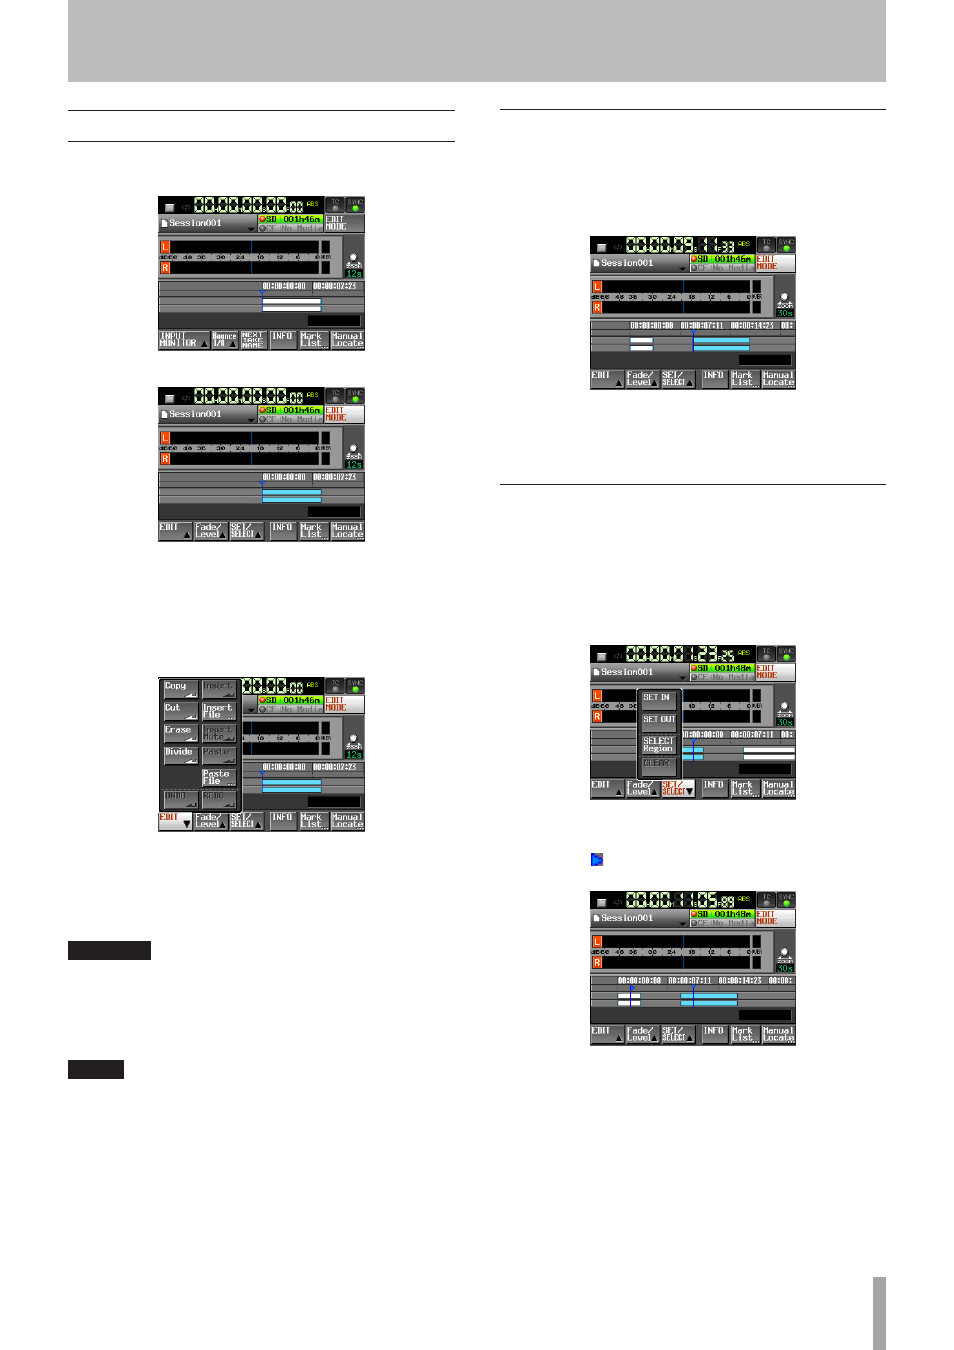
1 Press the HOME key to open the Home Screen.
2 Touch the
EDIT MODE
button to enter edit mode.
The
EDIT MODE
button becomes white with red
lettering, and the
REC/MON
,
Bounce I/O
and
NEXT
TAKE NAME
buttons disappears and are replaced
with the
EDIT
button,
Fade/Level
button, and
SET/
SELECT
button.
3 Touch the
EDIT
button to open a pull-up menu.
The pull-up menu includes not only nine editing
buttons such as
Copy
,
Cut
,
Erase
,
Divide
,
Insert
,
Insert File
,
Insert Mute
,
Paste
,
Paste File
,
but also buttons used for editing such as
UNDO
and
REDO
buttons.
CAUTION
If you do not save the AES31 editing information after
editing it, all changes will be cleared when you load
another project/session/AES31 editing information,
remove a card or turn off the unit’s power, for example.
NOTE
Repeated recordings or editing may greatly consume the
memory used in managing regions or editing history.
In this case, the pop-up message
Cannot Edit.
System limit reached.
appears:
Selecting the range to copy/cut/delete
• When the editing start and finish points are designated,
the range between the points is selected.
• When the editing start and finish points are not
designated, the entire region under the time cursor is
selected.
[When the editing points are not designated]
• When the timeline cursor is on the borderline of the
region, the region to the right is to be edited. If the
region to the right is the muted part, it is not selected.
Designating the editing start point
1 Press the HOME key to display the Home Screen.
2 Touch the
EDIT MODE
button to enter the edit mode.
3 Use the m/,, keys etc. to locate the timeline
cursor on the position (time) to start editing.
4 Touch the
SET/SELECT
button to display the pull-
up menu.
5 Touch the
SET IN
button on the pull-up menu item
to set the editing start point (IN point)
IN mark (“
”) will be displayed in the current position
marking area.
7–Timeline mode