7–timeline mode, Preparing to record, Basic preparations – Teac HS-2 User Manual
Page 45: Creating a new project, Creating new sessions
TASCAM HS-2
45
In this chapter, we explain how to use the timeline mode.
To use this unit in timeline mode, set the unit’s operation
mode to TIMELINE MODE. (See “Selecting the operation
mode” on page 44.)
Please refer to “4–Basic operation” when reading this
chapter.
Preparing to record
Basic preparations
Refer to “4–Basic operation” and make the basic prepara-
tions for recording.
Creating a new project
1 Press the PROJECT key on the front panel to open
the
PROJECT
screen.
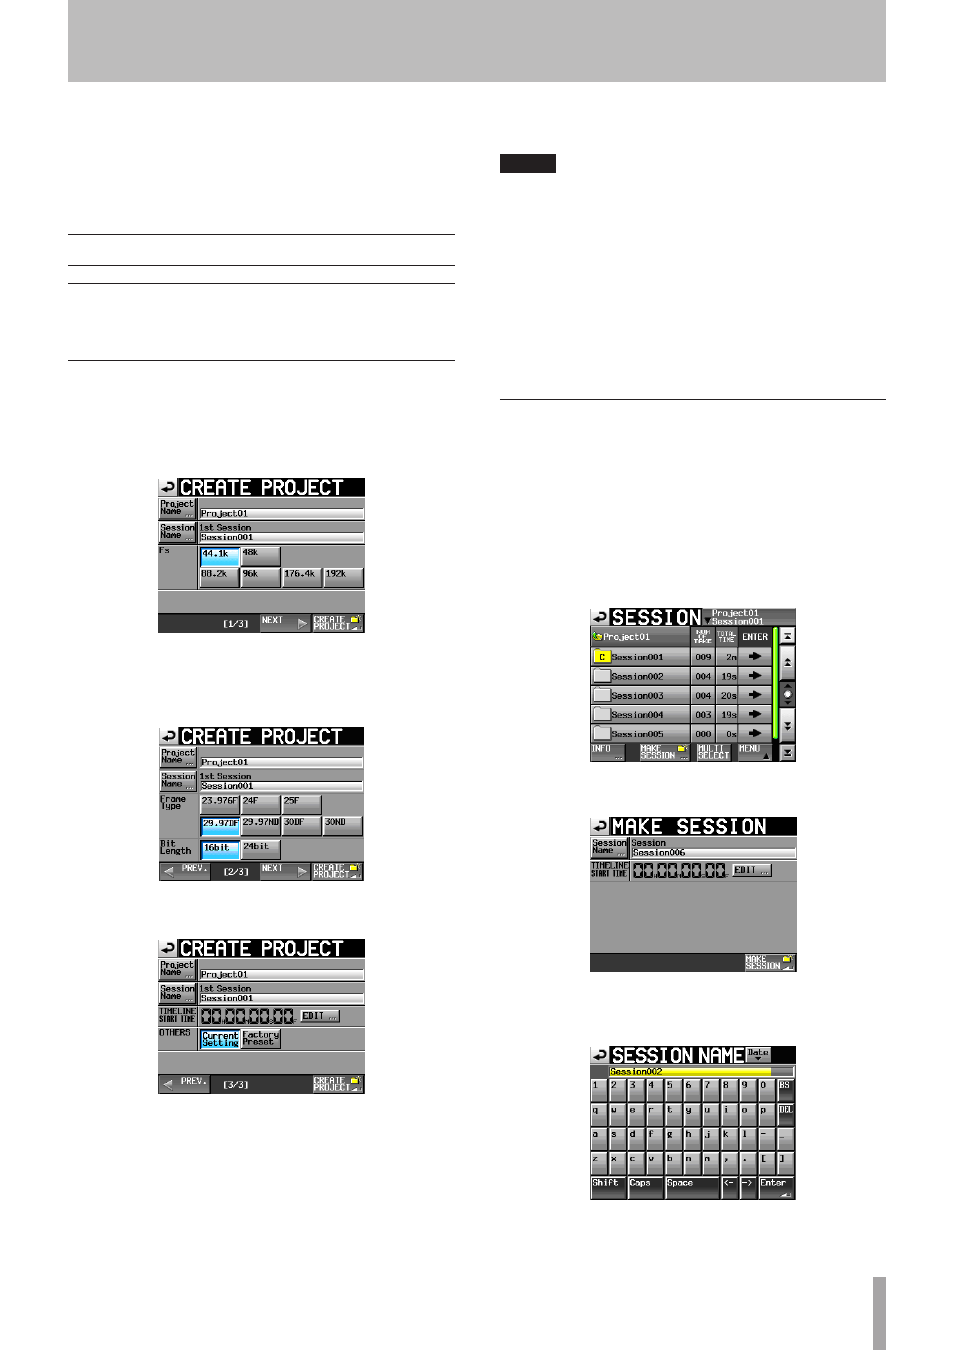
2 Touch the
CREATE PROJECT
button on the
PROJECT
screen to open the
CREATE PROJECT
screen.
On this screen, set the project name, the name for
the first session and the sampling frequency in re-
corded audio files.
Touch the
NEXT
button to open the next page.
Set the frame type then bit length.
Touch the
NEXT
button to open the next page.
Finally, set the starting time in timeline mode, and
then set whether other settings should be retained
from the currently open project or whether the fac-
tory defaults should be used instead.
For further details about these settings, see “Creating
new projects” on page 37.
3 After you complete making settings touch the
CREATE PROJECT
button.
NOTE
• If a project with the same project name already exists,
the
CREATE PROJECT
button appears gray and you
will not be able to create a new project. If this happens,
change the project name.
• You can also touch the
CREATE PROJECT
button on
CREATE PROJECT
screens 1/3 and 2/3 to create a
project.
4 Touch the
OK
button when the confirmation pop-
up message appears.
When creation of the project completes, the Home
Screen reopens.
Creating new sessions
Create new sessions as necessary.
1 Press the PROJECT key on the front panel to open
the
PROJECT
screen.
2 Touch the
e
button of the project in which you
want to create a new session to open its session se-
lection screen.
If it is not the current project, a pop-up window
appears confirming that you want to load it. Touch the
OK
button.
3 Touch the
MAKE SESSION
button to open the
MAKE
SESSION
screen.
4 Touch the
Session Name
button to open the
SESSION NAME
screen where you can change the
session name.
To input the session name follow the same proce-
dures in “Editing the project name” on page 38.
7–Timeline mode