Recording mode settings, Setting the file format, Other recording settings – Teac HS-2 User Manual
Page 46: 7–timeline mode
46
TASCAM HS-2
NOTE
You cannot use the “@” symbol at the beginning of a
session name.
5 Touch the
Enter
button or press the DATA dial to
return to the
MAKE SESSION
screen.
6 If necessary, set the timeline starting time.
7 When you have finished making settings, touch the
MAKE SESSION
button.
8 Touch the
OK
button or press the DATA dial when
the confirmation pop-up message appears.
After session creation completes, the Home Screen
opens.
For details about session operations, see “Session opera-
tions” on page 40.
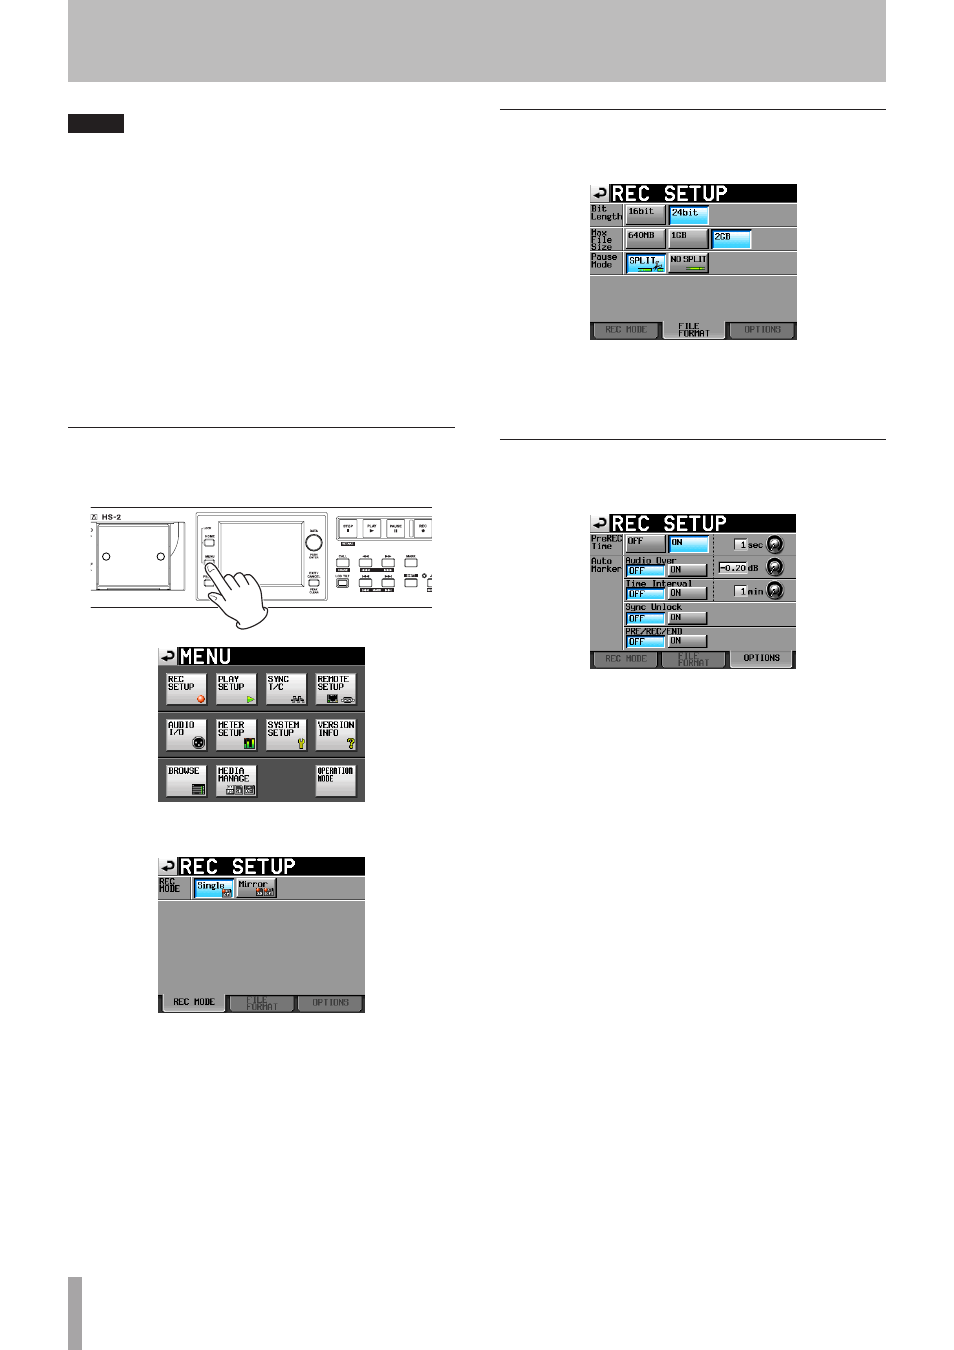
Recording mode settings
1 Press the MENU key on the front panel to open the
MENU
screen.
2 Touch the
REC SETUP
button to open the
REC
SETUP
screen.
On the
REC MODE
page, you can select the record-
ing mode. The background color for the selected
mode is light blue. For more details, see “REC
MODE page” on page 88.
Setting the file format
Touch the
FILE FORMAT
tab on the
REC SETUP
screen to open the following screen.
On the
FILE FORMAT
page, set bit-length, maximum
file size, and how files are treated when recording
is paused. The selected items appear light blue.
For details, see “FILE FORMAT page” on page 90.
Other recording settings
Touch the
OPTIONS
tab of the
REC SETUP
screen to
open the following screen.
On the
OPTIONS
page, you can set the pre-record-
ing time and the use of auto markers. For details,
see “OPTIONS page” on page 90.
7–Timeline mode