Rear panel connections, Rear panel connections -9 – Verilink WANsuite 5230 (34-00304.F) Product Manual User Manual
Page 23
A b o u t t h e W A N s u i t e 5 2 6 0 / 5 2 3 0
1-9
The user-activated input control buttons used to access and set configuration
and control options from the LCD menus are defined in the table below:
Rear Panel Connections
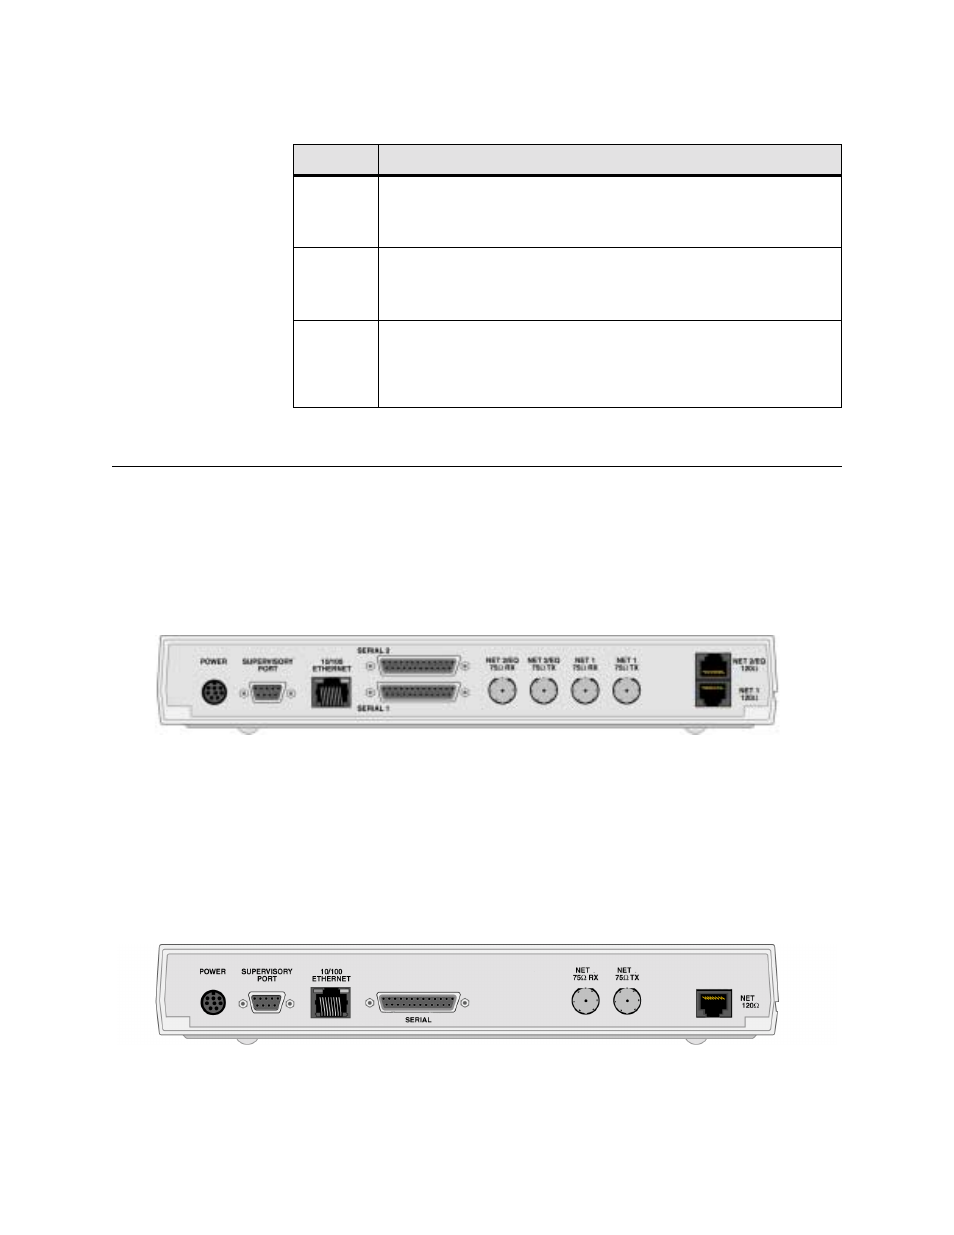
The rear panel of the WANsuite 5260 has 11 connectors. From left to right
these are as follows:
POWER
,
SUPERVISORY PORT
,
10/100 ETHERNET
,
SERIAL 2
,
SERIAL 1
,
NET 2 (75
Ω
RX), NET 2 (75
Ω
TX), NET 1 (75
Ω
RX),
NET 1 (75
Ω
TX), NET 2 (120
Ω
),
NET 1 (120
Ω
)
below.
NET 2
serves as the
E1 Equipment Port
or
DSX Port
for the unit.
Figure 1.2
WANsuite 5260 Rear Panel
The rear panel of the WANsuite 5230 has 7 connectors. From left to right,
these are as follows:
POWER, SUPERVISORY PORT, 10/100 ETHERNET,
SERIAL
, and
NET (75
Ω
Rx), NET (75
Ω
Tx), NET (120
Ω
)
1.3 below. The WANsuite 5230 has one E1 port to which you may connect
using either the 75-ohm BNC or the 120-ohm RJ-48C. Refer to, Network 1
Interface (5260) and Network Interface (5230) on the following page for more
information.
Figure 1.3
WANsuite 5230 Rear Panel
Button
Description
EXIT
The
EXIT
button exits a menu option, which then places the unit in the next
higher level of the menu hierarchy. If you are editing an option, pressing
EXIT
exits that screen without saving any changes. If you are in the main menu,
pressing
EXIT
logs off the unit.
SCROLL
The
SCROLL
button lets you review the available options for a given level in
the menu hierarchy or scroll through possible settings for a parameter. You can
also use the
SCROLL
button to set alphanumerical values, where applicable, by
scrolling incrementally through digits 0–9 or letters A–Z and a–z.
SELECT
The
SELECT
button lets you select the currently displayed option or value for a
given field, and enter an “edit” mode for parameters that require user-specified
input. Additionally, you can use the
SELECT
button to confirm certain actions
or settings. If this button is held during power-up reset, the configuration is
forced to packet defaults.