Wavetronix SmartSensor Advance Extended Range (SS-200E) - User Guide User Manual
Page 101
100
CHAPTER 8 • VERIFY CHANNELS-ALERTS-ZONES
Click and hold on the roadway display selector to access the roadway display mode list (see
Figure 8.13).
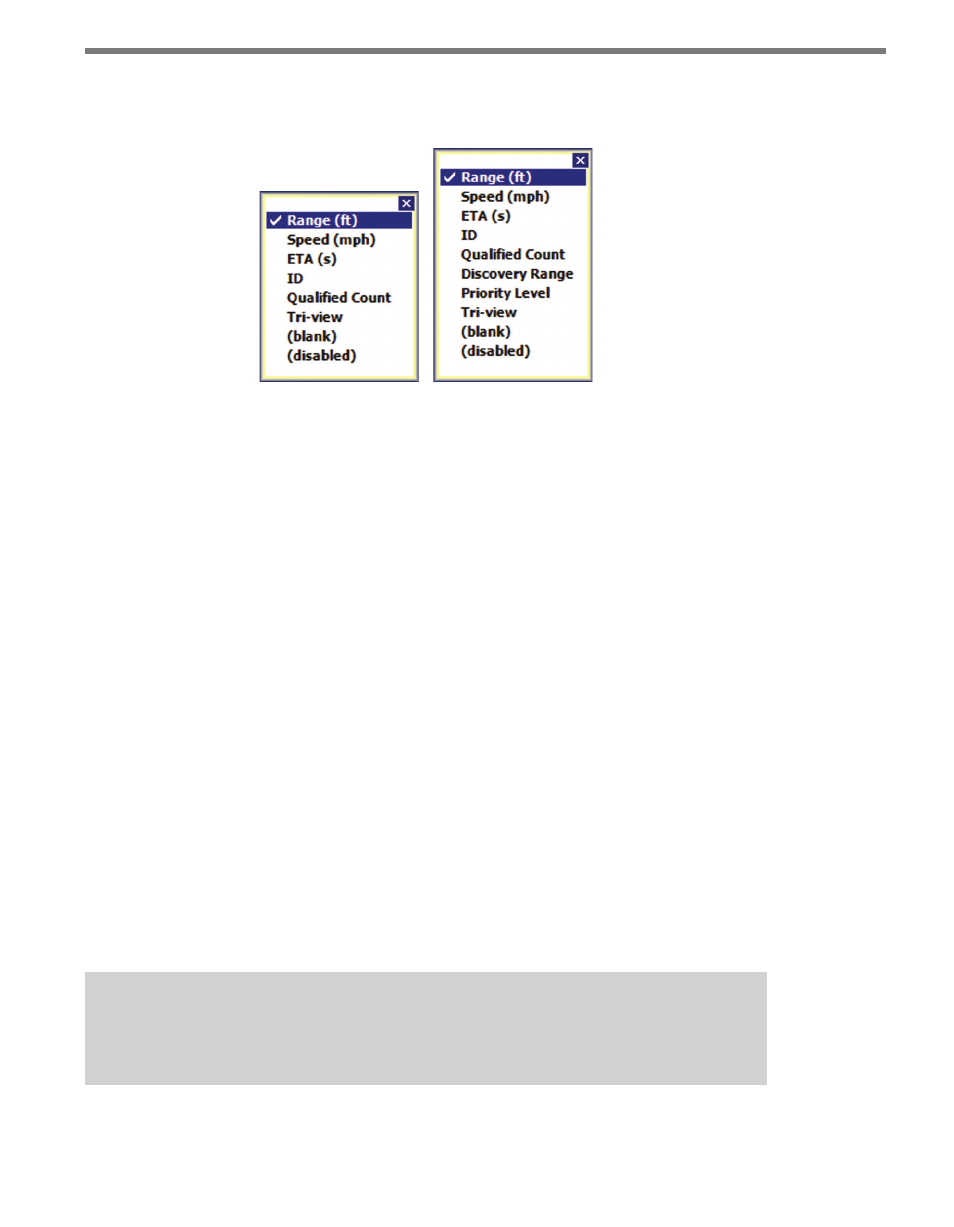
Figure 8.13 – Roadway Display Mode List for Advance (left)
and Advance Extended Range (right)
Left-click the roadway display button to cycle forward through the available modes; right-
click to cycle backwards through the list (right-clicking is only available on the PC version
of the SSMA software).
˽
Range (ft) – Displays the range of the associated tracker to the stop bar.
˽
Speed (mph) – Shows the speed of the associated tracker.
˽
ETA (s) – Shows the tracker’s Estimated Time of Arrival (in seconds) to the stop bar.
˽
ID – Displays the ID number of the associated tracker. SSMA assigns a unique five-digit
identification number (1 to 99999) to each tracker.
˽
Qualified Count – The two types of Qualified Count displays available are Qualified
Count and Dynamic Density. The data displayed on the trackers depends on the type
selected in the Setup CAZ screen.
˽
Discovery Range – Displays the range at which the tracker was first detected. (Only
available with SmartSensor Advance Extended Range.)
˽
Priority Level – Shows the priority level assigned to a vehicle based upon its discovery
range. Level 1 priority is the highest priority. Level 2 is the highest priority. (Only avail-
able with SmartSensor Advance Extended Range.)
˽
Tri-view – Allows up to three user-specified modes to be displayed on each tracker.
˽
(blank) – Removes all data from the tracker displays.
˽
(disabled) – Disables the trackers on the roadway. However, the LEDs in the right
sidebar will function as normal.
Note
The disabled mode may be useful when communication is slow or unreliable.