Tri-view – Wavetronix SmartSensor Advance Extended Range (SS-200E) - User Guide User Manual
Page 104
CHAPTER 8 • VERIFY CHANNELS-ALERTS-ZONES 103
Tri-view
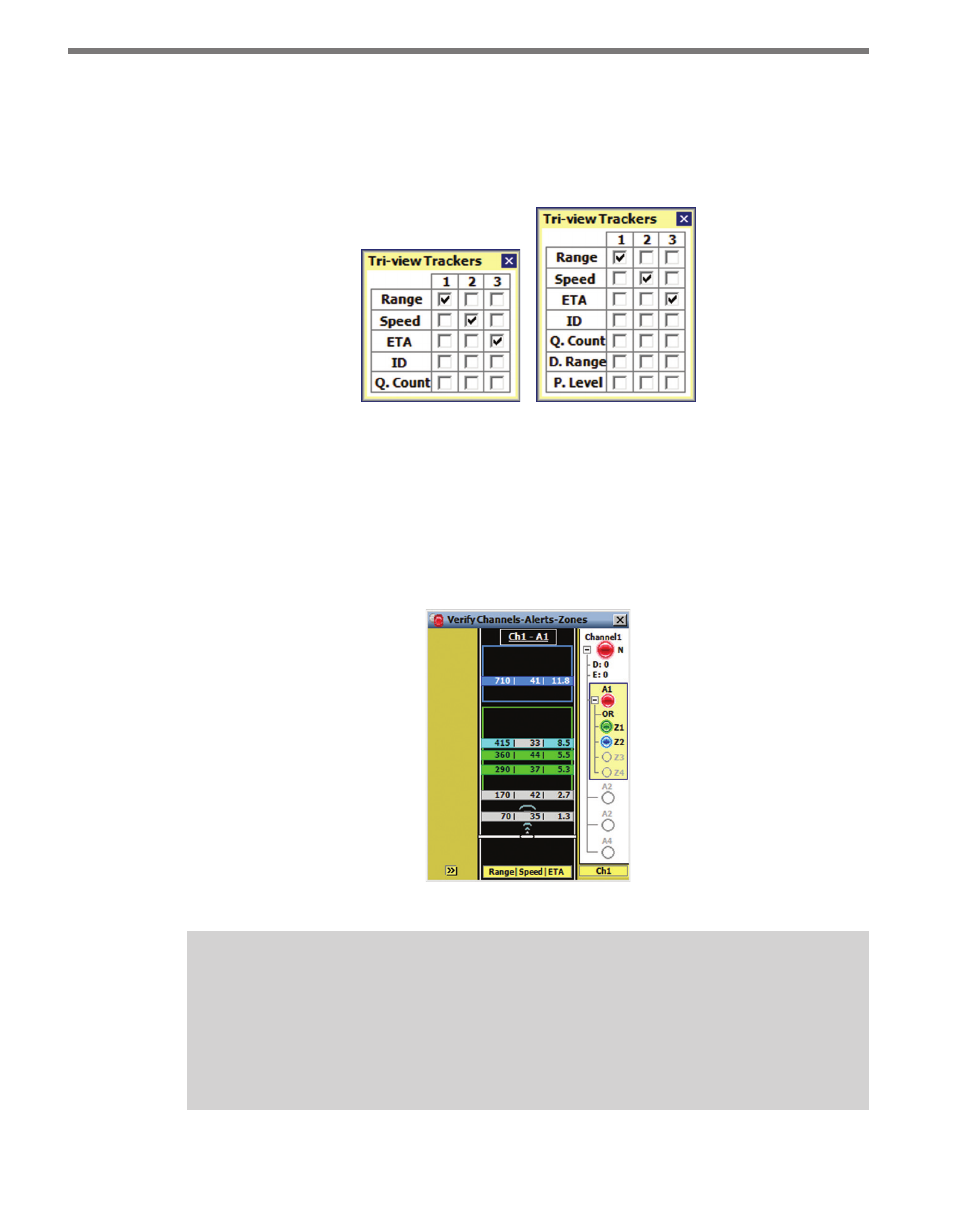
Configure the tri-view display by clicking and holding on the roadway display selector
while the tri-view mode is active. The desired modes can then be selected on the Tri-view
Trackers screen (see Figure 8.17).
Figure 8.17 – Tri-view Trackers for Advance (left) and Advance Extended Range (right)
The discovery range is abbreviated “D. Range” in the tri-view menu and abbreviated “Disc.”
in the selector bar. Priority Level is abbreviated “P. Level” and “Level” respectively.
Any mode can be assigned to display on the left (1), middle (2) or right (3) side of the
tracker display (see Figure 8.17 and 8.18). A mode cannot be displayed in more than one
location and removing a check mark will disable the corresponding column.
Figure 8.18 – Tri-view Display Mode
Note
The tri-view Qualified Count (Q. Count) data shows only part of the data displayed in
the Qualified Count display mode. The Qualified Count displays the count, but does
not display the amount of trackers needed to meet the defined requirements; the
Dynamic Density displays the percentage, but does not display count.