Attaching the sensor to the mount bracket – Wavetronix SmartSensor Advance Extended Range (SS-200E) - User Guide User Manual
Page 19
18
CHAPTER 1 • INSTALLING THE SMARTSENSOR ADVANCE
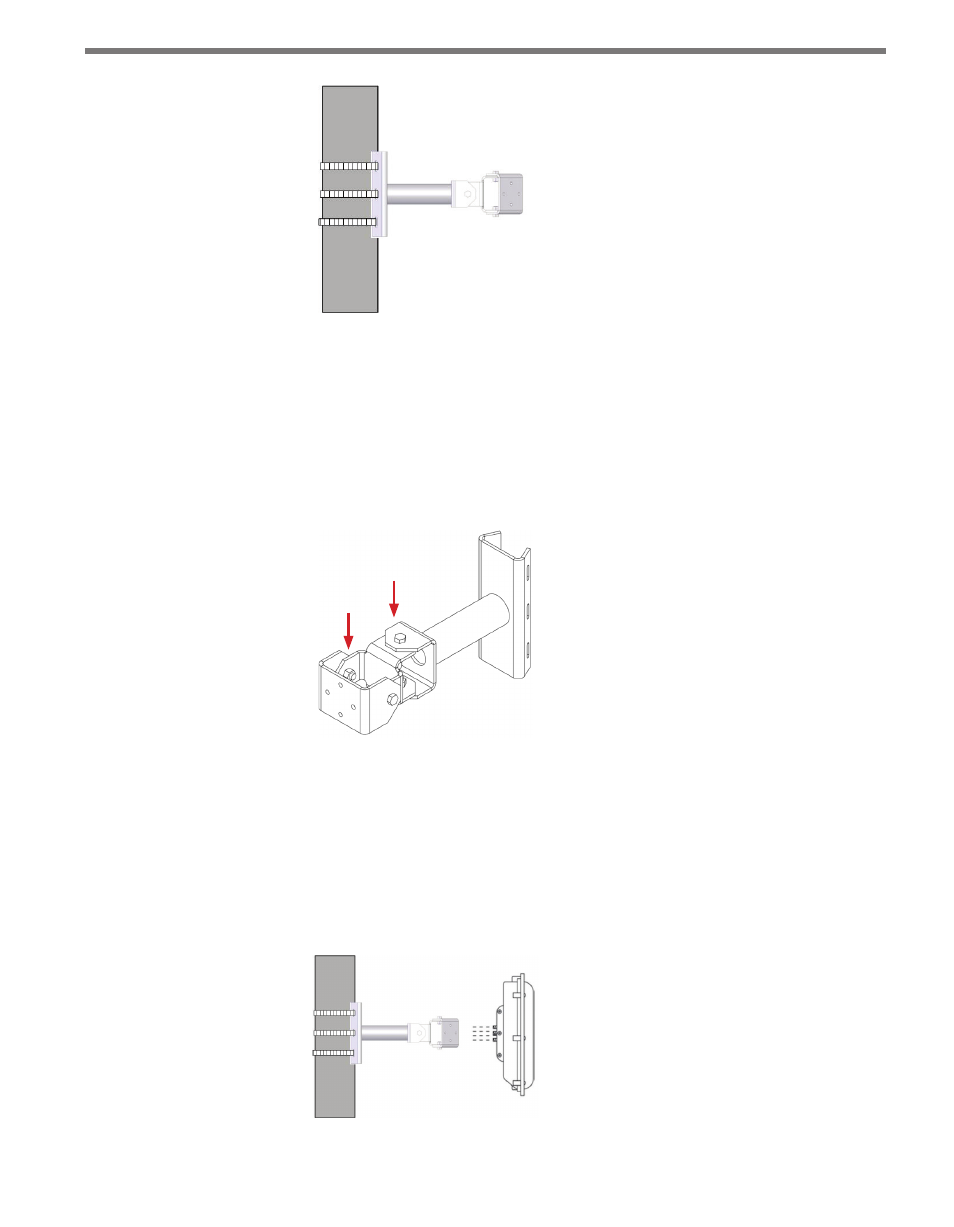
Figure 1.3 – Attaching the Mount Bracket to the Pole
4 Using the swivel joints (see Figure 1.4), pan and tilt the mount so that the mount head
points roughly to target distance in the center of the lanes of interest. (The viewfinder
will be used later to help you achieve a more precise alignment.)
If the sensor is on a vertical pole, first use swivel joint 1 to pan, then use swivel joint 2
to tilt. If the sensor is on a horizontal pole, first use swivel joint 1 to tilt then use swivel
joint 2 to pan.
1
2
Figure 1.4 – Swivel Joints
Attaching the Sensor to the Mount Bracket
1 Align the bolts on the sensor’s backplate with the holes in the mount bracket. The 8-pin
connector on the sensor should be pointing towards the ground.
2 Place the lock washers onto the bolts after the bolts are in the mount bracket holes.
3 Thread on the nuts and tighten (see Figure 1.5).
Figure 1.5 – Attaching the Sensor to the Mount Bracket