Internet connection – Wavetronix SmartSensor Advance Extended Range (SS-200E) - User Guide User Manual
Page 46
CHAPTER 4 • COMMUNICATION
45
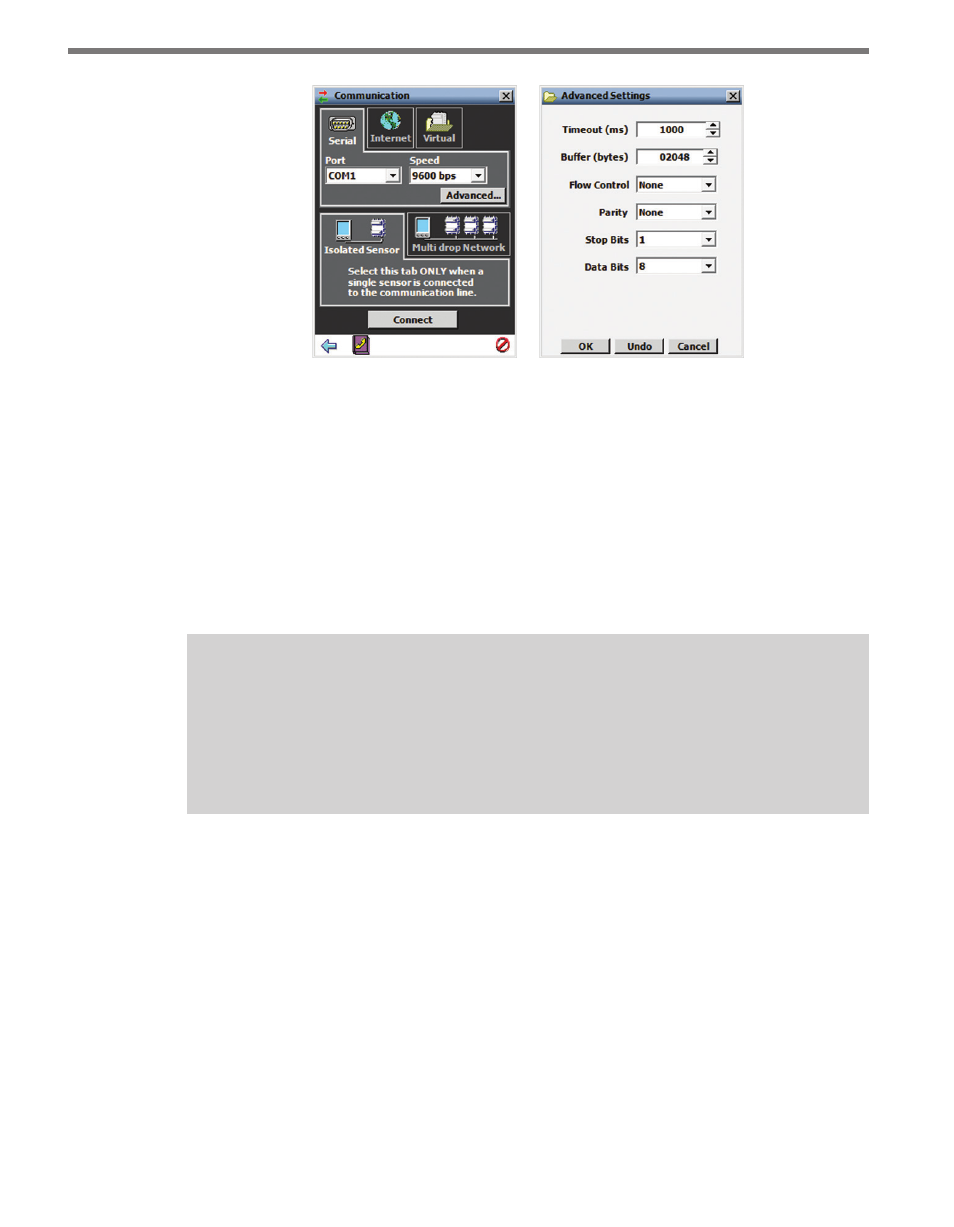
Figure 4.2 – Serial Connection (left) and Advanced Settings (right)
The Advanced Settings screen contains the following fields:
˽
Timeout (ms) – Allows you to set an additional amount of time (in milliseconds) that
SSMA will wait for a response when communicating with the sensor.
˽
Buffer (bytes) – Contains the number of bytes used by SSMA to store data received
from the sensor.
˽
Parity – This should always be set to None.
˽
Stop Bits – This should always be set to 1.
˽
Data Bits – This should always be set to 8.
Note
When a connection is made using the
Isolated Sensor tab instead of the Multi-drop
Network tab, the software will connect to the first sensor it finds. If you have multi-
ple sensors and want to be able to connect to each one, use the
Multi-drop Network
tab (see Multi-drop Network section below).
Internet Connection
1 Click on Communication.
2 Select the Internet tab (see Figure 4.3).
3 Enter the IP address of the Serial-to-Ethernet adapter to which the sensor of interest is
connected, or the domain name associated with the sensor in the Address field. The IP
address is four octets, each ranging from 0-255, separated by dots (“.”). An URL address
can also be entered into this field (i.e. sensor.earlink.com).
4 Enter the port number assigned to the Ethernet-to-Serial adapter in the Port field. This
will be an integer value in the range of 0-65536. If you are using a Click 301 device,
the default port number will be 10001. Click the Advanced… button for additional