Selecting a tracker display mode – Wavetronix SmartSensor Advance Extended Range (SS-200E) - User Guide User Manual
Page 69
68
CHAPTER 6 • SENSOR CONFIGURATION
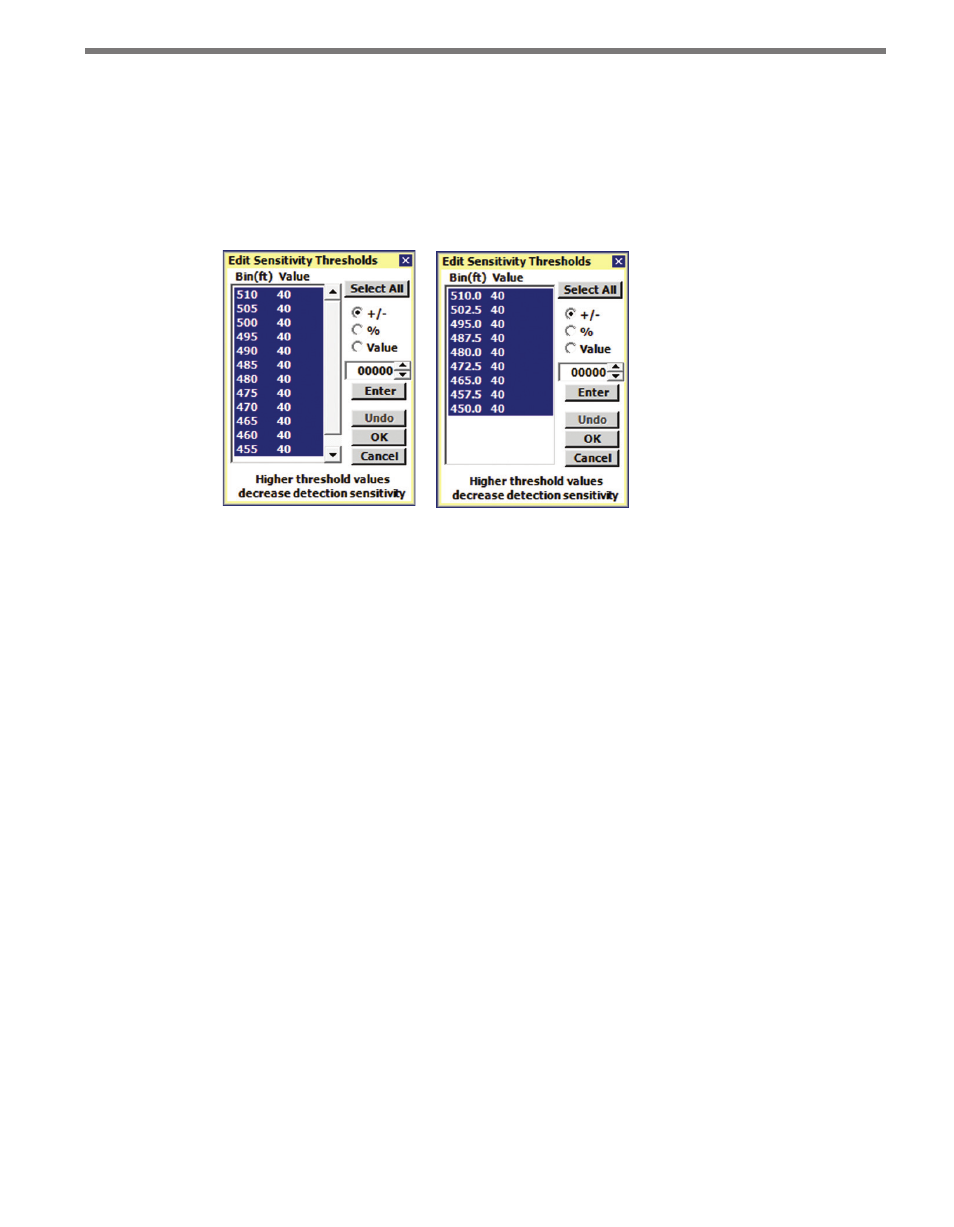
3 Click the Edit button and the Edit Sensitivity Thresholds screen will appear (see Figure
6.10). The following three editing modes are available for modifying sensitivity values:
•
The +/- mode adds or subtracts the specified number to the existing sensitivity lev-
els.
•
The % mode sets the sensitivity level to be the specified percent of the existing value.
•
The Value mode sets the sensitivity level to be the specified value.
Figure 6.10 – Edit Sensitivity Thresholds Screen for Advance (left)
and Advance Extended Range (right)
4 Click and drag again to select the exact range bins to adjust.
5 Make the sensitivity level adjustments.
6 After adjusting the sensitivity, click the Enter button to apply the adjustment.
7 Click the OK button to accept the modifications and close the Edit Sensitivity window;
click the Undo button to return all modified sensitivity levels to their initial values; or
click the Cancel button to undo all changes made.
8 Re-evaluate the detections.
If any changes were made during the Sensor Configuration process, a pop-up window will
appear prompting the user to save the changes to the sensor’s FLASH memory. Changes
that were not written to FLASH will be lost the next time the sensor reboots. The process of
saving to FLASH memory takes approximately five seconds.
Selecting a Tracker Display Mode
The following is a list of tracker display data that can be changed by clicking the display bar
at the base of the roadway:
˽
Range
˽
Speed
˽
ETA
˽
ID
˽
Blank
˽
Disabled