Disassemble the quick disconnect housing, Reassemble the quick disconnect housing, Powermax – Hypertherm Powermax105 Service Manual User Manual
Page 310

Torch componenT replacemenT
10-20
powermax
105 Service Manual
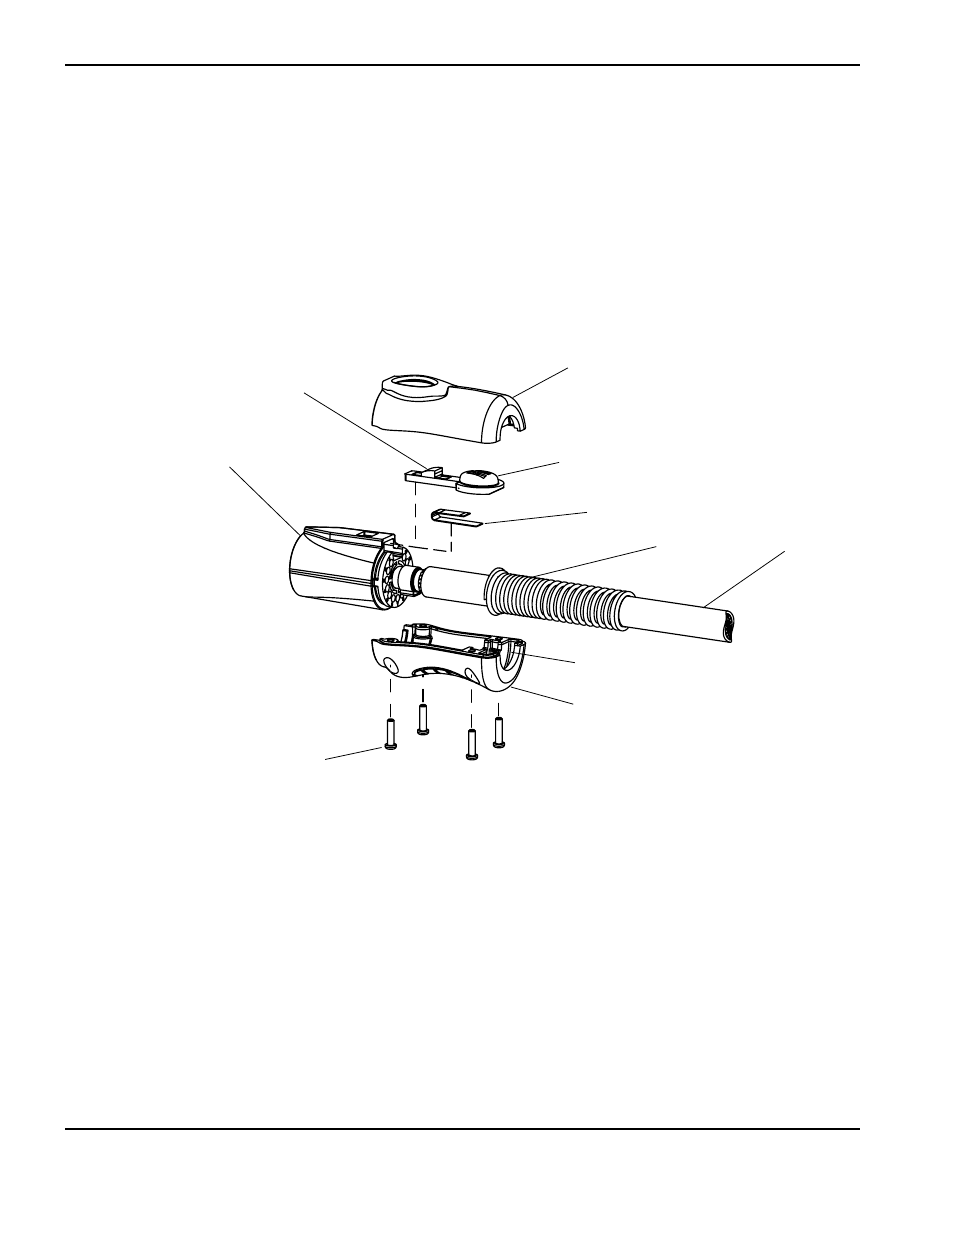
Four screws
Spring
Bottom shell half
Latch
Top shell half
Torch lead
Quick disconnect
housing
Strain relief
Strain relief slot
Latch tab
Reassemble the quick disconnect housing
1. Place the new latch into the quick disconnect housing.
2. Hold up the end of the latch and insert the new spring under the latch.
3. Use a flat-blade screwdriver to push the spring into the recess until it clicks into place.
4. Install the new shell halves onto the torch lead, making sure the strain relief fits in the slot of the shell and the wires
are not pinched or do not interfere with the latch.
5. Use T10 TORX driver or a flat-blade screwdriver to tighten the four screws.
Disassemble the quick disconnect housing
1. Remove the four screws from the bottom half of the shell using a T10 TORX driver or a flat-blade screwdriver.
2. Remove the two shell halves.
3. Remove the latch by using a flat-blade screwdriver to press down firmly on the latch tab while pushing the tab down
and out toward the lead.
4. Pull the spring out of the quick disconnect housing.