Verilink WANsuite 6x30 (34-00315.B) Product Manual User Manual
Page 76
3-48
W A N s u i t e 6 x 3 0
Route Details Screen
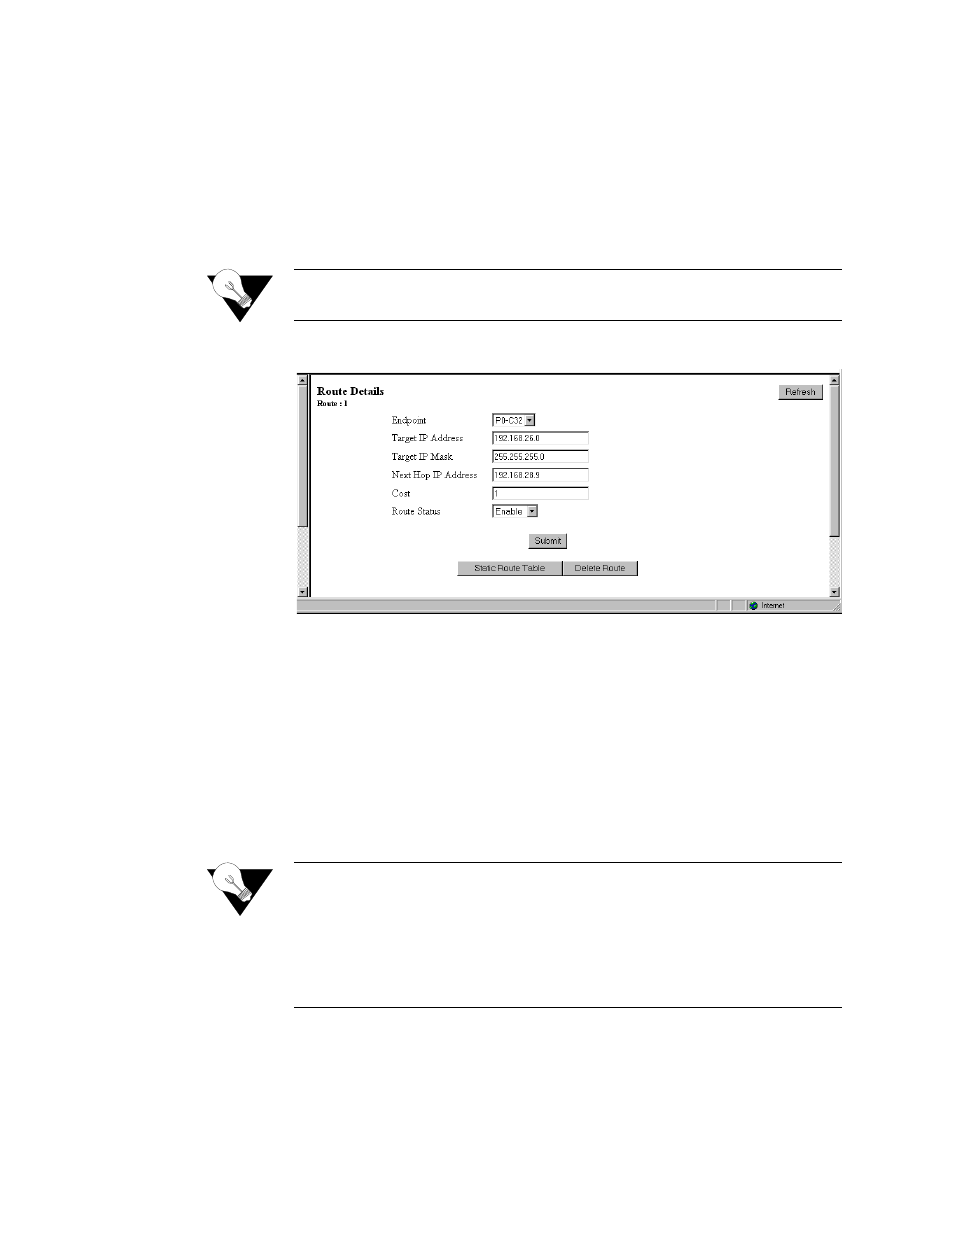
Clicking on the “Route Details” button from the Static Route menu will display
the screen shown in Figure 3.45. This screen is used to establish the
configuration parameters of a given route.
To establish a new route or to change the parameters of an existing route,
enter the desired values in the available parameter fields and press the
“Submit” button.
NOTICE:
A “Submit” on this screen will activate a newly created route. It is not
necessary to perform a “Save and Restart” for the route to take effect.
Figure 3.45
Route Details Screen
E n d p oin t
Endpoint name (or interface) through which to send the IP packet to reach the
Target IP Address.
Ta rg et IP A d d ress
Represents the target network that you want this router to reach.
Values: 0.0.0.0
−
255.255.255.255
Default: 0.0.0.0
Ta rg et IP M a sk
Mask of the target network.
Values: 0.0.0.0
−
255.255.255.255
Default: 0.0.0.0
NOTICE:
Setting the Target IP Address and Target IP Mask to 0.0.0.0 defines the
default route for this unit. Because a unit can have only one default
route, if a default route is configured as a WAN route on the above
screen, the Gateway address configured on the 10/100 Ethernet screen
must be left blank. Likewise, if a Gateway is configured on the 10/100
Ethernet screen, it becomes the default route, and no WAN default route
can be configured on a Static Route.
N ext H o p IP A d d ress:
IP address of the next device in the route.