Part ix– connections and ports, Chapter 23 – inputs and outputs, Top panel – Teac SX-1 Reference Manual User Manual
Page 192: Outputs, Inputs
192
TASCAM SX-1
Reference Manual
Part IX– Connections and Ports
Chapter 23 – Inputs and Outputs
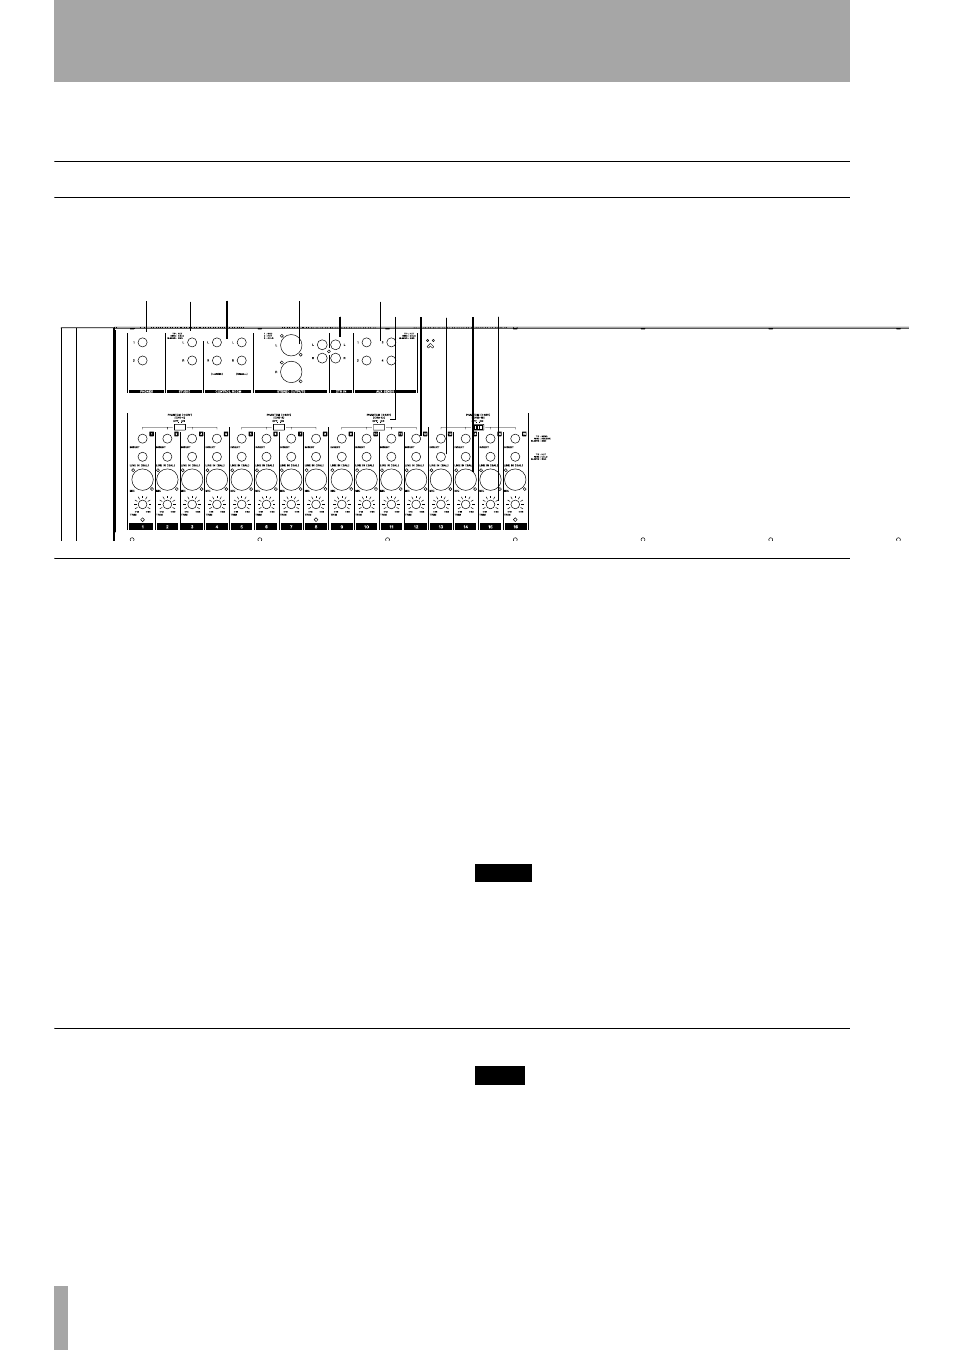
Top Panel
The top panel of the SX-1 is where most of its analog
mixer inputs and outputs are located.
OUTPUTS
1
PHONES (1 & 2)
These stereo output jacks
are where you connect your headphones.
They are labeled as
1
and
2
to designate their associ-
ated control sections which are
PHONES 1
and
PHONES 2
(the controls for which are found on the
SX-1's front panel).
2
STUDIO
These 1/4-inch balanced TRS out-
puts are where you connect your Studio speakers (the
controls for these outputs are found on the SX-1's
front panel).
3
CONTROL ROOM (LARGE) &
(SMALL)
These 1/4-inch balanced TRS out-
puts are where you connect your Control Room
speakers (the controls for these outputs are found on
the SX-1's front panel).
4
Balanced & unbalanced STEREO
OUTPUTS
These are the Master L/R outputs
coming directly from the Master fader (at default) on
the SX-1's front panel. Use these outputs to send sig-
nal to a mastering device (such as a DAT deck or cas-
sette deck).
5
AUX SENDS 1 - 4
By default, these bal-
anced outputs come from the SX-1 Auxiliary sends.
You can use these outputs to send signal to outboard
processors and additional headphone amplifiers.
However (as with all the jacks in this section), flexi-
ble routing is available from the
Routing
screen, which
allows other uses for these outputs. As aux sends
their level controls are available directly from the
SX-1's front panel.
NOTE
All TRS and XLR analog connections operate at +4dBu,
while the RCA analog connections operate at –10dBV.
The pinouts for these connectors are provided on the
SX-1 surface.
INPUTS
6
2-TR IN
These inputs are of RCA unbalanced
type. They are provided as a convenient way of con-
necting analog two-track inputs (such as a cassette
deck or CD player).
7
PHANTOM POWER
These switches turn
the phantom power for the 16 XLR balanced mic
inputs on/off in groups of four channels.
TIP
Never connect or disconnect a microphone with the
phantom power on or you could damage the micro-
phone. Always turn the phantom power on after the
microphone has been plugged in. Also, never plug a rib-
bon microphone into a channel where phantom power
will be used or it is likely that you will destroy the rib-
bon element.
1
2
3
4
5
6
7 8 9 A B