Working with external timecode sources, Part iii–locate, transport, & surround – Teac SX-1 Reference Manual User Manual
Page 35
Part III–Locate, Transport, & Surround
TASCAM SX-1
Reference Manual
35
to the first machine in the Machine Control List that
contains that channel.
To customize a device, select it in the Machine Con-
trol List with the up and down arrows on the front
surface (
DATA ENTRY
keys) or the left most encoder
knob. Press the
EDIT
soft menu button and then you
will have the following choices.
IDS:
Changes the ID number assigned to the exter-
nal device, not used for P2 devices.
RECS:
Toggles the number of REC-ARM channels
between the supported values, which are 2, 4, 8, 16,
24, 48 and 64. The other possible values of 4, 32, 40
and 56 are only available if the Auto-Detect feature
recognizes the external machine as having that num-
ber of tracks to control.
NAME:
Allows editing the displayed name of the
device. Only the first 9 characters will be visible in
the LCD screen.
To change the starting channel for the Rec-Arm
assignment, turn the
4th
encoder under the LCD
screen to bring up a popup of the possible choices.
Note that the SX-1 internal Sequencer shows 64 Rec
channels. This is because there are 64 output MIDI
channels (4 outputs at 16 channels each). The
sequencer itself has 128 tracks, and each of these
tracks can be routed to any of the 64 outputs. The
SX-1 uses a smart algorithm to determine which
Sequencer track to
REC
-Arm, given the MIDI output
track
REC
-arm channel pressed.
Working with External Timecode Sources
Most of the time, the only reason to want to control
an external device from the SX-1 is when it is the
Timecode Master, and you want the SX-1’s HDR and
Sequencer to follow the external Video, for example.
The SX-1 is capable of chasing and locking to Longi-
tudinal and MIDI Timecode variations (LTC and
MTC). Since MTC is a low-precision signal that is
further compromised by sharing the Midi data stream
with regular note and controller information, the SX-
1 provides an MTC only input to pipe the Timecode
information directly into the synchronization hard-
ware. If the MTC source is the same as your other
MIDI data, then you can set the MTC input to be the
regular MIDI Input.
The SX-1 will inspect the contents of the Machine
Control List, and send the transport commands, jog/
shuttle speed and locate commands to the device that
is the Timecode master, favoring LTC Master over
MTC master if both exist. The exception to this rule
is the Record button. Pressing Record (from any of
the front panel, VGA UI or foot switch sources) will
enable record for all of the devices in the list, if there
is a channel for that device Rec-Arm enabled. Simi-
larly, exiting record by any means will exit record on
all machines, not just the “Transport Master”.
If after enabling Record, the
RECORD
Transport
LED remains blinking, then you know that no
REC
-
Arm controls are ON for the devices in the machine
control list.
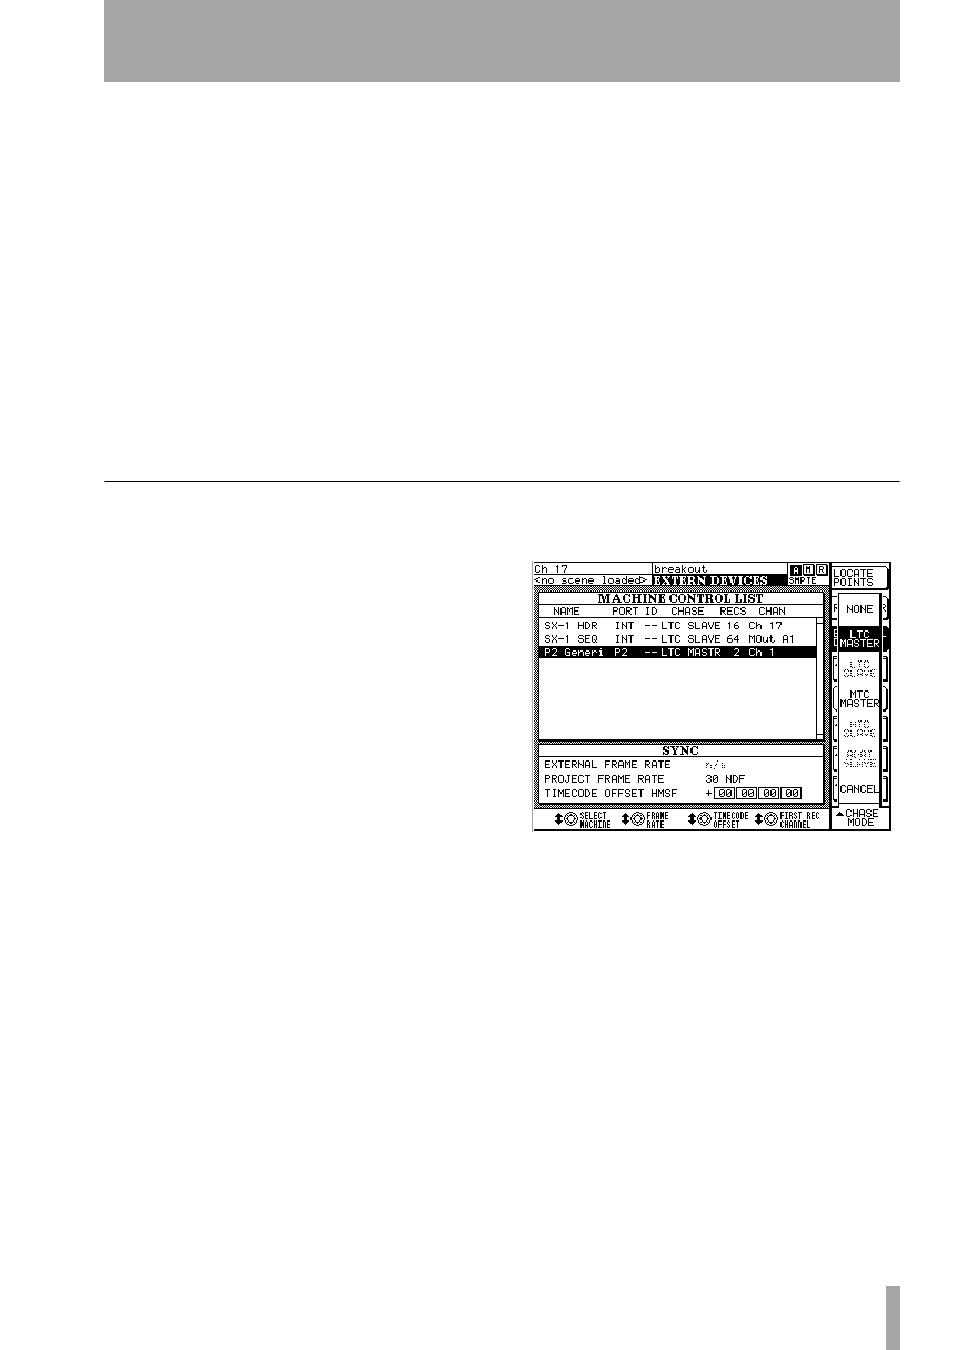
To Select the P2 device as your LTC master, first
highlight the P2 device in the Machine Control List
and then press the
Chase Mode
Soft Menu button.
Pressing the
LTC Master
soft menu button will set the
external machine to be the LTC Master. The SX-1
will automatically change the HDR’s chase mode to
LTC SLAVE for you.
From this point on, the SX-1 Front Panel will indi-
cate with the
SYNC STATUS LTC CHASE
LED On,
and the
LOCKED
LED will be blinking, indicating
that the SX-1 HDR and sequencer will lock and
chase the external timecode. Note that the 7-segment
display will advance a little, about 22 frames at
30NonDrop, because the HDR “parks” 32000 sam-
ples ahead of the current Timecode. This is so the
HDR can count and verify the incoming Timecode
when it starts to move, and be ready to lock at play
speed as soon as possible.