Chapter 11 – routing & bussing, The philosophy, Vga routing displays – Teac SX-1 Reference Manual User Manual
Page 57: Part iv–mixer controls, Working with the sx-1’s routing pages
Part IV–Mixer Controls
TASCAM SX-1
Reference Manual
57
Chapter 11 – Routing & Bussing
Working With the SX-1’s Routing Pages
The SX-1 has a very extensive routing matrix, with
the native ability to send signals a number of differ-
ent places. As such, it is important to understand how
to route audio using the VGA and LCD Routing win-
dows.
The philosophy
Understanding how to route signals on the SX1 can
take a moment to understand, because the machine
has tremendous capabilities in this area. The poten-
tial for confusion lies in the fact that the unit can sep-
arate its physical I/O from their default routings.
What this means is that inputs and outputs can be
used for various purposes, not only the ones they are
labeled with or assigned to by default. For example,
although there are four jacks on the top panel labeled
AUX OUT
s
1-4
, these jacks can serve other purposes.
There is no reason that the jack labeled
AUX OUT 1
could not send out Direct Out 12, or Buss 1 Out, or
Mixer Bypass 1 Out, or any number of other sources.
This means that you can use any combination of rele-
vant I/O to solve a number of different tasks, includ-
ing creating an external insert (which will be
discussed in a moment). As well, you could send the
same signal to a number of different outputs, or cre-
ate different monitor mixes, by using the aux outs in
combination with the stereo outs, ADAT I/O or the
expansion slots.
The possibilities are extensive, and the fact that you
can store any routing configuration as a preset means
you can manage your I/O effectively.
VGA Routing Displays
In the
MAIN DISPLAY MODE
area, press the
ROUTING
key to recall the
ROUTING
VGA screen.
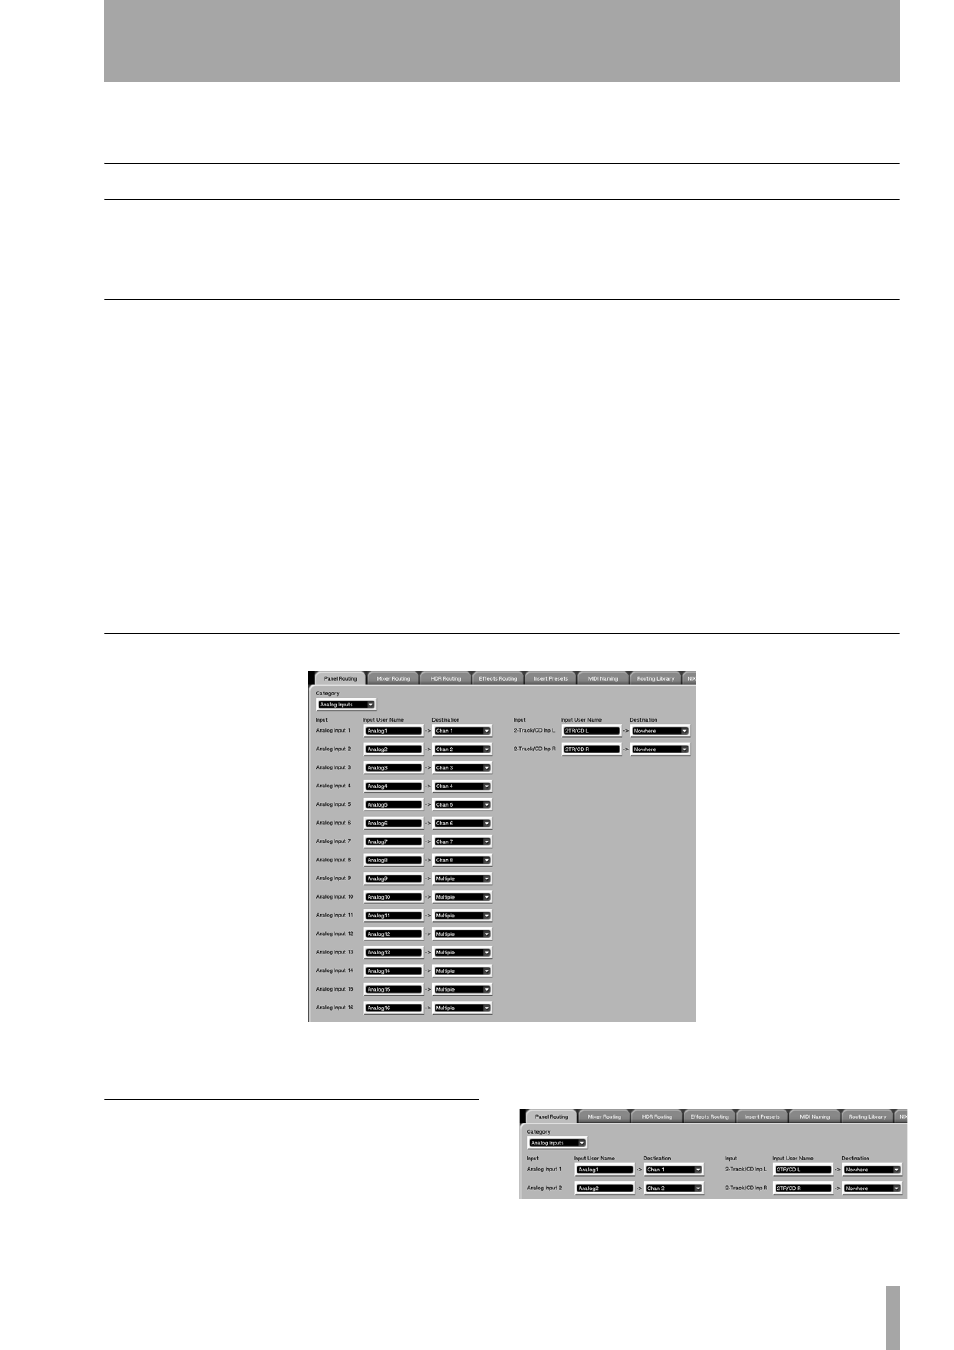
Panel Routing
To reach this tab, first press the
ROUTING
key in the
MAIN DISPLAY MODES
sec-
tion. Then click on the
Panel Routing
tab. This tab con-
tains both the pre- and post-mixer patch bay. From
this screen you can route any of the SX-1’s physical
inputs to the mixer’s 32 inputs, 8 returns, or 8 inserts.
In this tab, you can also give your analog inputs cus-
tom names.