Actually routing the insert to a mixer channel, Part iv–mixer controls – Teac SX-1 Reference Manual User Manual
Page 62
Part IV–Mixer Controls
62
TASCAM SX-1
Reference Manual
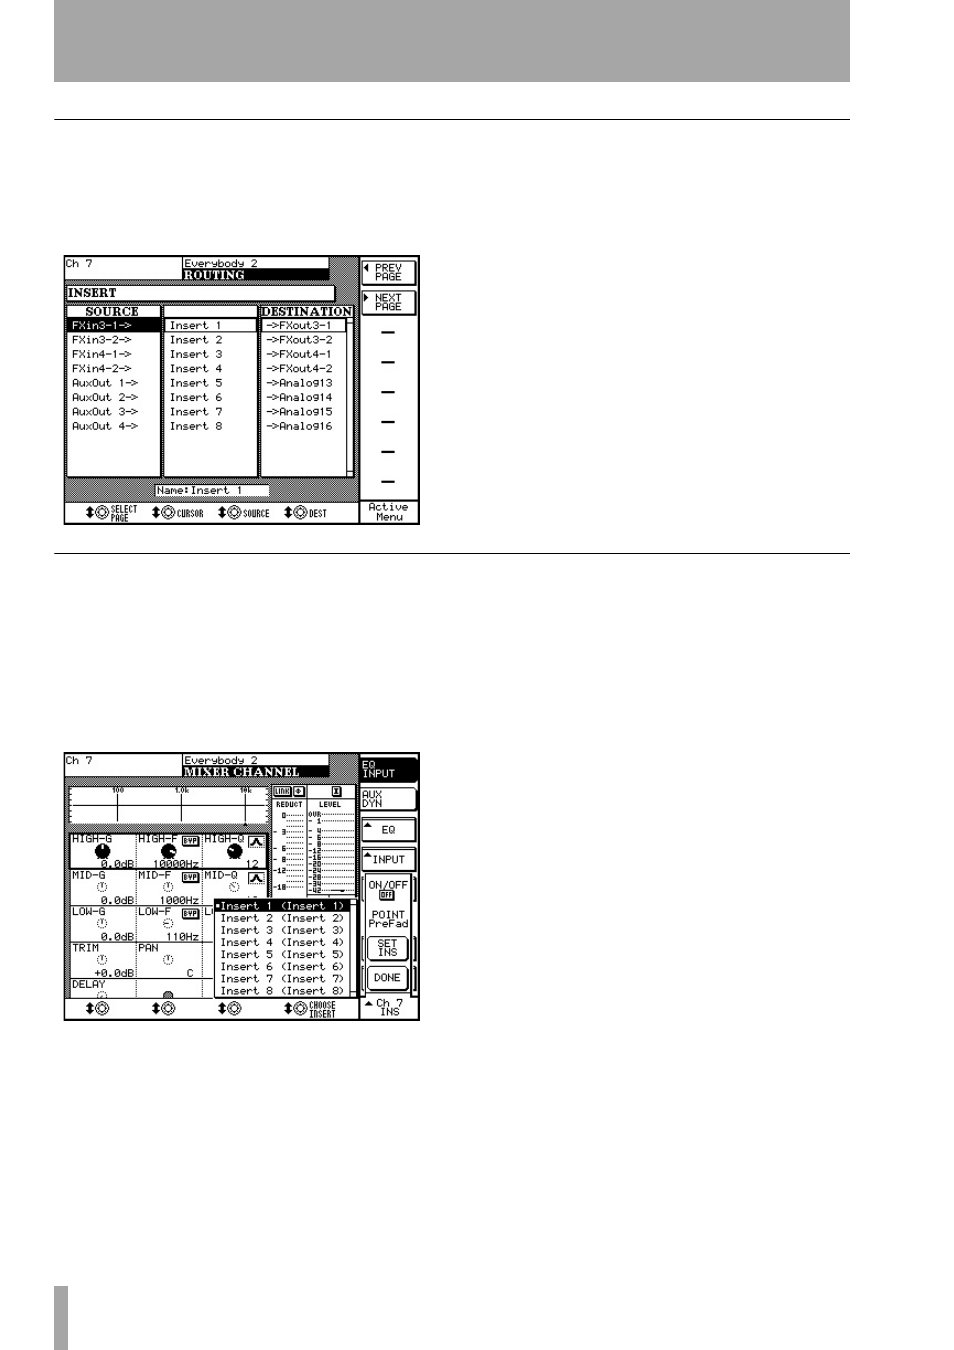
LCD
The implementation on the LCD screen is nearly
identical to the VGA, only soft knobs are used for the
pull-down menus instead of the mouse.
The screen looks like this:
The
Source
field is the same as the VGA’s
Insert Send
field, as the
Destination
pull-down is the same as the
VGA’s
Insert Receive
display. The
Node
list is simply the
default name of the Insert, as it is not possible to
name inserts from the LCD screen (although the
LCD will display the name of the insert directly
below the Node field).
To determine the Insert’s Source or “send”, use the
SOURCE
knob on the bottom of the LCD screen. To
determine the Insert’s Destination or “receive”, use
the
DEST
(destination) knob at the bottom of the
screen. Otherwise, the functionality of the inserts is
the same as the VGA.
Actually routing the insert to a mixer channel
After you have configured your insert, and you wish
to enable it on a mixer channel, hit the
CHANNEL
key (in the
MAIN DISPLAY MODES
section) and
then select the channel on which you would like to
use the insert.
Once you’ve selected the LCD
Channel
screen and
pressed the
Insert
soft key, you should see this screen:
The knob at the bottom right of the screen labeled
CHOOSE INSERT
scrolls through the list of eight inserts,
while the
SET INS
button selects the insert when it is
chosen. The
ON/OFF
soft button to the right actually
enables or disables the insert selected, and the
POINT
button selects where in the signal chain the insert
occurs.