AGI Security GVASBOX-100 User Manual
Page 112
104
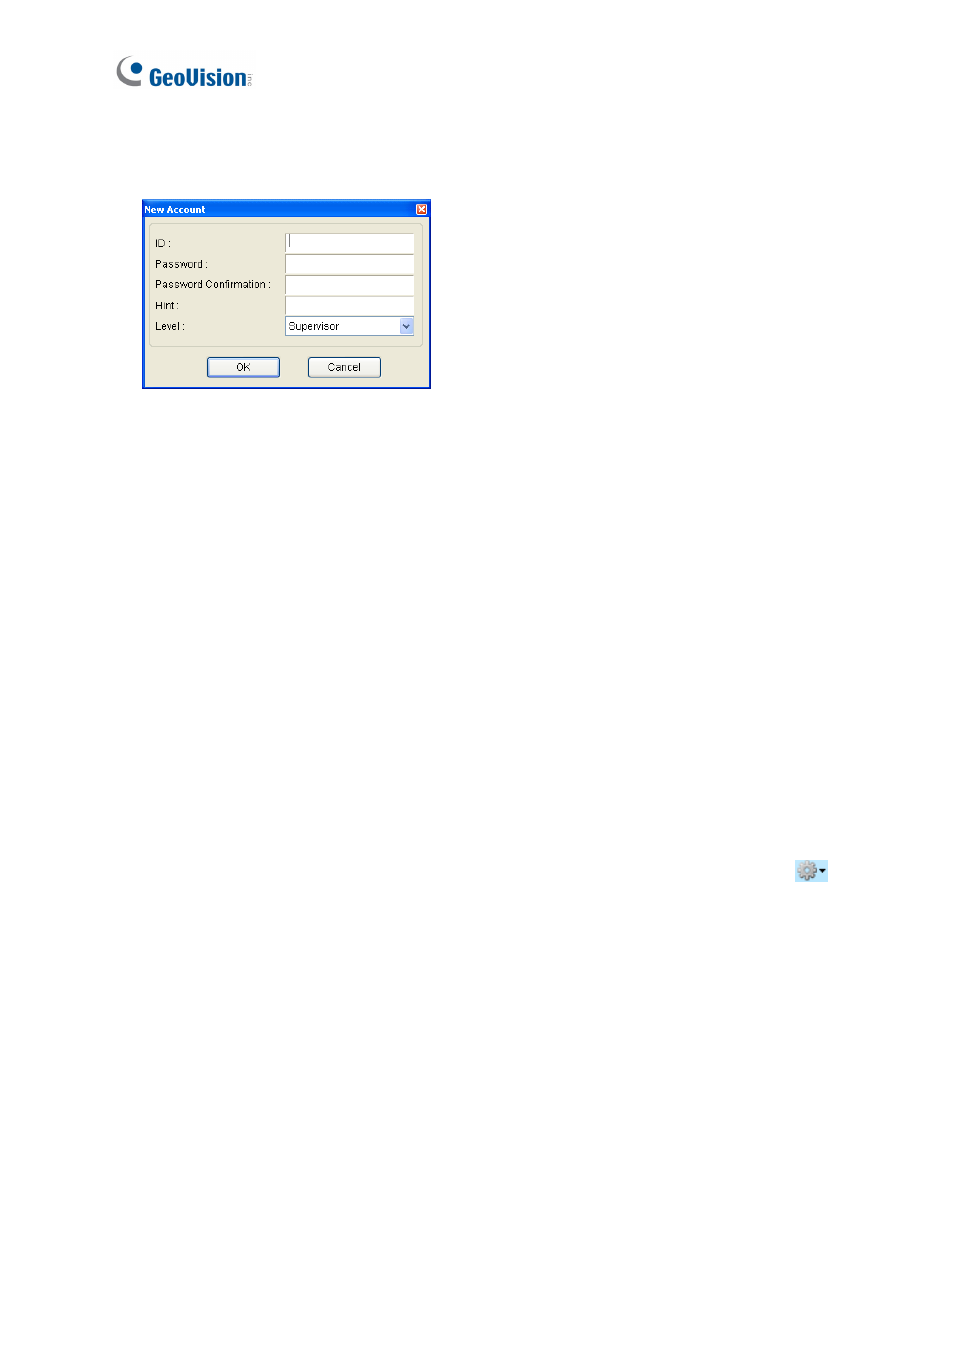
3. To create an account, click the New button in the bottom left corner. This dialog box
appears.
Figure 11-6
4. Type the Supervisor’s ID and Password. Re-type the password in the Password
Confirmation field.
5. In the Level drop-down list, select Supervisor to have access to all GV-VMWeb
functions as shown in Figure 11-4. Click OK.
6. To grant limited access, select Power User or User and click OK.
7. Select the privileges you want to grant. The following options are available.
Log: Look up visit records in the past for each visitor.
Visitor Data: Create or edit visitor profiles.
Visit Records: Create or edit visits in the Demand for Visit section.
Verify: Grant permission to allow the visit in the Demand for Visit section.
Issue Card: Assign a card to the visitor in the Demand for Visit section. The Verify
privilege must also be allowed for the account to have access to this option.
System Settings: Enable the Auto-Verify option under Setting drop-down list
.
8. Click OK.