AGI Security GVASBOX-100 User Manual
Page 40
32
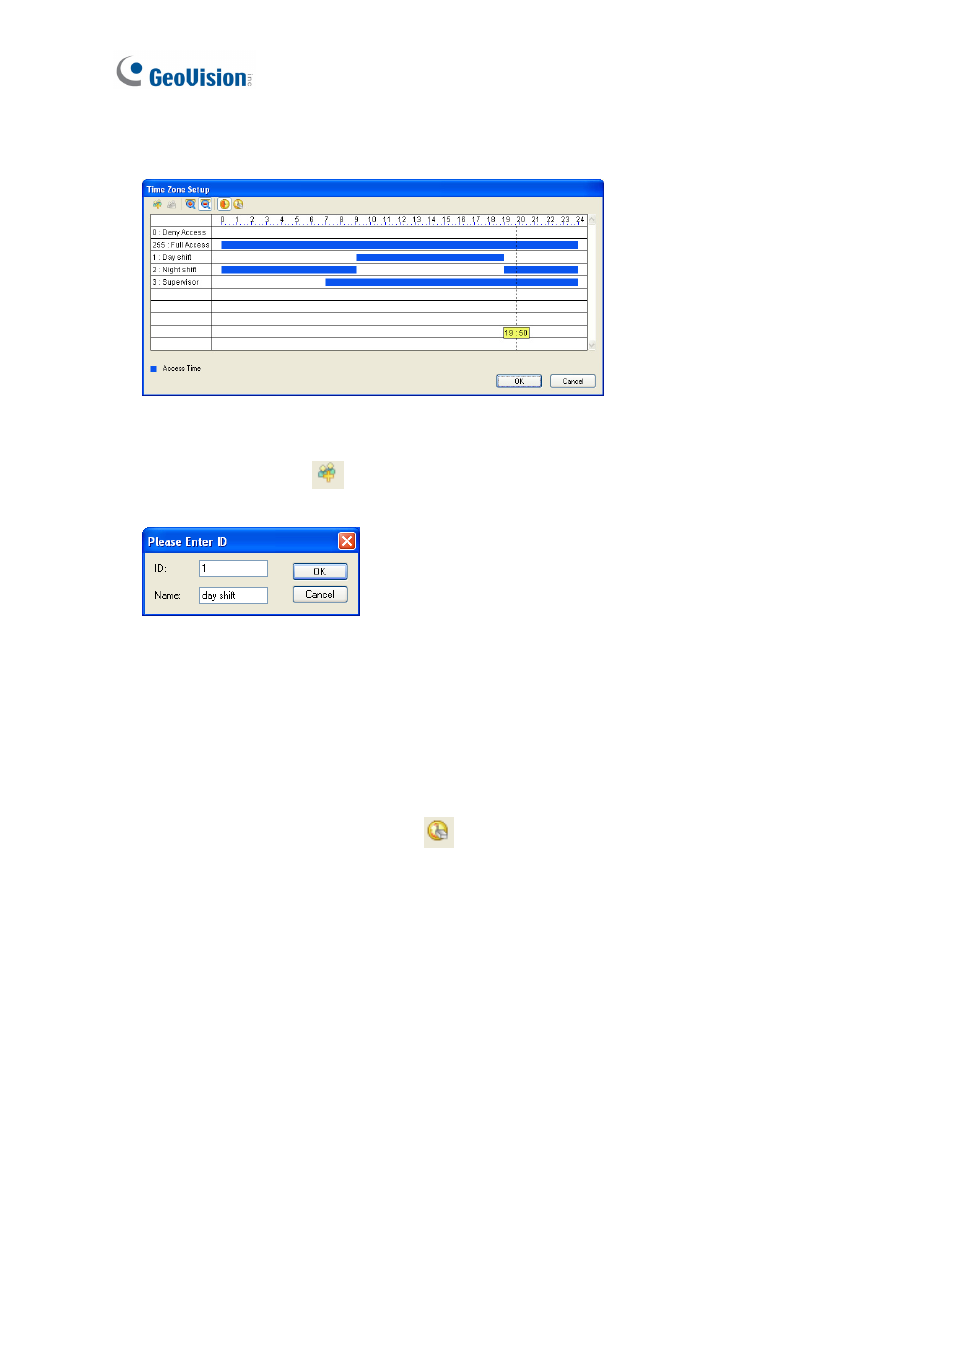
1. On the menu bar, click Setup and select Time Zones. This dialog box appears.
Figure 4-10
2. Click the Add button
. This dialog box appears.
Figure 4-11
3. The ID is the number of the time zone. The system will automatically create the ID based
on how many time zones have been added. Give a Name to the time zone you are going
to define. Click OK.
For example, name the Time Zone 1 as day shift.
4. Click the Add Access Time button
. Then drag the mouse on the timeline to define a
period of access time.
For example, the time of day shift is from 09:00 to 19:00.
5. To create the second time zone, click the Add button and name it as night shift. Then
click the Add Access Time button. Drag the mouse on the timeline to set the time from
19:00 to 24:00 and from 00:00 to 09:00.
6. To create the third time zone, click the Add button and name it as Supervisor. Then click
the Add Access Time button. Drag the mouse on the timeline to set the time from 07:00
to 24:00.
7. Click OK. The three time zones have been defined.