Power up the iad, Log in via a terminal emulation program, Table 2–1. terminal emulator settings – Verilink Net Engine (3150-30626-001) Product Manual User Manual
Page 31: Table 2–2. default iad user ids and passwords
NetEngine IAD User Guide
Quick Start Guide
12
Power Up the IAD
1. With the console cable connected, on 6000 family IADs plug the AC
power adapter into the IAD. On 7000 family IADs, turn on the power
switch, located on the back panel. This starts the IAD and it executes
the boot process to begin normal operation.
2. Verify that the Power indicator on the front panel illuminates.
Log in via a Terminal Emulation Program
With a serial cable connected, follow these steps to log in to the IAD:
1. Open a terminal emulation program (Hyperterminal, for example).
2. Select the COM port to which the IAD is connected.
3. Type or select the following settings and save your changes.
4. Press Enter. The IAD displays the log in message:
Enter Login ID >
5. Type the default supervisor level user ID (
Supervisor
) (or your user
ID if changed) and press Enter. Note that both the user ID and
password are case-sensitive.
below lists the default user IDs and passwords.
For information on security levels, and user ID and password management
see
6. The IAD displays the password message:
Enter Password >
NOTE
As the IAD boots, it sends status messages to the console
port. If you are connected, you will see the boot sequence
progress.
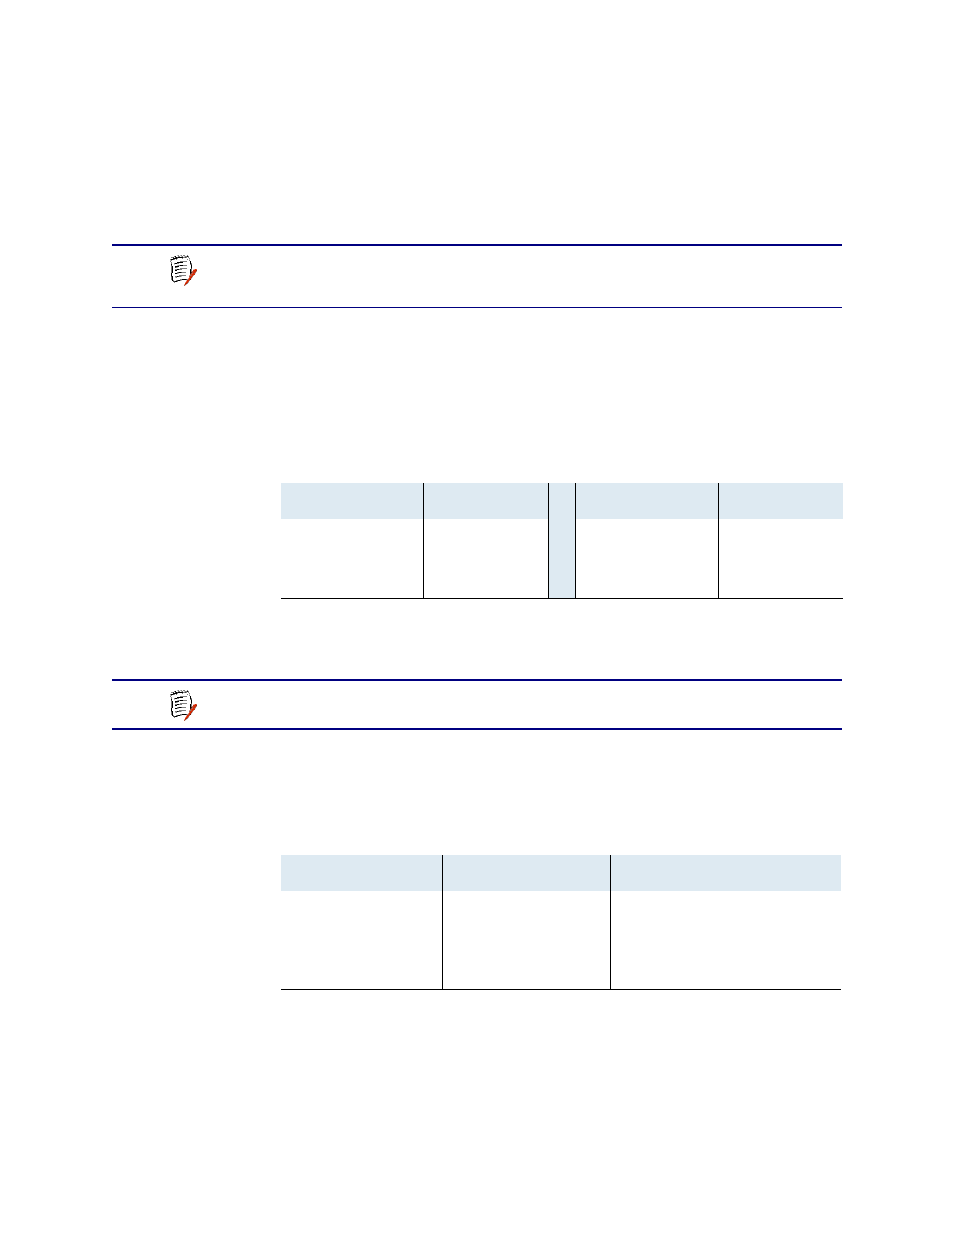
Table 2–1.
Terminal Emulator Settings
Setting
Value
Setting
Value
Bits per second
19,200
Stop bits
1
Data bits
8
Flow control
None
Parity
None
Emulation
ANSI or VT100
NOTE
If the IAD does not respond, make sure the IAD is powered
up, check the cable and connections, and review the settings.
Table 2–2.
Default IAD User IDs and Passwords
Security Level
User ID
Password
User
<enter>
<Enter>
Network
Administrator
NetMan
<Enter>
Supervisor
Supervisor
supervisor