3 hardware installation, 1 installing the switch, 2 connecting console – Amer Networks SS2R48G4i V2 User Manual
Page 23
SS2R24G4i/SS2R48G4i
12
z
RJ-45
pin
Table 2-4 The required tools and utilities
2.3 Hardware Installation
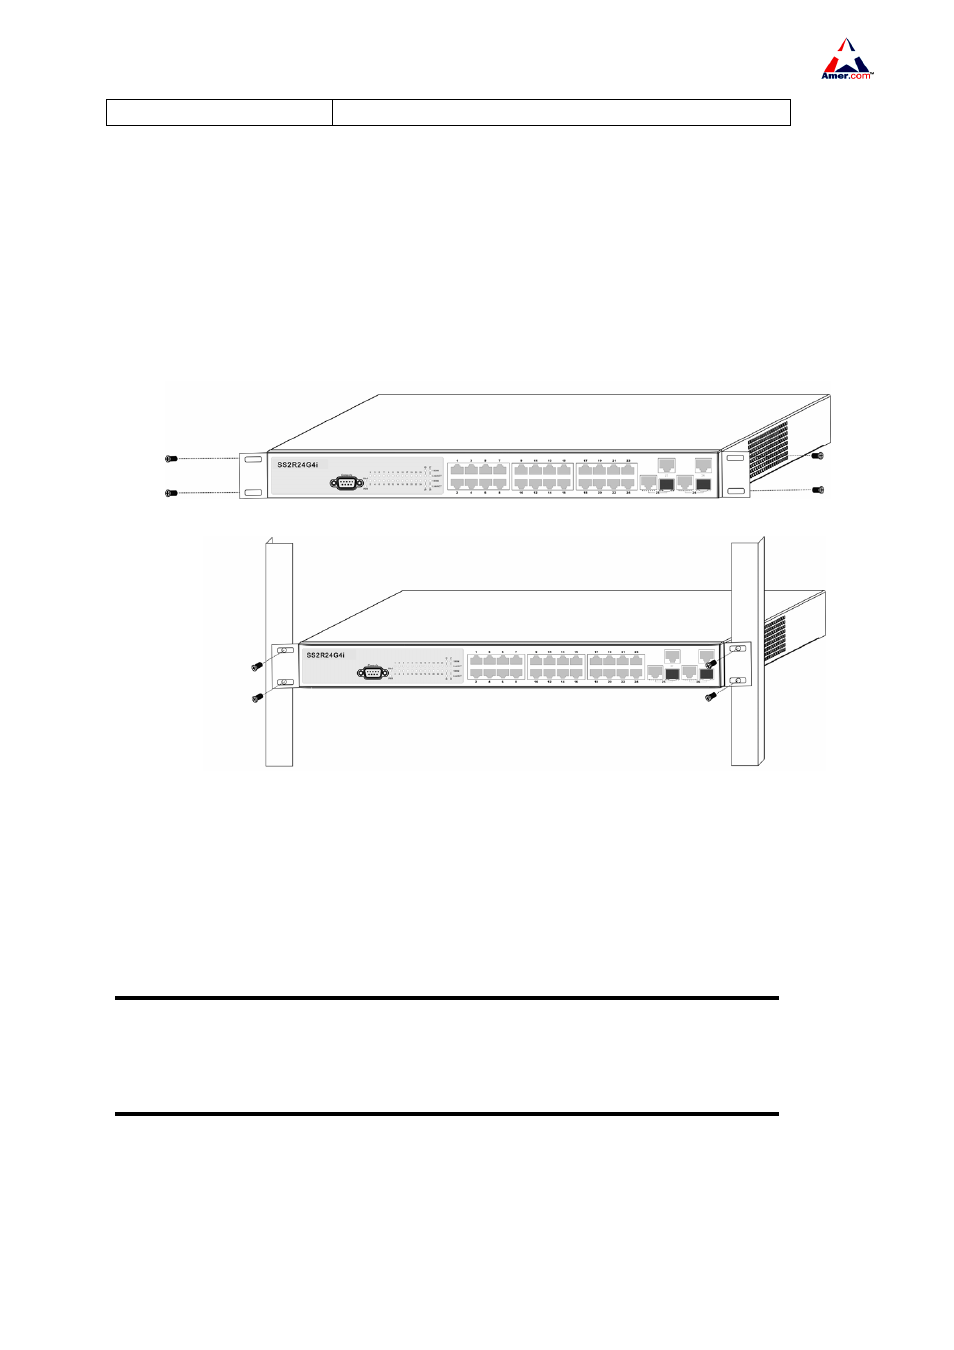
2.3.1 Installing the Switch
Please mount SS2R24/48G4i switch on the 19’’ rack as below
Fig 2-1 SS2R24/48G4i switch Rack-mounting
1. Attach the 2 brackets on the SS2R24/48G4i switch with screws provided in the accessory
kit.
2. Put the bracket-mounted switch smoothly into a standard 19’’ rack. Fasten the
SS2R24/48G4i switch to the rack with the screws provided. Leave enough space around
the switch for good air circulation.
Caution!
The brackets are used to fix the switch on the rack. They can’t serve as a bearing. Please place a
rack shelf under the switch. Do not place anything on top of the switch. Do not block the blowholes on
the switch to ensure the proper operation of the switch.
2.3.2 Connecting Console
SS2R24/48G4i switch provides a DB9 interface serial console port. The connection procedure is