Yaskawa DriveWizard AC Drive User Manual
Page 77
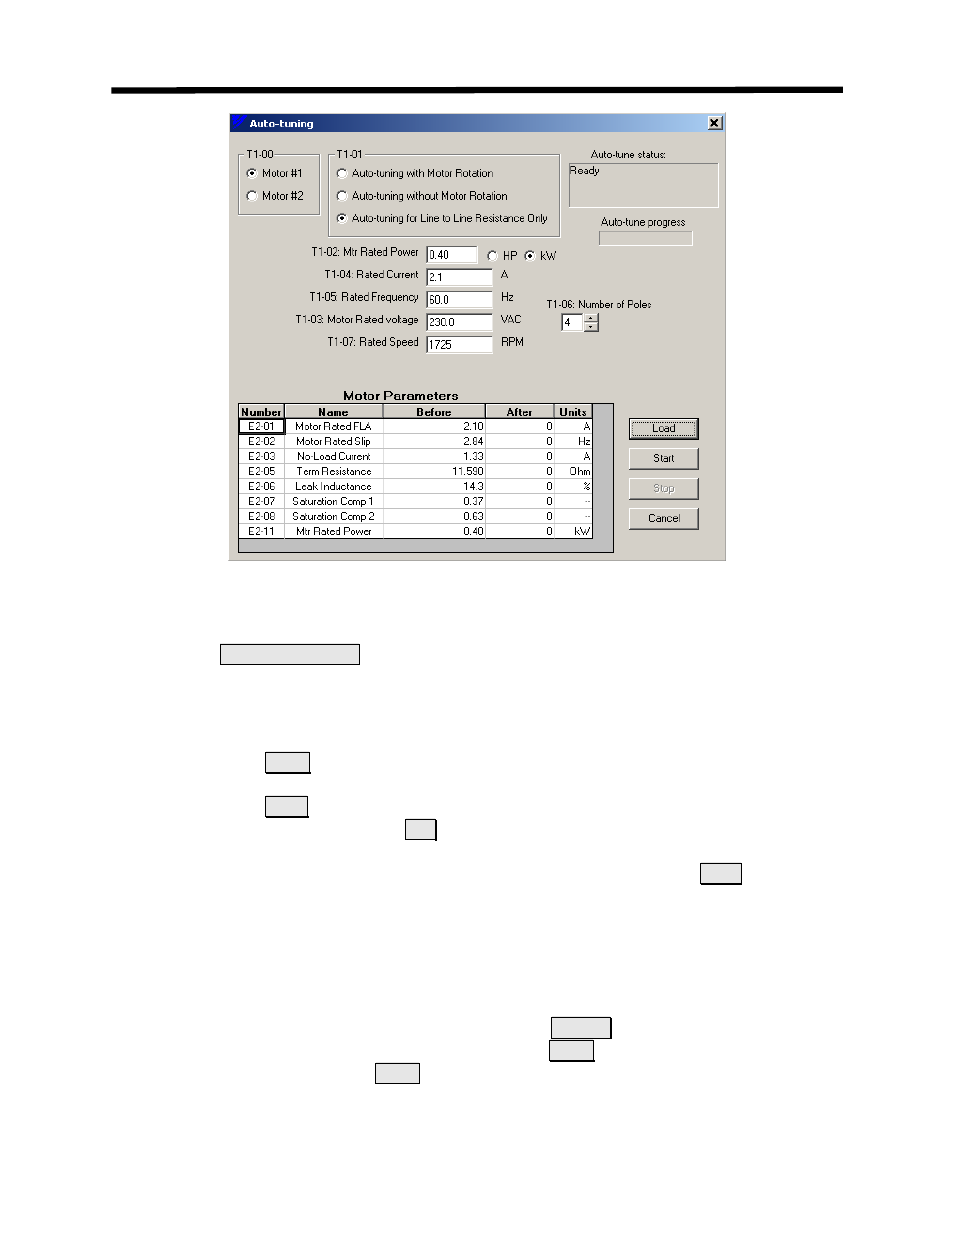
Figure 4.51: Auto-tune Main Window
To perform an auto-tune, follow these steps:
1. Select
Motor #1 or #2 by
clicking on the appropriate button in the T1-00 box
2. Select which tuning method you would like to perform. The method(s) available for the
particular drive and control mode will appear normally (not grayed out).
3. Enter the data in the windows that appear for other T1 parameters. The number of T1
parameters that appear is based on the drive type and control mode it is in.
4. Click on the
Load
button to download the entered T1 parameters to the drive.
5. When downloading is complete the start button will become active.
6. Click on the
Start
button to start the auto-tune. An auto-tune run warning window will
appear (Figure 4.52). Click on
OK
to continue the auto-tune.
7. The status and progress of the auto-tune will be displayed in the upper right-hand side of
the window. You can stop the auto-tune at any time by clicking on the
Stop
pushbutton.
While the auto-tune is running the drive output current and frequency will be displayed
(see Figure 4.53). A flashing green light indicates the auto-tune is in progress and
DriveWizard
™ is communicating with the drive.
8. When the auto-tune is complete DriveWizard
™ will read the appropriate Ex-xx
parameters from the drive and display them in the after column of the Motor Parameter
spreadsheet.
9. You can exit the auto-tune function by clicking on
Cancel
or closing the window.
10. You can start another auto-tune by clicking on the
Load
button. Be sure to make any
changes before clicking on
Load
.
Inverter Menu
77