BrightSign BrightAuthor User Guide v.4.1.1 User Manual
Page 20
12
Chapter 2 – Setting up BrightSign Players
8. Click
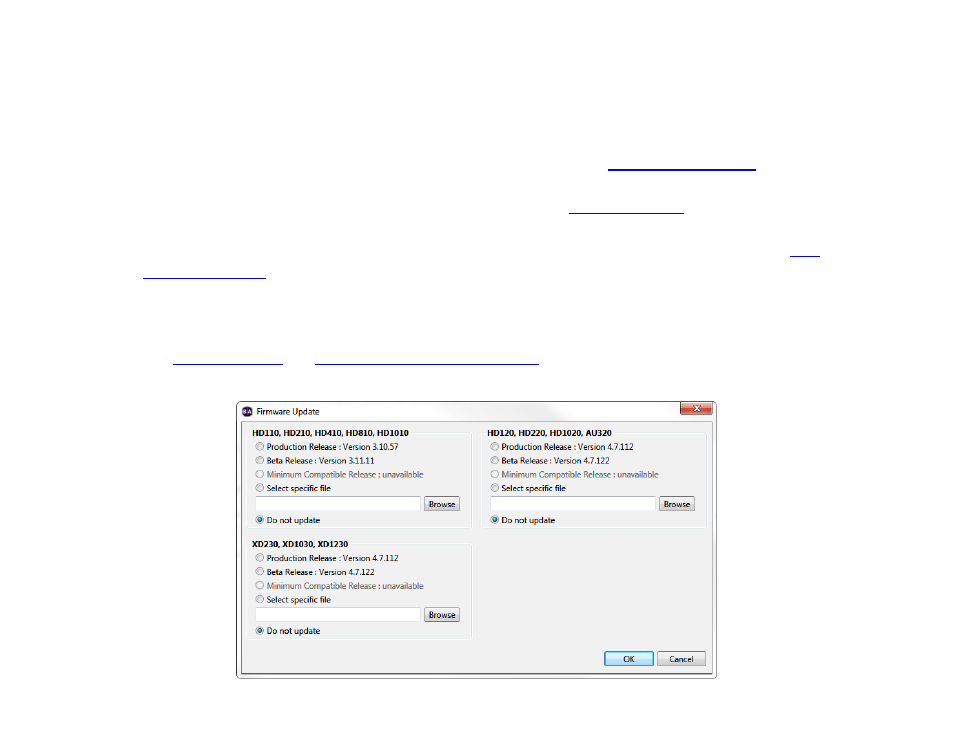
Specify Firmware Update to indicate whether you want to update the firmware and to which version. The
Firmware Update window is divided by BrightSign model. In the section that corresponds to your BrightSign unit,
select a firmware version or select
Do not update, and then click OK.
9. Under
Unit Configuration, click Networked with BrightSign Network, and then specify the following:
a. (Optional)
Enable diagnostic web server: Check this box to enable the
. You can include
a username and password in the text fields below for added security.
b. (Optional)
Enable local web server: Check this box to enable the
. You can include a
username and password in the text fields below for added security.
c. (Optional)
Enable Update Notifications: Check this box to have the player automatically refresh the
whenever variable values change on the player.
10. Select the
Networked with the BrightSign Network option.
a.
Group: Select this option to include the player in a standard BSN group. Use the dropdown list to select a BSN
group for the unit. Groups allow you to publish presentation schedules to multiple units simultaneously.
See
Publishing with BrightSign Network
b.
BrightWall Group: Select this option to include the player in a BSN BrightWall group. Use the dropdown list to