Rf in (atsc) – BrightSign BrightAuthor User Guide v.4.1.1 User Manual
Page 56
48
Chapter 3 – Creating Presentations
RF In (ATSC)
Note: The RF In state was changed significantly in BrightAuthor version 3.7.0.12. If you have an RF In project from an
earlier version of BrightAuthor, you will need to recreate the presentation with a new version of BrightAuthor.
Note: We do not recommend displaying an RF In state at the same time as a
zones, for example).
This state displays live video that is passed to the BrightSign player through the RF Input. This feature is available only on
t
Before you can display video from the RF Input, you must first perform a channel scan on the player while it
is connected to the cable source: You can do this prior to publishing the presentation (via the
or during the presentation (via the
Note: A
event will trigger on an RF In state only if the video bit rate of the tuner input drops to 0Mbs.
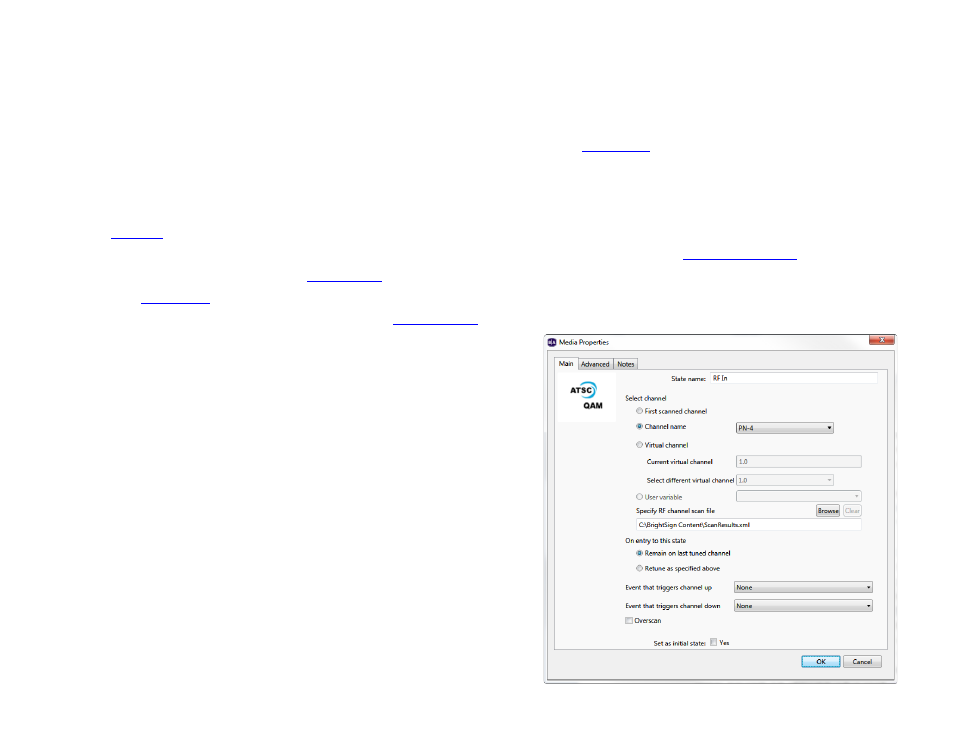
1. (Optional) If you’ve already performed a
on the player, you can use the “ScanResults.xml” file
generated by the scan on the SD card to enable the
Channel
name and Select different virtual channel options:
a. Click the
Browse button next to Specify RF channel
scan file.
b. Locate the SD card or USB flash drive you used to
perform a channel scan on the player.
c. Open the “ScanResults.xml” located in the directory.
2. In the
Select channel section, determine which channel will
be played upon entering the RF In state.
a.
First scanned channel: Displays the first channel
detected during the channel scan (i.e. the smallest
detectable channel number).
b.
Channel name: Displays the channel with the specified
name. To use this option, you must first specify a