Creating a multi-zone presentation, Multi-zone – BrightSign BrightAuthor User Guide v.4.1.1 User Manual
Page 41
33
Chapter 3 – Creating Presentations
add. This can be the same folder used in your Media Library or a new folder. A list of all files currently added
to the playlist is displayed below
Presentation Media Files. For each file you want to replace, select a new
file using the dropdown lists beneath
Replacement Media File.
g. To create interactive events, see
Presentation Interactive
Chapter 4 – Making a
7. (Optional) Rename the playlist:
.
a. Click
Edit in the upper-right corner of the playlist area.
b. Enter a new name for the playlist.
c. Click
OK.
8. (Optional) Set playback options:
a. To edit settings for a single item, right-click the thumbnail in the playlist area, select
Edit, and then choose
the settings you want to apply to the selected item.
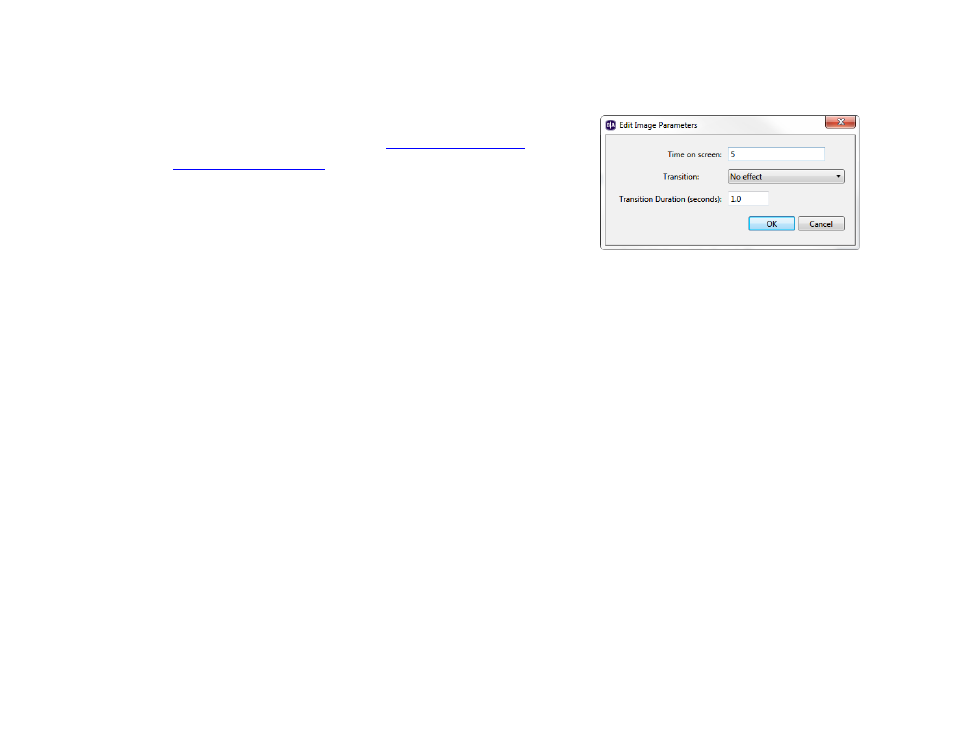
i.
Image files: Specify the Time on Screen, the Transition effect to the image from the previous media
item, and the
Transition Duration.
ii.
Video files: Specify the Volume of the video.
iii.
Audio files: Specify the Volume of the audio track.
b. To edit settings for multiple items, press
Ctrl+Click to select the items in the playlist area. On the menu bar,
click
Edit >Selected Items, and then choose the settings you want to apply to the selected items.
9. On the menu bar, click
File > Save… to store your presentation.
Note: Make sure you have the Edit tab selected in the upper-left portion of the screen. To save the presentation with a
different name or in a different folder, select
File > Save… As. To export the presentation and associated content,
select
File > Export….
Creating a Multi-Zone Presentation
In a multi-zone presentation, BrightAuthor divides the screen into rectangles called zones. You can play different content
in each zone, and each zone supports a specific type of content. BrightAuthor provides a handful of multi-zone templates.